With Zope, CMF, Plone, and all sorts of other great products now installed on your system, you can add your first Plone site. Installing Plone, the software, is not the same as creating a Plone site; the latter requires performing tasks to specifically let Zope know that this new Plone object is now part of its world.
Note
If you used the Windows or Mac OS X installer, a default site called plone has already been created. But follow the next steps to create a Plone site on your own, to familiarize yourself with the process.
Follow these steps to add a Plone site to your Zope application server:
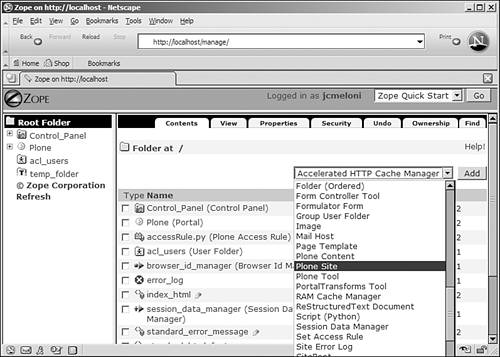
Log in to the Zope Management Interface and select Plone Site from the Add drop-down list, as shown in Figure 2.11.
Figure 2.11. Select Plone Site from the drop-down list.
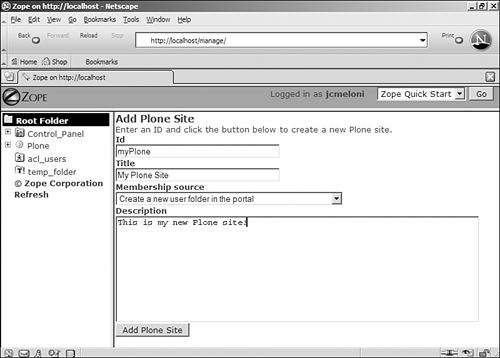
Complete the form for adding a Plone site, see Figure 2.12. The ID is a short name in alphanumeric characters and becomes part of the URL to your Plone site (for example, an ID of myPlone means that the URL to your Plone site will be http:// yourdomain /myPlone ). The title will appear on all pages of your Plone site; Membership Source should be the default for now. The description field is self-explanatory.
Figure 2.12. Completing the form to create your Plone site.
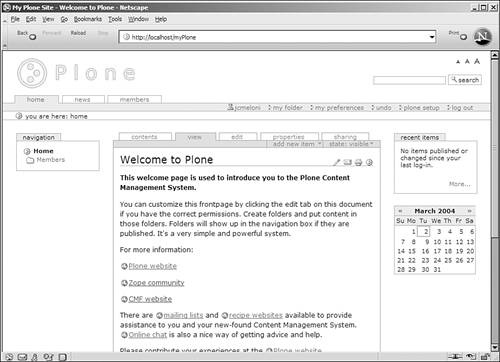
After you press the Add Plone Site button, your site is created and appears in the window. You can access it directly at its URL; you will see the following Figure 2.13.
Figure 2.13. Your new Plone site.
Congratulations, you're the proud owner of a brand-new baby Plone!