More New Security Features
| The security features you've seen so far are certainly worth the price of admission and should be enough to make Vista the most secure Windows OS yet. But Microsoft has more security tricks up its sleeve. The next few sections take you on a quick tour of the most important or interesting of the rest of Vista's new security innovations. Preventing Rogue Services with Windows Service HardeningIf you could map out the Windows attack surface, the biggest feature in the resulting landscape would be, by far, the system and third-party services that run in the background. Services are a tempting malware target for two reasons. First, most services are "always on," in the sense that they start when Windows loads and then remain running until you shut down the system. Second, most services run with a high privilege level that gives them full access to the system. Malware that manages to get into a computer can use the system services to perform almost any task, from installing a Trojan horse to formatting the hard drive. To reduce the chance that a malware program could turn a system's services on itself, Windows Vista implements a new service security technology called Windows Service Hardening. This technology doesn't prevent malware from infecting a service. (That's the job of Windows Firewall and Windows Defender.) Instead, Windows Service Hardening is designed to limit the damage that a compromised service can wreak upon a system by implementing the following security techniques:
System Drive Encryption with BitLockerTake new Vista technologies such as the bidirectional Windows Firewall, Windows Defender, and Windows Service Hardening; throw in good patch-management policies (that is, applying security patches as soon as they're available); and add a dash of common sense, and your computer should never be compromised by malware while Vista is running. However, what about when Vista is not running? If your computer is stolen or if an attacker breaks into your home or office, your machine can be compromised in a couple of different ways:
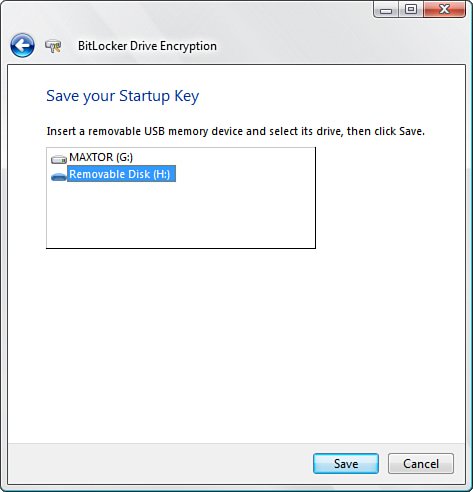
Either exploit gives the attacker access to the contents of your computer. If you have sensitive data on your machinefinancial data, company secrets, and so onthe results could be disastrous. To help you prevent a malicious user from accessing your sensitive data, Windows Vista comes with a new technology called BitLocker that encrypts the entire system drive. That way, even if a malicious user gains physical access to your computer, he or she won't be able to read the system drive contents. BitLocker works by storing the keys that encrypt and decrypt the sectors on a system drive in a Trusted Platform Module (TPM) 1.2 chip, which is a hardware component available on many newer machines. To enable BitLockerwhich is available only in the Enterprise and Ultimate editions of Windows Vistaopen the Control Panel and select Security, BitLocker Drive Encryption (or just open the BitLocker Drive Encryption icon directly if you're using Classic view). In the BitLocker Drive Encryption window, shown in Figure 6.21, click Turn On BitLocker. Figure 6.21. Use the Control Panel BitLocker Drive Encryption window to turn BitLocker on and off.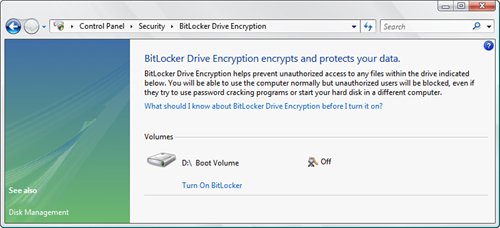 This launches the Turn On BitLocker Drive Encryption Wizard, which takes you through the following tasks:
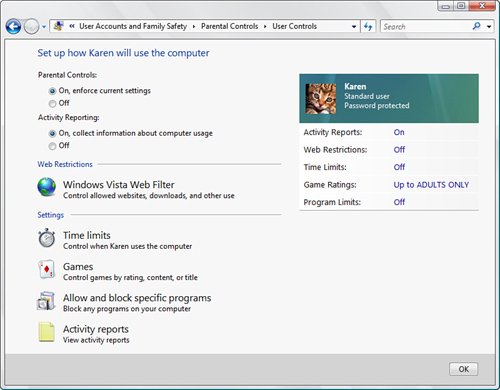
Note You can also use the Trusted Platform Module (TPM) Management snap-in to work with the TPM chip on your computer. Press Windows Logo+R, type tpm.msc, and click OK. This snap-in enables you to view the current status of the TPM chip, view information about the chip manufacturer, and perform chip-management functions. Avoiding Overflows with Support for the NX BitOne common cause of system crashes, and a common technique used by makers of malicious software, is the buffer overflow. A buffer is a memory area set aside to hold data. The buffer has a fixed size, which means it can't handle data larger than that size. A well-programmed system includes checks to ensure that only data of the correct size (or less) gets written to the buffer. In practice, however, the desire for faster code or sheer sloppiness by the programmer can occasionally result in unprotected memory buffers. When buffer overflow occurs, either by accident or by design, the extra data is written to memory areas that are adjacent to the buffer. If these adjacent areas just hold more data, nothing terrible happens. However, if the adjacent areas contain core operating system code, the system can crash; even worse, if the adjacent areas are designed to run system control code, a clever hacker can take advantage of that to run whatever code he or she wants, usually with disastrous results. To help prevent these nasty aspects of buffer overflow, recent CPUs have implemented the NX (No eXecute) attribute, which can brand certain memory areas as nonexecutable. This means that even if a buffer overflows into a code area, no malicious code can run because that area is marked with the NX attribute. Windows Vista fully supports the NX bit, allowing it to brand core system areas such as the stack and the head as nonexecutable. Thwarting Malware Randomly with ASLRMicrosoft isn't assuming that users' machines will never be subject to malware attacks. To that end, Windows Vista implements not only support for the NX bit and continued support for Data Execution Prevention (which prevents malicious code from running in protected memory locations). Vista also implements an open-source security feature called Address Space Layout Randomization (ASLR). This feature is aimed at thwarting some common attacks that attempt to run system code. In previous versions of Windows, certain system DLLs and executables were always loaded into memory using the same addresses each time, so attackers could launch one of those processes because they knew the function's entry point. With ASLR, Vista loads these system functions randomly into one of 256 memory locations, so attackers can't be certain where a particular bit of system code resides in memory. Using Parental Controls to Restrict Computer UsageIf you have children who share your computer, or if you're setting up a computer for the kids' use, it's wise to take precautions regarding the content and programs that they can access. Locally, this might take the form of blocking access to certain programs (such as your financial software), using ratings to control which games they can play, and setting time limits on when the computer is used. If the computer has Internet access, you might also want to allow (or block) specific sites, block certain types of content, and prevent file downloads. All this sounds daunting, but Windows Vista's new Parental Controls make things a bit easier by offering an easy-to-use interface that lets you set all of the afore-mentioned options and lots more. (You get Parental Controls in the Home Basic, Home Premium, and Ultimate editions of Windows Vista.) Before you begin, be sure to create a standard user account for each child that uses the computer. When that's done, you get to Parental Controls by opening Control Panel and selecting the Set Up User Account link (or by launching the Parental Controls icon directly if you're using Classic view). Click the user you want to work with to get to the User Controls window. You should activate two options here:
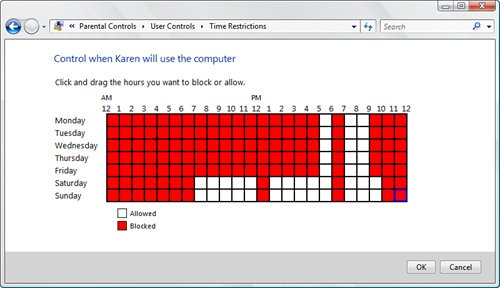
The User Controls window gives you four links to use when setting up the controls for this user:
Network Access ProtectionOver the past few years, we've all heard too many reports of viruses and other malware spreading around the globe in the electronic equivalent of a wildfire. One of the reasons these plagues spread so quickly is that they often start on computers connected to local area networks. The malware takes over the hapless network client and soon begins moving through the network, taking down clients and servers as it goes. A client computer that allows a malware infection to spread to the network is an IT professional's worst nightmare, but Windows Vista has a solution. It's called Network Access Protection (NAP), and the idea behind it is simple: If a client computer is compromisedeven if it's only theoretically possible that it might be compromiseddon't let it connect to the network. (NAP comes with the Business, Enterprise, and Ultimate editions of Windows Vista.) The way NAP works is that Vista runs a service called the Network Access Protection Agent. This service checks the health status of the computer: its installed security patches, downloaded virus signatures, security settings, and more. Before the network logoneither via the local area network or via a remote connectionthe agent reports the computer's health status to a NAP enforcement service running on the server. (This enforcement service is part of Windows Server "Longhorn.") If any of the health items are not completely up-to-date or within the network guidelines, the NAP enforcement service either doesn't let the computer log on to the network, or it shuttles the computer off to a restricted area of the network. You can also set up the server's NAP process to automatically update the client computer with the latest patches, virus signatures, security settings, and so on. |
EAN: 2147483647
Pages: 122
- Assessing Business-IT Alignment Maturity
- Linking the IT Balanced Scorecard to the Business Objectives at a Major Canadian Financial Group
- Measuring and Managing E-Business Initiatives Through the Balanced Scorecard
- Measuring ROI in E-Commerce Applications: Analysis to Action
- Governance in IT Outsourcing Partnerships