Filling Out and Saving Forms
The easiest way to fill out a form stored in a form library is to open your web browser and, using the URL provided when you created the library, visit the form library’s home page, which looks something like the page shown in Figure 12-8.
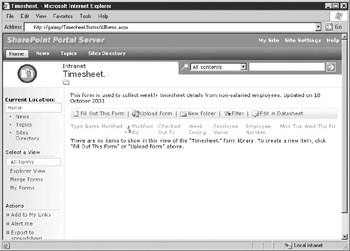
Figure 12-8: A typical form library home page
xxxxxxxx xxx xxxx xxx xxxx xxxx xxxxxx xxxxx xxx xxxx xxxxxxxxxx xxxx xxx xxxxxxx xx xxxx xxxxxxxx. xxx xxx xxxx xxxx xxx xxx xxxx xx xxx xxxxxxxx xxxxx, xxxx xxx xx xxx xxxx xxxxxxxx xxx xxxxxxxxxxxxx xxxx xxx xxx xxxxxxxxxx xx.
When you are finished filling out your form, you can then select File | Save, which opens a standard Save As dialog box with the form library as the default location. Enter a unique name for your completed form and then click the Save button to save the form.
xx xxx xxxxx xxx xxxxxxx xxxx xxxx xxx xxxx xxxx xxxxxxx, xxx xxxxxx xxx xxx xxxx xxxx xxxxxx, xxx xxxxxx xx x xxx xxxx. xx xxxxxxxx, xxx xxxx xx xxx xxxx xxxxxx xxxx xxx xxxxxx xx xxxxxxx xxxxxx xxxxxx xx xxx xxxxxxx xxxxxx xxx xxxxx xxxx, xx xxxxx xx xxxxxx xxxx.
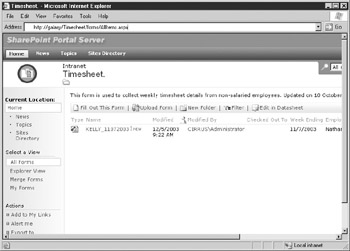
Figure 12-9: Form library columns
You can now view the data from your form, use the datasheet view to analyze the data, and more. But before you get too far into working with a form library from an end-user’s perspective, you need to look at how to modify the structure and display settings of the library itself, which is what the next section discusses.
EAN: 2147483647
Pages: 142