Section 13.2. Taking Control of Controls


13.2. Taking Control of Controls

So far, you've seen how to create a form from scratch, and add all the controls you want. However, you haven't used this newfound power to do anything special. Sure, you've picked up the ability to add extra labels, lines, and rectangles. But that kind of eye candy pales in comparison to the truly helpful features Access lets you add to your forms. Want to prevent people from entering buggy data? Check. Want to add Web page-style hyperlinks ? No problem. The list of what you can do to soup up your forms' abilities is almost endless. The following sections show you the most popular ways to take charge of the controls on a form.

13.2.1. Locking Down Fields

In a database, almost every piece of information's subject to change. However, that doesn't mean people should have free range over every field.

Suppose Boutique Fudge creates a form named CurrentOrders that lets people in the warehouse review outstanding customer orders, sorted by date. The warehouse personnel need to review each order, pack it up, and then ship it out. The only change they need to make is to update the order status (to indicate when it's been sent out), or add a record to the shipment log. Other details, like the order date, the order contents, and the customer who's receiving the order, should be off limits. The warehouse people have no reason to change any of this information.

Forms are powerful tools in scenarios like this, because they let you prevent changes in certain fields. That way, there's no chance that a misplaced keystroke can wipe out a legitimate piece of information.

Every bound control (a control that displays a field from your table) provides the following two properties that you can use to control editing. You can change these properties using the Property Sheet in Design view (Section 11.4).

  • Locked determines whether or not you can make changes in a field. If Locked is set to Yes, then you can't edit the field value. However, you can still select the text in a text box, and then copy it.

  • Enabled lets you deactivate a control altogether. If Enabled is set to No, the control appears with dimmed (gray) text. Although you can still see the field value in a disabled control, you can't interact with it in any way. If it's a text box, you can't even select and copy the text it contains.


Tip: If you want to prevent edits altogether, consider using the Allow Edits, Allow Deletions, and Allow Additions form properties instead, which are described in Section 12.3.6.

13.2.2. Prevent Errors with Validation

In Chapter 4, you learned how to prevent errors from creeping into your tables by using validation rules, default values, and input masks. This bulletproofing's an essential part of database design.

However, validation rules don't help in some situations because the rules apply sometimes, but not always. You don't want the sales people at Boutique Fudge to enter a new order with an old date. Clearly, that's a mistakea new order should receive today's date. To try and stamp out the problem, a clever database designer like yourself may use the following validation rule on the OrderDate field:

 <=Date( ) 

However, a few weeks later you discover that the catering department neglected to enter the information about their orders on time. For record-keeping purposes, these orders need to indicate when the order was originally placed. So you need to remove your well-intentioned validation rule before you can enter these records.

It turns out situations like these abound in real life. Fortunately, there's a way to handle this scenario without giving up on validation. The trick's to place the validation in the controls on the form. That way, different forms can use different validation rules. If you want to make completely unrestricted changes, then you can edit the data directly using the datasheet for the table.

If you plan to move the validation out of your tables and into your forms, then you'll be interested in the following control properties, which you can tweak in the Property Sheet:

  • Validation Rule sets an expression that the value must meet in order to be considered valid. For example, the expression <=Date() compares the current field value to the date returned by the Date( ) function (which is today's date). The entry's allowed only if it's today's date or before. You can find many more examples of validation expressions in Section 4.3.2.

  • Validation Text sets the error message that appears if you attempt to enter a value that violates the validation rule. This custom text replaces Access's generic error message"The value you entered does not meet the validation rule defined for the field or control"which doesn't make much sense to real people.

  • Input Mask sets a pattern that both guides and restricts people's input. Input masks are a good way to deal with fixed-length text values like phone numbers, postal codes, and social security numbers . Section 4.2 has more about how input masks work and how to create them.

  • Default Value sets the value that appears in a field when you create a new record. (You're free, of course, to change the default value if it's not what you want.) You'll find it particularly useful to set default values at the form level, because defaults often apply to a specific task rather than the entire table.


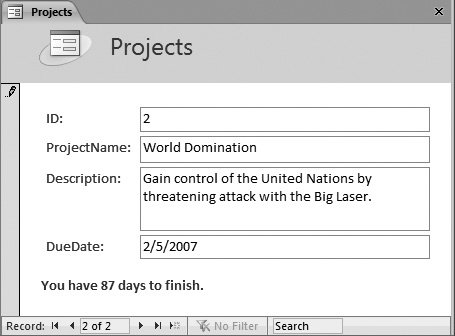
Note: You can set a default value for the same field at the table level and the form level. If you do, the form's default value takes over.

13.2.3. Performing Calculations with Expressions

An expression's a formula that manipulates some information, like numbers, dates, or text, and displays the final result (see Figure 13-13). Often, expressions perform calculations with field values. You've used expressions before to crunch the numbers in queries (Chapter 7) and reports (Chapter 10), and now you'll put them to work in your forms.

To create an expression, follow these steps:

  1. Add a text box control to your form (from the ribbon's Form Design Tools Design Controls section) .

    You need to use the text box, because it can show dynamic values like expressions. A label can show only a fixed piece of text, so it's no help.

  2. In the Property Sheet, choose the Data tab. Place your expression in the Control Source setting .

    Remember, expressions start with the equals sign. The expression = Price*1.15 calculates the price with tax for a product by multiplying the value in the Price field by 1.15.

    Figure 13-13. In this form, the expression ="You have " & [DueDate]-Date( ) & " days to finish" calculates the number of days between the current date and the project due date, and places that number in a complete sentence . You'll see this information appear as soon as you type in a due date and move to another field. (You can get around this requirement, and force the fields to update themselves as you type, by using a tiny bit of VBA code that triggers a recalculation. Section 17.4.2 shows an example.)


  3. Optionally, set Enabled to No to hammer home the point that this value can't be edited .

    When you create a control that uses an expression, Access doesn't let you edit the calculated value. It's just as if you set the Locked property to Yes. However, some people may still try to change this value. If you think this scenario's a problem, set Enabled to No so that the control appears dimmed and nobody can tab to it. This setting also means that you can't copy the value in the text box.

  4. Optionally, apply formatting .

    You can adjust fonts and colors using the ribbon's Form Design Tools Design Font section. To configure the way Access shows numeric values, switch to Layout view, and then use the Form Layout Tools Formatting Formatting section.


Note: To remove the border around a text box (so it looks more like a label), select it in Design view, choose Form Design Tools Design Controls Line Type, and then pick the first item in the list (which is blank, signifying "no line).

13.2.4. Organizing with Tab Controls

One of the control world's unsung heroes is the tab control , which lets you present large amounts of content in a limited space. The tab control's trick's the way it lets you organize this content into separate pages . You can see only one page at a time, and you choose which one by clicking the corresponding tab (see Figure 13-14).

The tab control isn't all good news. Its main drawback's that you need to use extra clicks to get from one tab to another. For that reason, the tab control isn't a great choice in forms that you've set up to create new records. In those instances it's better to streamline the new record creation process and have all the controls on one page, so you can move through them quickly. A tab control makes most sense in forms that are primarily designed for editing or reviewing data. If this data can be subdivided into logical groups, and if editing tasks often involve just one group , then the tab control's a good choice.

Figure 13-14. It makes sense to put customer address information on a separate tab, because all these fields make up a logical group of related information.


To use a tab control, follow these steps:

  1. In the ribbon's Form Design Tools Design Controls section, click the Tab Control icon .

    Once the tab control appears, you may want to move or resize it so it fits into your form perfectly .

  2. Add all the tab pages you need .

    Every new tab control starts with two pages. You can move from page to page by clicking the correct tab.

    To create a new page, right-click any page (but not the tabs themselves), and then choose Add Page. To remove an existing page, right-click it, and then choose Delete Page.

  3. Give the tabs good names .

    The tabs that Access creates start out with pointless names like Page19 and Page20. To change the name , select the page, and then change the Caption setting in the Property Sheet. The page that displays customer address fields could have the caption "Address Information".

    To rearrange your pages, right-click the tab control, and then choose Page Order. Access opens a Page Order dialog box with a list of tabs. To change the order of a tab, select it, and then click Move Up or Move Down.


    Note: If you create more pages that can comfortably fit in your tab control, Access adds a strange scrollbar in the top-right corner that lets you scroll through the tabs. To avoid this oddity, resize your tab control so that it's wide enough to fit every tab, or avoid using long tab names.
  4. Place controls on the different pages .

You can drag controls from the rest of your form onto a page, or you can add new controls from the ribbon. Either way, remember to select the tab you want first, and then add the controls you need. Even in Design view, you can see only one page of a tab control at a time.


Tip: If your controls are in a layout, you can't drag them into a tab. Instead, select them, right-click your selection, and then choose Cut. Next , right-click inside the tab page where you want to place them, and then choose Paste.

13.2.5. Going Places with Links

Links are the less powerful cousin of buttons. Whereas command buttons (Section 13.2.7) can perform almost any action, links are limited to exactly two tasks:

  • Launching your default browser and navigating to a specific site.

  • Opening a file (like a Word document) in the program that owns it.

To create a link, follow these steps:

  1. In the ribbon's Form Design Tools Design Controls section, click the Hyperlink icon .

    Assuming you have Control Wizards switched on (Section 13.1.2), the Insert Hyperlink dialog box appears (see Figure 13-15). Using this window, you can supply the text for the link and the destination where the link transports people when clicked.

  2. Click the Existing File or Web Page option on the dialog box's left side .

    You can also use the Object in This Database option to create a link that opens another database object, like a form. However, command buttons are better suited to this task.

    Alternatively, you can choose E-mail Address to create a link to an email address. When you click this link, your default email program launches, and creates a new message with the starter text you supply.

    Figure 13-15. Someone's about to create a new hyperlink. It'll appear with the text "Click here to visit the company website" (which, of course, you can edit to say anything you want).


  3. In the "Text to display" text box, enter whatever you would like the link to say .

    Common choices for the text include the actual Web address (like http://www.mycompany.com) or a descriptive message (like "Click here to go to my com-pany's Web site").

  4. If you want to set a custom tooltip for this hyperlink, then click the ScreenTip button. Type in your message, and then click OK .

    As you no doubt already know, a tooltip's a little yellow message- bearing window that opens above a hyperlink when your mouse pointer hovers over the link. If you don't specify a custom tooltip, then Access shows the full path or URL (Web address) instead.

  5. If you want to add a link to a document, browse to the appropriate file, and then select it. If you want to add a link to a Web page, then type the URL into the Address text box .

    If you're adding a link to a document, then Access sets the address to the full file path, as in C:\MyDocuments\Resume.doc . You can type this path in manually, and if your network supports it, you can use UNC (Universal Naming Convention) paths that point to a file on another computer using the name of the computer, as in \\SalesComputer\Documents\CompanyPolicy.doc .


    Note: You're free to link to files on your computer or those that are stored on network drives . Just remember that when you click the link, Access looks in the exact location you've specified. If you move the target file to a new location, or you open the database on another computer, Access can't find the linked file.
  6. Click OK to insert the hyperlink .

    The new hyperlink appears on your form. You can then drag it wherever you want.

    To use a hyperlink, just click it. You'll notice that the mouse pointer changes to a pointing hand as soon as you move over the hyperlink.

13.2.6. Navigating with Lists

There are two list controls in Access forms: the list box and the combo box. The difference is that the list box shows several items at once (depending on how large you make it). The combo box shows just one itemto see the list, you need to click the drop-down arrow.

Access gives you two ways to use list controls:

  • You can use them to edit a field . Access automatically creates a combo box control when there's a lookup defined for the field (as described in Section 5.2.5). This combo box works the same as a lookup list in the datasheet.

  • You can use them to navigate to the record you want . In this case, the list shows the field value for every record in the table. When you chose one of the values, Access jumps to the corresponding record.

Using lists for navigation is a true Access power trick. If you often look for a record using the same criteria (like if you hunt down products by name or employees by social security number), this technique's much faster than using the navigation buttons or filtering the records.

Here's how to create a list for navigation:

  1. Make sure the Control Wizard feature's turned on .

    If you're not sure, check that the Form Design Tools Design Controls Use Control Wizards buttons highlighted.

  2. In the ribbon's Form Design Tools Design Controls section, click the List Box or Combo Box icon .

    Both these controls work exactly the same when you're using them for navigation. The only difference is that the List Box takes more space. If you decide to use it, then place it at the side of the form. People usually choose the Combo Box (Figure 13-16).

  3. Draw the control on the form .

    As soon as you finish, a wizard appears to help you set up the list (Figure 13-17). This process works in a similar way to the Lookup wizard you used to set up table relationships (Section 5.2.5).

  4. Choose "Find a record on my form", and then click Next .

    You'll learn about the other options in the next section.

  5. Choose the field you want to use for the lookup, and then click Next .

    The example in Figure 13-16 uses the ProductName field. Technically, the list always works the same wayit finds items based on their unique primary key value (Section 2.4). The list you're creating actually has two columns . The first column stores the primary key, and the second column shows the value that's in the field you selected. However, on your form, you don't see the primary key, because it's hidden.

    Figure 13-16. In this form, a list box lets you jump to the product you want with one click. Notice that this list doesn't take the place of the ProductName text box control. You use the list to find the record you want, and the text box to change the product name. Of course, if you never needed to change product names in this form, you wouldn't need to include the ProductName text box.


    Figure 13-17. When you create a list, the List Box wizard lets you choose to use it for editing or navigation.


    Note: This technique doesn't work as well if the field you pick allows duplicates. If you create a list that uses the LastName field, you may spot more than one MacDonald. In this case, consider adding more than one field to your lookup list (like both the LastName and FirstName).
  6. Leave the "Hide key column" checkbox turned on, and click Next to continue .

    If you don't plan to show the primary key columnand usually you won'tjust click Next to breeze past this window.

  7. Enter a text caption for your list .

    This caption appears in a label next to the list control. You may want to use something like "Click the product you want to see". You can move or delete the label after the fact.

  8. Click Finish to create the list .

    Now you can try out your list. Right-click the tab title and choose Form View to switch back to the form. Then, choose an entry from the list to jump straight to the appropriate record.


    Note: List-based navigation has one quirk. If you change the value that appears in the list, then Access doesn't update the list until you move to another record. In the previous example, this property means that if you rename a product, then the old name appears in the list until you move on.

13.2.7. Performing Actions with Command Buttons

The last control you'll consider is one of the most powerful. Command buttons let you trigger just about any action, like opening a new form, printing a report, or polishing off last year's taxes. (All right, some tasks are more difficult than others, but if you're willing to hunker down with some Visual Basic code, almost anything's possible.)

When you add a button to a form, Access launches the useful Command Button wizard, where you can choose the action you want from a list of ready-made choices. The Command Button wizard then helps you build a macro (see Chapter 15) that does whatever you requested .

The choices in the Button wizard provide a good menu of possibilities. Some Access fans find that they can do almost everything they want to do by just using buttons and the wizard. Other people eventually want to do something more original, in which case they need to create their own macros or write custom code (tasks you'll tackle in Part Five).

The following steps lead you through the Button wizard:

  1. In the ribbon's Form Design Tools Design Controls section, click the Button icon .

Figure 13-18. You can instruct your form to carry out six categories of actions. Once you select a category (in the list on the left), you see a list of actions in that category (in the list on the right).


Choose the action you want to perform .

Most actions are self-explanatory. Here are some of the highlights:

  • In the Record Navigation category , you can use commands like Go To First Record, Go To Last Record, Go To Next Record, and Go To Previous record to create your own navigation buttons. If you do, then set the form's Navigation Buttons property to No to hide the standard buttons.

  • In the Record Operations category , you can create a new blank record (Add New Record) or do something with the current one (like Delete Record, Duplicate Record, and Print Record). You can even choose to commit changes right away before you navigate to the next record (Save Record), or undo the last change (Undo Record).

  • In the Form Operations category , you can close the current form (Close Form) or print it (Print Current Form). You can also open another form (Open Form), which is one of the most used button actions because it helps you move from task to task.


    Note: When you use the Open Form action, you have the option of applying filtering based on the current record. Sadly, this feature's somewhat broken. In Chapter 14 (Section 14.3.1), you'll consider a more detailed example that uses filtering to show related records.
  • In the Report Operations category , you can work with other reports using commands like Open Report, Preview Report, and Print Report. These actions help you make the jump from reviewing data (in a form) to printing it (in a report).

  • In the Application category , you're limited to one actionthe self-explanatory Quit Application.

  • In the Miscellaneous category , you'll find options to run a separate query (Run Query) or fire off a macro (Run Macro). You'll learn how to create macros in Chapter 15.

Click Next .

The next step depends on what action you selected. Some actions require extra information. If you chose to show a form or print a report, Access prompts you to pick the form or report you want to use.

Once you've finished supplying any extra information, Access asks you to sup-ply the button text and choose a picture (Figure 13-19).

Figure 13-19. Pictures are tempting, but the ones Access includes are decidedly old-fashioned. Most Access fans decide to create picture-less buttons. If you want to include a picture, then turn on the Show All Pictures checkbox to see everything Access has to offer (even pictures that may not make sense for your current action), or use the Browse button to add in your own picture.


Note: Any bitmap (.bmp file) works for your button picture, so long as it's small enough to fit. Icons, .jpeg, and .gif files are also acceptable.

Enter some text and choose a picture. Then, click Next .

You can change these details after the fact by modifying the Caption and Picture properties (which appear in the Format tab).

Supply a name for the button .

The name's what appears in the Property Sheet list. Better names make your button easier to find. And if you write code that works with your buttons (Chapter 16), better names make for code that people can more easily read and understand.

Click Finish .

To try out your button, switch to Form view, and then give it a click.


Access 2007[c] The Missing Manual
ISBN: 596527608
EAN: N/A
Year: 2007
Pages: 153

flylib.com © 2008-2017.
If you may any questions please contact us: flylib@qtcs.net