Section 2.3. The HTML Document
So far, you've been considering HTML snippetsportions of a complete HTML document. In this section, you'll learn how to put it all together and create your first genuine Web page.
To create a true HTML document, you need a minimum of three container tags: <html>, <head>, and <body>. These three tags work together to describe the basic structure of your page.
-
< html >
This tag wraps everything else in your Web page. It tells the browser that you're using HTML.
-
< head >
This tag designates the header portion of your document. The header can include some optional information about your Web page, including the title (which is displayed in your browser's title bar), search keywords, and a style sheet (which you'll learn about in Chapter 6).
-
< body >
This tag holds the meat of your Web page, including the actual content you want to display to the world.
There's only one right way to combine these tags. Here's the correct arrangement:
<html> <head> </head> <body> </body> </html>
Every Web page uses this basic framework. The ellipsis () shows where you'll want to insert additional information. The spaces in between the lines aren't required; they're just to help you see the tag structure more easily.
Note: Almost all browsers let you bend these rules, and create a document that lacks these three basic tags. Of course, if you wanted to learn the wrong way to write Web pages, you probably wouldn't be reading this book!
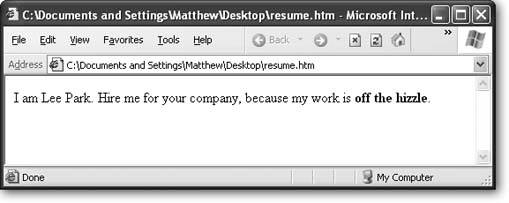
To transform this barebones template into a real document, you just need to start adding some content. For example, let's say you're starting a basic r sum page. Here's a very basic first go at it:
<html> <head> </head> <body> I am Lee Park. Hire me for your company, because my work is <b>off the hizzle</b>. </body> </html>
The only change is the addition of text in the <body> section. A single <b> tag is also used, just to dress it up a little. Before you go any further, you may want to try creating this sample file in your own text editor, and opening it in your favorite Web browser (see Figure 2-5). You're then ready to try out all the upcoming HTML tricks.
Note: Even if you have high- powered HTML editing software (like FrontPage or Dreamweaver), don't use it yet. To get started learning HTML, it's best that you do it by hand so you understand every detail that's going into your Web page. Later on, when you've mastered the basics and are ready to create more sophisticated Web pages, you'll probably want to switch to other tools (see Chapter 4).
|
2.3.1. Adding a Title
The first improvement you can make to the simple r sum page is to add a title. Without it, most browsers show the URL or file path (where the Web page is stored) in the title bar. Once you add a title that information disappears, and is replaced with your custom text (see Figure 2-6).
|
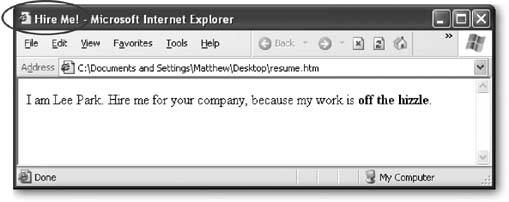
The title information isn't a part of the content of your Web page. Instead, it's added using a <title> tag in the <head> section. Here's the example shown in Figure 2-6:
<html> <head> <title>Hire Me!</title> </head> <body> I am Lee Park. Hire me for your company, because my work is <b>off the hizzle</b>. </body> </html>
Tip: Titles are important. When a Web surfer bookmarks your page, the title is what shows up in the browser's Bookmark (or Favorites) menu. Titles are also used by many search engines to identify your page.
2.3.2. Line Breaks and Text Flow
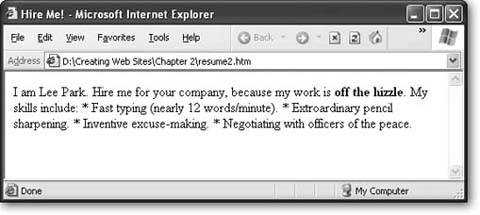
As you start to create more detailed Web pages, you'll quickly discover that building a Web page isn't as straightforward as, say, creating a page in Microsoft Word. For example, you may decide to enhance the r sum page by creating a list of skills. Here's a reasonable first try:
<html> <head> <title>Hire Me!</title> </head> <body> I am Lee Park. Hire me for your company, because my work is <b>off the hizzle</b>. My skills include: *Fast typing (nearly 12 words/minute). *Extraordinary pencil sharpening. *Inventive excuse making. * Negotiating with officers of the peace. </body> </html>
The problem occurs when you open this seemingly innocent document in your Web browser (Figure 2-7).
The problem is that HTML ignores extra white space. That includes tabs, line breaks, and extra spaces (anything more than one consecutive space). The first time this happens to you, you'll probably stare dumbfounded at the computer screen and wonder why Web browsers are designed this way. But it actually makes a fair bit of sense when you consider the fact that HTML needs to work as a universal standard .
Say you were to customize your hypothetical Web page (like the one shown in Figure 2-7) with the perfect spacing, indenting, and line width for your computer monitor. The problem is it may not look as good on someone else's monitor. For example, some of the text may scroll off the right side of their page, making it difficult to read. And different monitors are only part of the problemtoday's Web pages need to display on different types of devices . Lee Park's future boss might conceivably view his r sum on anything from the latest iBook laptop to a fixed-width terminal or a Web-enabled cell phone.
|
To deal with this wide range of display options, HTML lets you define the structure of your text with tags. Instead of telling the browser, "Here's where you go to the next line and here's where you add four extra spaces," HTML tells the browser, "Here are two complete paragraphs and here's a bulleted list." It's then up to the browser to display your Web page according to the instructions contained in your HTML.
To correct the r sum example, you need to use three new container tags:
-
< p >
Indicates a paragraph. Web browsers don't indent paragraphs, but they do add a little space in between consecutive paragraphs.
-
< ul >
Indicates the start of an unordered list (which is usually displayed with a bullet next to each item). This is the perfect way to detail Lee's skills.
-
< li >
Indicates an individual item in a bulleted list. Each list item is indented, and has a bullet () preceding it. The <li> tag can only be used inside a <ul> tag. In other words, every list item needs to be a part of a bulleted list.
Here's the corrected Web page (shown in Figure 2-8), with the new tags highlighted in bold:
<html> <head> <title>Hire Me!</title> </head> <body> <p> I am Lee Park. Hire me for your company, because my work is <b>off the hizzle</b>. </p> <p> My skills include: </p> <ul> <li> Fast typing (nearly 12 words/minute). </li> <li> Extraordinary pencil sharpening. </li> <li> Inventive excuse making. </li> <li> Negotiating with officers of the peace. </li> </ul> </body> </html>
|
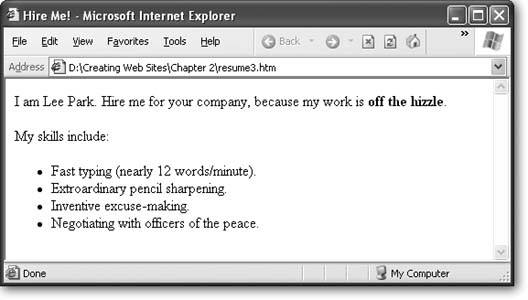
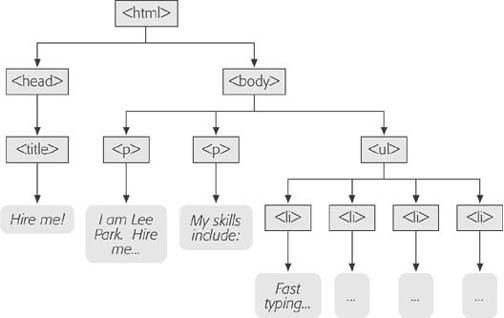
Figure 2-9 shows how you can analyze the HTML document so far using a tree model. The tree model is a handy way to get familiar with the anatomy of a Web page, because it shows the overall structure at a glance. However, as your Web pages get more complicated, they'll probably include too much information to comfortably see in a tree model diagram.
You can turn the browser's habit of ignoring line breaks to your advantage. To help make your Web documents more readable, add line breaks and spaces wherever you want. Web gurus often use indentation to make the structure of nested tags easier to understand. In the r sum example, you can already see this trick in action. Notice how the list items (the lines starting with the <li> tag) are indented. This has no effect on the browser, but it makes it easier to see the structure of the HTML document, and how it will be rendered in the browser.
|
Of course, if you're a masochist, you don't need to use any spaces. The previous example is exactly equivalent to the following much-less-readable HTML document that omits white space entirely:
<html><head><title>Hire Me!</title></head><body><p>I am Lee Park. Hire me for your company, because my work is <b>off the hizzle</b>.</p><p>My skills include:</p><ul><li>Fast typing (nearly 12 words/minute).</li><li> Extraordinary pencil sharpening.</li><li>Inventive excuse making.</li><li> Negotiating with officers of the peace.</li></ul></body></html>
Of course, it's nearly impossible for a human to write HTML like this without making a mistake.
2.3.3. Where Are All the Pictures?
Whether it's a stock chart, a logo for your underground garage band , or doctored photos of your favorite celebrities , the Web would be a pretty drab place without pictures. But so far, you've only seen how to put text into an HTML document. What happens when you need an image?
Although it may surprise you, there's actually no way to store a picture inside an HTML file. There are plenty of good reasons why you wouldn't want to anywayyour Web page files would become really large, it would be hard to modify your pictures or do other things with them, and you'd have a fiendish time editing your pages in a text editor because the image data would make a mess. The solution is to store your pictures as separate files, and then link them to your HTML document. This way, the pictures will show up exactly where you want them in your Web page when it's displayed by a browser. The pictures just aren't stored in the HTML file.
| GEM IN THE ROUGH Have Something to Hide? |
| When you're working with a complex Web page, you may want to temporarily remove a tag or a section of content. This is a handy trick when you have a page that doesn't quite work right, and you want to try and find out where the problem lies. One way to do this is with the good ol' fashioned cut-and-paste features in your text editor. However, HTML has a simpler solution comments . To create an HTML comment, you use the <!-- character sequence to mark the start of the comment, and the --> character sequence to mark the end. Everything in between these two markers, whether it's content or tags, is completely ignored by the browser. The comment markers can appear on the same line, or you can use them to hide an entire section of your HTML document. Here's an example that hides two list items. When you open this document in your Web browser, the list will show only the last two items ("Inventive excuse making" and "Negotiating with officers of the peace"). <ul> <!-- <li>Fast typing (nearly 12 words/minute). </li> <li>Extraordinary pencil sharpening.</li> --> <li>Inventive excuse making.</li> <li>Negotiating with officers of the peace.</li> </ul> When you want to return the list to its original glory , just remove the comment markers. |
The linking tool that performs this trick is the < img > tag (short for image). The image tag is a standalone tag that points to an image file, which the browser then retrieves and inserts into the Web page. The image file can be placed in the same folder as your Web page (which is the easiest option) or located on a completely different Web site.
Although you'll learn everything you ever wanted to know about Web graphics in Chapter 7, it's worth considering a simple example right now. To try this out, you need a Web-ready image handy. (The most common supported file types are JPEG, GIF, and PNG.) If you've downloaded this book's companion content (from the "Missing CD" page at www.missingmanuals.com), you can use the sample picture leepark.jpg . Assuming this file is in the same folder as your Web page file, you need the following image tag to display the picture:
<img src="leepark.jpg">
This example introduces something new. Although <img> is a standalone tag, it isn't self-sufficient. In order for the tag to mean anything, you also need to supply the file name . To incorporate this extra information into the image tag, HTML uses attributes . Attributes are extra pieces of information that appear after the tag name, but before the closing > character. In many cases, you can use multiple attributes, in which case you separate each attribute using a space.
The attribute itself has two partsa name (this is the code that tells the browser what the attribute does) and a value (this is the piece of information you're supplying). In the <img> example, the attribute you're using is named src , which is shorthand for source. The value of the source attribute tells the browser where to find the image file you want to use.
Once you've unraveled the image tag, you're ready to use it in an HTML document. Just place it inside an existing paragraph, wherever it makes sense.
<html> <head> <title>Hire Me!</title> </head> <body> <p>I am Lee Park. Hire me for your company, because my work is <b>off the hizzle</b>. <img src="leepark.jpg"> </p> <p>My skills include:</p> <ul> <li>Fast typing (nearly 12 words/minute).</li> <li>Extraordinary pencil sharpening.</li> <li>Inventive excuse making.</li> <li>Negotiating with officers of the peace.</li> </ul> </body> </html>
Figure 2-10 shows exactly where the picture is displayed.
Note: You'll learn many more tricks for Web graphics, including how to change their size and wrap text around them, in Chapter 7.
2.3.4. The 10 Most Important Tags (and a Few More)
You've now reached the point where you can create a basic HTML document, and you're well on your way to HTML mastery with several tags under your belt. You know the fundamentalsall that's left is to expand your knowledge by learning more tags.
HTML has a relatively small set of tags. In fact, there are just over 60 in all. You'll most likely use fewer than 25 tags on a regular basis.
Note: You can't define your own tags and use them in an HTML document because Web browsers won't know how to interpret them.
|

Table 2-1 provides a quick overview of some the most fundamental building blocks in HTML, several of which you've already seen.
Table 2-1. The Basic HTML Tags
| Tag | Name | Type | Description |
|---|---|---|---|
| <b>, <i>, <u> | Bold, Italic, Underline | Container | These three tags apply character stylingeither bold, italic, or underline formatting. |
| <p> | Paragraph | Container | As your high school English teacher probably told you, the paragraph is the basic unit for organizing text. When you use more than one paragraph tag in a row, the browser inserts a certain amount of space in between the two paragraphsjust a bit more than a full blank line. Full details appear in Chapter 5. |
| <br> | Line Break | Standalone | Sometimes, all you want is text separated by simple line breaks, not separate paragraphs. This keeps your text closer together than when you use paragraph tags. You'll learn more about text layout in Chapter 5. |
| <h1>,<h2>, <h3>,<h4>, <h5>,<h6> | Heading | Container | If you need a title to stand out, the heading tags are a good choice. They display text in large, bold letters . The lower the number, the larger the text, so <h1> is for the largest heading. By the time you get to <h5>, the heading size has dwindled down to the normal text size, and <h6>, although bold, is actually smaller than normal text. |
| <hr> | Horizontal Line | Standalone | A horizontal line can help you split one section from another. The line automatically matches the width of the browser window. (Or, if you put it inside another element like a cell in a table, it takes on the width of its container.) |
| <img> | Image | Standalone | To display an image inside a Web page, use this tag. Make sure you specify the src attribute to indicate the file name of the picture you want the browser to show. |
| <a> | Anchor | Container | The anchor tag is the starting point for creating hyperlinks that allow Web surfers to jump from one page to another. You'll learn about this indispensable tag in Chapter 8. |
| <ui>,<li> | Unordered List, List Item | Container | These tags let you build basic bulleted lists. The browser automatically puts individual list items on separate lines and indents each one. For a quick change of pace, you can substitute <ul> with <ol> to get an automatically numbered list instead of bullets (ol stands for ordered list). |
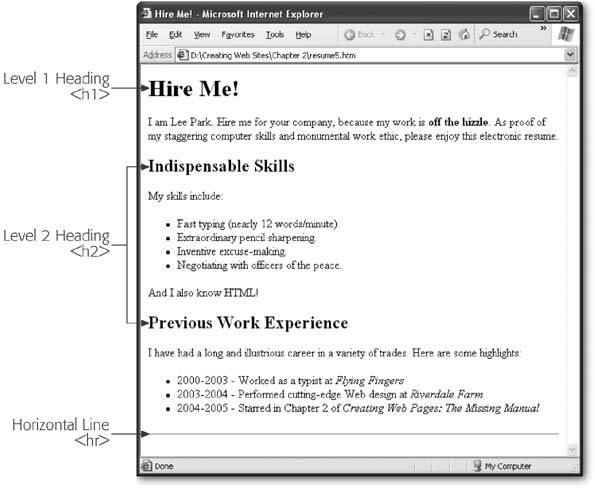
In order to make the r sum really look respectable, you can use a few tricks from Table 2-1. Figure 2-11 shows this revised version of the Web page:
<html> <head> <title>Hire Me!</title> </head> <body> <h1>Hire Me!</h1> <p>I am Lee Park. Hire me for your company, because my work is <b>off the hizzle</b>. As proof of my staggering computer skills and monumental work ethic, please enjoy this electronic resume.</p> <h2>Indispensable Skills</h2> <p>My skills include:</p> <ul> <li>Fast typing (nearly 12 words/minute).</li> <li>Extraordinary pencil sharpening.</li> <li>Inventive excuse making.</li> <li>Negotiating with officers of the peace.</li> </ul> <p>And I also know HTML!</p> <h2>Previous Work Experience</h2> I have had a long and illustrious career in a variety of trades. Here are some highlights: <ul> <li>2000-2003 - Worked as a typist at <i>Flying Fingers</i></li> <li>2003-2004 - Performed cutting-edge Web design at <i>Riverdale Farm</i></li> <li>2004-2005 - Starred in Chapter 2 of <i>Creating Web Pages: The Missing Manual</i></li> </ul> <hr> </body> </html>
2.3.5. Common Mistakes
Now that you've seen some Web pages that get it right, it's worth considering a few common mistakes that can mangle the best of pages.
2.3.5.1. Missing a closing tag
You know the rulecontainer tags should always appear in pairs. That means if you use a tag like <h1> to switch on heading 1 style, make sure you use </h1> soon after to turn it off. The problem occurs if your closing tag isn't quite kosher. For example, maybe you left out the ever important slash character (/). Try to guess what the result of this mistake will be:
- <h1>The Tile That Never Ends
<h1>
The first tag turns on the heading style, and the second tag tries to turn it on again , which has no effect. The end result is that the heading 1 style is never switched off, and the entire Web page is rendered in gigantic bold letters. Ouch.
Here's what you really want:
- <h1>The Tile That Never Ends</h1>
|
2.3.5.2. Endless tags
As you can see, a minor typo can wreak a great deal of havoc. If you leave out the slash, you'll be faced with the unmistakable Entire Web Page In Giant Bold Letters syndrome. If you make another common mistake and leave out one of the angle brackets, you'll encounter the equally common Disappearing Page disorder .
Here's the mistake:
-
<p
The invisible paragraph.</p>
In this case, the starting <p> tag is missing the closing > character. As a result, the browser tries to interpret the entire line of text "<pThe invisible paragraph.</p>" as some sort of tag it's never seen before. And you know what browsers do with tags they don't recognize? They ignore them completely. As a result, the contents of that paragraph won't appear in your Web page at all. If you expected to see something that's mysteriously absent, an improperly closed tag is probably at the root of it.
Incidentally, a similar problem can occur with attributes if you include only one quotation mark instead of two. Here's an example that shows this mistake with the src attribute in the image tag, which is the only attribute you've seen so far.
- <img src="leepark.jpg>
Because the closing quotation mark is missing, the rest of the HTML document (until the next quotation mark is found) is interpreted as an incredibly long file name. As a result, the browser won't display the picture, and a great deal of text will vanish .
| FREQUENTLY ASKED QUESTION The Difference Between <b> and <B> |
| Should I use uppercase or lowercase tags ? HTML isn't case-sensitive. That means that your tags can use any mix of lowercase letters or uppercase letters without disrupting the browser. Of course, just because something's allowed doesn't mean it's necessarily a good idea. Although Web browsers won't make a distinction, most professional Web designers use only lowercase (as does this book) for a number of reasons:
That said, a few Web fans still like uppercase tags because they sometimes stand out better in a sea of HTML. So feel free to go uppercase if you like, but just be warned that the rest of the world won't follow suit. |
2.3.5.3. Handling special characters with caution
In HTML, certain characters have a special meaningnamely angle brackets (< >) and the ampersand (&). You can't enter these characters directly into a Web page, because the browser will assume you're trying to give it a super-special instruction. Instead, you need to replace these characters with the equivalent HTML character entities , as described in the box "Telling the Browser to Ignore a Tag" on Section 2.2.3. Table2-2 shows the basic HTML character entities.
Table 2-2. HTML Character Entities
| To Get This: | Type This: |
|---|---|
| < | < |
| > | > |
| & | & |
| " | &" |
Strictly speaking, you don't need all of these entities. Quotation marks are always acceptable, except inside attribute names . Browsers are usually intelligent enough to handle the ampersand (&) character appropriately, but it's better style to use the entity & because that way there's no chance the browser will confuse the ampersand with another character entity. Finally, the character entities for the angle brackets are absolutely , utterly necessary.
Here's some flawed text that won't display correctly:
I love the greater than (>) and less than (<) symbols. Problem is, when I type them my browser thinks I'm trying to use a tag.
And here's the correction with the HTML character entities. When the browser processes this text and displays it, it replaces the entities with the characters you really want.
I love the greater than (
>) and less than (<) symbols. Problem is, when I type them my browser thinks I'm trying to use a tag.
Tip: Character entities are also a handy way to insert symbols like non-English characters, the copyright mark, and the Euro currency symbol. You'll learn more in Chapter 5.
EAN: N/A
Pages: 135