| When you're done mastering, it's time to save your final song. The simplest way is to use the Export Song As Audio File command discussed in "Saving Your Work" in Chapter 4, "Getting Started." However, if your song contains custom patches and samples, you need to make sure they're available the next time you open the song. Although you could create your own ReFill to make sure they're all there (see "Creating Your Own ReFills" in Appendix B, "Resources"), if you just need to archive a song using a few original patches and samples, creating a self-contained song is much easier. To do this you just need to set the song self-contain settings. To save a self-contained song 1. | Choose File > Song Self-Contain Settings (Figure 11.50).
Figure 11.50. Use the Song Self-Contain Settings to make sure your song won't be missing any parts. 
This will bring up the Song Self-Contain Settings dialog box with a list of all the referenced sound files for the song.
| 2. | Click Check All to include all the referenced files (Figure 11.51).
Figure 11.51. It's a good idea to include all referenced files, though if you're using only Factory and Orkester resources, it's not necessary. 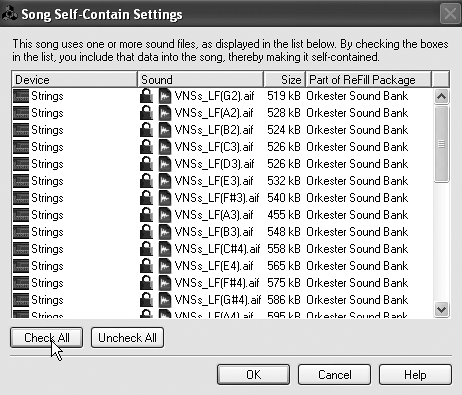
| 3. | To remove sounds, select them in the Song Self-Contain Settings dialog box, and click Uncheck.
| 4. | Click OK.
Now whenever you save your song, it will contain all the referenced sounds.
|
 Tips Tips
If you're using only patches and sounds from the Factory and Orkester banks, self-contain settings don't have any effect. It is much easier to keep track of your files before you save your work. That way, you can decide to reorganize your library's folder structure later and not have to see the Missing Sounds dialog box when you open a song.
Managing Sounds Protect against accidental loss of work! Any time you use patches from a variety of sources, it's a good idea to look at the Song Self-Contain settings and make a note of what sounds your song needs. For example, if your song requires an obscure ReFill you downloaded from a shareware site, make a note of it and back up a copy of the ReFill when you archive the song to CD or DVD. That way, if you forget and throw the ReFill out, or take your work to another computer, you can still boot the song properly! |
Finding missing sounds The Missing Sounds dialog box will help you find or replace any missing files required by a song or patch. To find missing sounds 1. | Songs or patches using missing refills will launch the Insert CD dialog (Figure 11.52). Click Browse to launch the browser or Cancel to bring up the Missing Sounds dialog.
Figure 11.52. The missing ReFill dialog box asks for the CD the sounds are on. To manually search your local system, click Cancel. 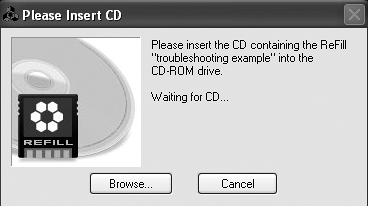
| 2. | In the Missing Sounds dialog box (Figure 11.53), click Search & Proceed to start an automatic operation, Open Dialog to search manually, or Cancel to abort.
Figure 11.53. Searching for files referenced by an old song is much harder than keeping track of them before you save! 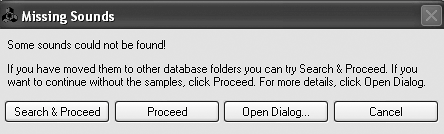
| 3. | The manual search window has several options:
- Download ReFill This handy feature opens your Web browser to the ReFill's URL so you can download it again (Figure 11.54).
Figure 11.54. If you've lost a ReFill, Reason can help you find and download it again. 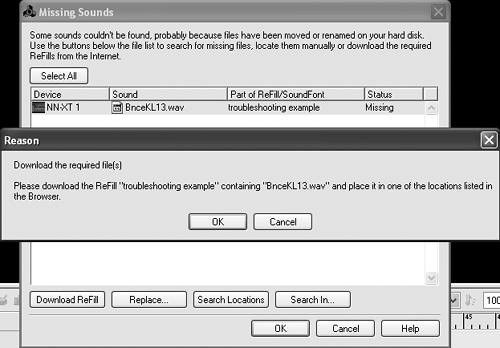
- Replace / Search In This opens the Reason browser so you can find a compatible or duplicate sound to use instead.
- Search Locations This will automatically search your local drives for the missing sound.
|
|