| New in version 3.0 of Reason, the Combinator can take any Rack setupincluding combinations of instruments, effects, Mixers, and internal connectionsand put them into just one rack device (Figure 9.1 and Figure 9.2). This can then be saved as a Combi patch, loaded and saved just like an instrument sound. Figure 9.1. The Combinator turns a complex Rack setup like this… 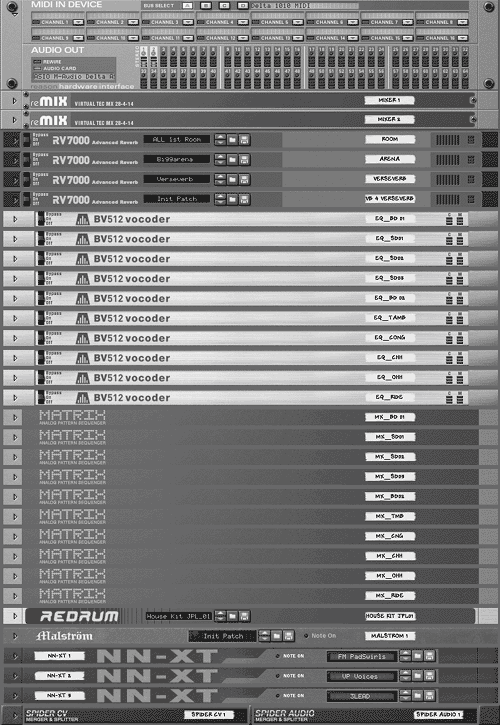
Figure 9.2. ...into this compact setup. 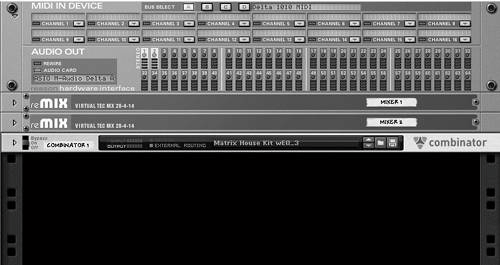
The Combinator is ideal for storing templates of frequently used setups, creating and saving chains of effects, or cordoning off Rack setups that share the same purpose. Let's try running all 10 channel outputs of a Redrum to their own Mixer channel. This gives us many more ways to augment the sound of each drum. To create a basic 10-output drum setup 1. | In an empty Rack, create a 14:2 Mixer.
| 2. | Press Shift and create a Redrum.
This will bypass auto-routing.
| 3. | From the back panel, cable each drum channel audio output to a separate 14:2 Mixer channel (Figure 9.3).
Figure 9.3. Start with a basic 10-channel drum setup. 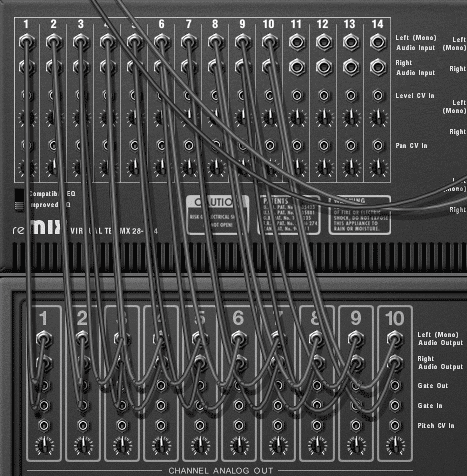
|
 Tip Tip
Now save yourself future setup time and embed this Rack configuration into a Combinator device that can be easily loaded as a patch. There is no downside to doing this, since you can still edit this setup however you want. To combine a setup 1. | Holding the Shift key, select all the Rack devices you want to save as a Combi setup.
| 2. | Select Edit > Combine or right-click and select Combine from the context menu (Figure 9.5).
Figure 9.5. Combine your devices. 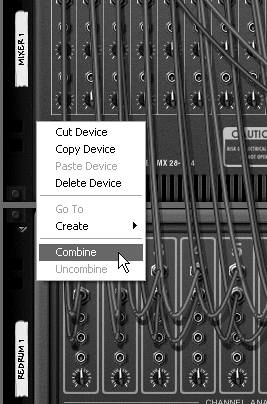
Your setup is turned into a Combinator (Figure 9.6).
Figure 9.6. On the back panel you should see that a gray Combinator frame now encases your setup. 
| 3. | Go to the front panel to view your setup as a Combinator (Figure 9.7).
Figure 9.7. This is the front view of a combined 10-channel drum setup in a Combinator device. 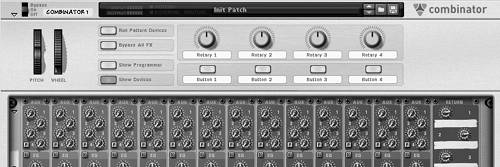
You may need to scroll up the Rack window to see the Combinator front panel.
|
In the next example, we'll continue with the 10-channel drum setup, and insert a BV512 equalizer for each separate drum channel. This will involve some repetitive tasks, but you'll only have to perform this procedure oncethen you can save it as a new patch and use it from now on. To add more devices to a combined setup 1. | If your Combinator is folded, unfold it and click the Show Devices button (Figure 9.8).
Figure 9.8. Use the Combinator Show/Hide Devices button to further expand or minimize. 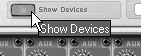
| 2. | Click inside the Combinator device area.
| 3. | Hold Shift and (one by one) create 10 BV512 devices.
| 4. | From the front panel, set each BV512 unit to Equalizer (Figure 9.9).
Figure 9.9. You won't hear any sound unless you set the BV512 units to Equalizer mode. 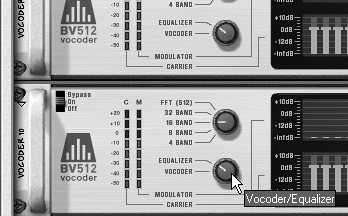
This may seem tedious, but at least you only have to do it once!
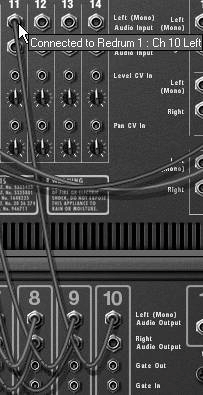
| 5. | From the back panel, switch the Redrum's first Mixer channel input cables to the first BV512 inputs (Figure 9.10).
Figure 9.10. Switch the Redrum cables from Mixer channel inputs to BV512 inputs to set up the equalizers as insert effects. 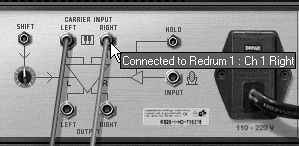
| 6. | Cable the first BV512 outputs to the first Mixer channel inputs (Figure 9.11).
Figure 9.11. Cable the BV512 outputs to the Mixer channel inputs. 
| 7. | Minimize the finished BV512 so you don't have to scroll your Rack view as you continue.
Reason will help you track your connections visually by color-coding the cables. Once they are passing through an effect, the cables will turn green.
| 8. | Repeat steps 5 through 7 for each BV512, cabling all 10 drum outputs through a BV512 (Figure 9.12).
Figure 9.12. All 10 drum channels are now running through their own equalizers. 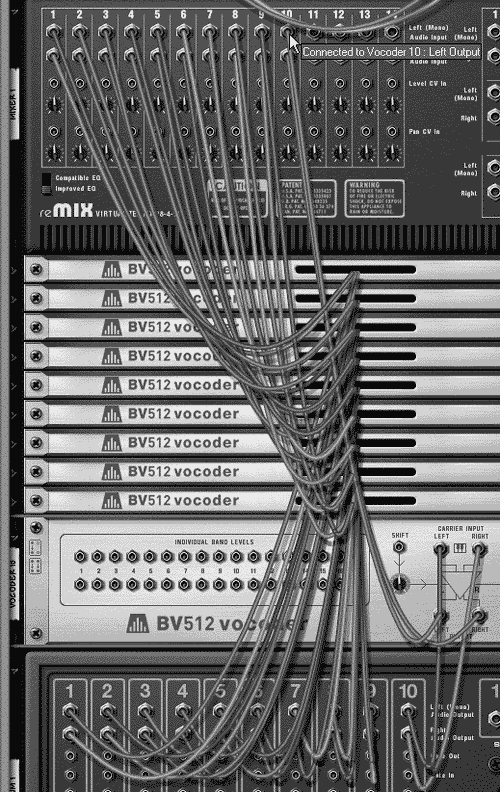
| 9. | In the Rack, click the name of each BV512 device and give it a new, descriptive name (for example, "EQ_DrmCh01") so that you can tell what each device is connected to at a glance (Figure 9.13).
Figure 9.13. To avoid confusion, keep your device names short but descriptive. 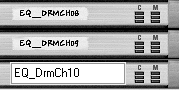
| 10. | Now go to the Redrum, solo each drum in turn, and adjust its EQ until you like the sound of the kit (Figure 9.14).
Figure 9.14. Solo each Redrum channel and adjust its EQ. 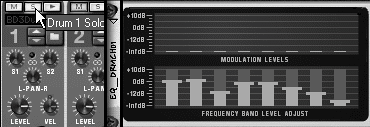
|
Tip
Now is a good time to save or rename the patch. To save a Combinator patch 1. | On the Combinator front panel, click the Save Patch button (Figure 9.15).
Figure 9.15. The Save Patch button saves the entire Combinator setup. 
| 2. | In the Save dialog box, select a destination for your patch (Figure 9.16).
Figure 9.16. Save your custom patches where you can easily find them later. 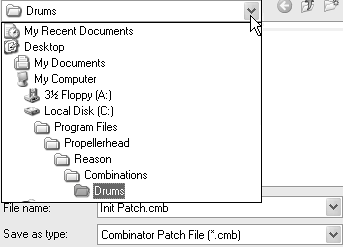
| 3. | Name your patch and click Save (Figure 9.17).
Figure 9.17. Name and save your patch. 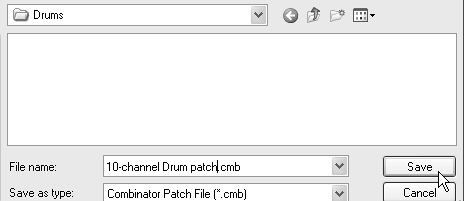
Your new patch name should now appear in the Combinator display screen (Figure 9.18).
Figure 9.18. The Combinator patch display should now show the new patch name. 
|
|