13.1. User Controls
| User controls allow you to save a part of an existing ASP.NET page and reuse it in many other ASP.NET pages. A user control is almost identical to a normal .aspx page, with two differences: the user control has the .ascx extension rather than .aspx, and it cannot have <HTML>, <Body>, or <Form> tags. The simplest user control is one that displays HTML only. A classic example of a simple user control is an HTML page that displays a copyright notice. To demonstrate this, create a new web application named UserControls. Once the application is open, right-click on the project and choose Add New Item. Highlight Web User Control and name your new control Copyright.ascx, as shown in Figure 13-1. Example 13-1 shows the complete listing for Copyright.ascx, which you will notice is nothing but HTML. Figure 13-1. Creating a user control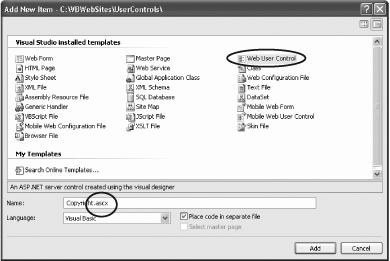 Example 13-1. Copyright user control<%@ Control Language="VB" AutoEventWireup="false" CodeFile="Copyright.ascx.vb" Inherits="Copyright_ascx" %> <hr> <table> <tr> <td align="center">Copyright 2005 Liberty Associates, Inc.</td> </tr> <tr> <td align="center">Support at http://www.LibertyAssociates.com</td> </tr> </table> To see your user control at work, you'll modify Default.aspx, adding a few controls as well as the user control (to provide a copyright at the bottom of the page). The first step is to register your copyright control at the top of the page with a Register statement: <%@ Page Language="VB" AutoEventWireup="false" CodeFile="Default.aspx.vb" Inherits="Default_aspx" %> <%@Register tagprefix="OReilly" Tagname="copyright" src="/books/2/660/1/html/2/copyright.ascx" %> Notice that this consists of a tagPrefix (e.g., "OReilly") and a TagName: "copyright" as well as a pointer to where this control is defined (src="/books/2/660/1/html/2/copyright.ascx"). The next step is to add the control to your page. Just as you have used a tagprefix (asp) and a tagname (Button) for web controls: <asp:Button> here you will use your own prefix and tagname: <OReilly:copyright runat="server" /> Add this line to the bottom of your form, just above the closing <div> statement. Next, switch to Design view and you'll see the copyright in place. Now, create a second page (testUserControl.aspx) and add controls to that page. Remember to register the user control at the top of the page using the same Register directive, and place the control in the page where you want it to appear. Create hyperlinks on both pages so that you can move from one to the other. You should see that the user control is displayed at the bottom of each page, serving as reusable code, as demonstrated in Figure 13-2. Figure 13-2. Basic user control on two pages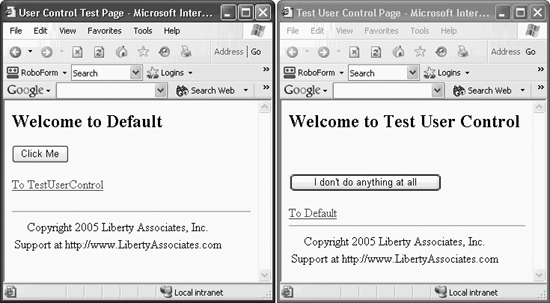 The copyright user control is shown at the bottom of both pages, as you would expect. 13.1.1. Adding Code to User ControlsSo far, all you've put into the user control is straight HTML. This is simple, but also somewhat limited. In the next example, you'll create a user control that reuses your carefully developed and somewhat complex interface and code from a previous example. Reopen the WebNorthWindDataControls application you developed in Chapter 10 (or use the downloaded source). Open the Products.aspx page and copy everything within the <div> tags to the clipboard. Now return to your UserControls application and create a new User Control. Name it NorthWindProductsControl.ascx. Open the file in Source view, and paste the clipboard contents anywhere after the <%@ Control> directive. Go back to WebNorthWindDataControls. Copy the code-behind for the methods used by this page, and paste them into the code-behind of your new user control. Finally, open TestUserControl.aspx and add two lines. The first is the registration line for your new user control at the top of the page: <%@Register tagprefix="OReilly" Tagname="Products" src="/books/2/660/1/html/2/NorthWindProductsControl. ascx" %> The second line inserts an instance of this control into the page: <OReilly:Products runat="server" /> To make the control stand out, I'll place it within an ASP:Panel: <asp:Panel Height="50px" runat="server" Width="125px" BackColor="#C0FFFF" BorderStyle="Groove"> <OReilly:Products runat="server" /> </asp:Panel> The panel surrounds the control (and creates a border and background color) while the single line placing the Products control includes the entire control and its supporting code. There is one more thing you must do before you run this program, however. Examine the .ascx file and search for either of the SqlDataSource controls . You'll find that both refer to the NorthwindConnectionString, which you created in the previous project, but not in this one: <asp:SqlDataSource runat="server" SelectCommand="SELECT [ProductID], [ProductName] FROM [Products]" ConnectionString="<%$ ConnectionStrings:NorthwindConnectionString %>"> </asp:SqlDataSource> This is easy to rectify, however. Return to WebNorthWindDataControls, and open the Web.config file. You'll find connectionString defined as follows: <connectionStrings> <add name="NorthwindConnectionString" connectionString="Your connection string here" providerName="System.Data.SqlClient" /> </connectionStrings> Open the Web.config on your new project and you'll find an empty connectionStrings element. (If you haven't yet run the application in Debug mode, you won't have a Web.config file. In this case, just press F5 to run the application, and tell Visual Studio to create a Web.config file when it asks what it should do.) <connectionStrings /> Replace the empty element with the element you retrieved from WebNorthWindData-Controls, and you are ready to run your application. It should look like Figure 13-3 13.1.1.1. Control propertiesThere can be only one @Control directive for each user control. This attribute is used by the ASP.NET page parser and compiler to set attributes for your user control. Possible values are shown in Table 13-1. Figure 13-3. Product user control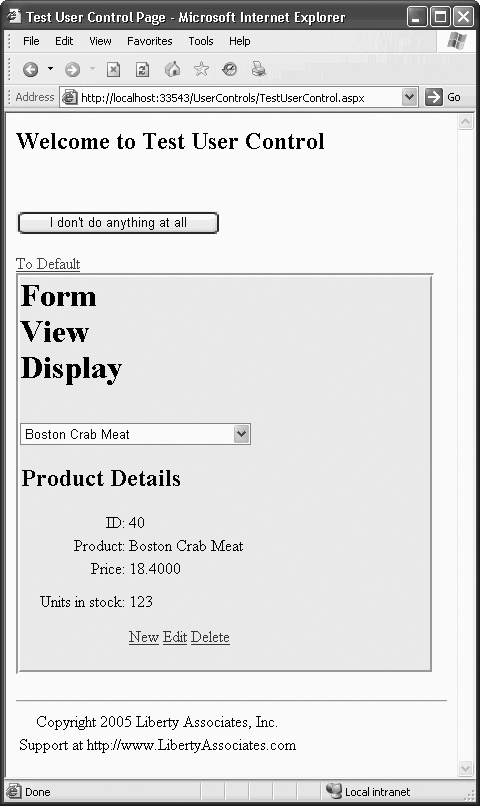
|
EAN: 2147483647
Pages: 162