| At first glance, changing a file's format can be a confusing and complicated matter, especially if you don't know what all those acronyms stand for. The reality is that it's not as complicated as it first appears. Photoshop provides almost 20 format options from which to choose; all you have to do is know which ones to use. Choose File, Save As Regardless of the current format of the file, you change the file format from the Save As dialog box. Choose File, Save As to open the dialog box. 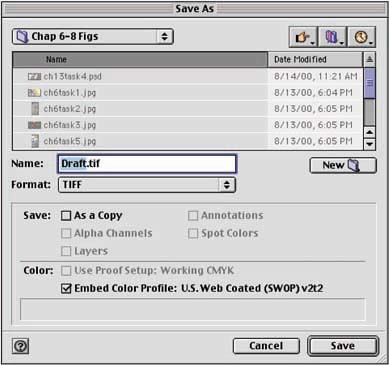
Rename File and Select Format If desired, highlight the current filename in the Name list and type a new filename in the Name field. Access the Format pop-up menu and choose a new file format. 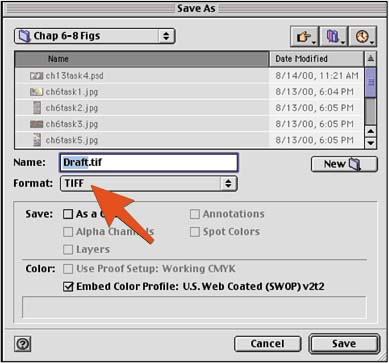
Choose File Destination If desired, use the pop-up menu at the top of the dialog box and navigate to a new destination folder in which you want to store the image. 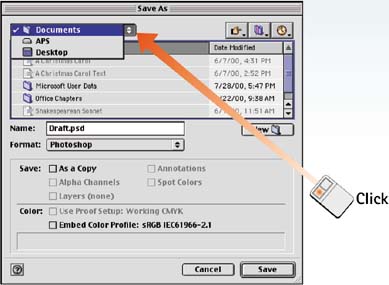
Duplicate the File if You Want In the Save section of the Save As dialog box, enable the As a Copy check box to duplicate the file. The As a Copy option ensures that the original file will not be overwritten. 
To Save as a JPEG When you choose to save a file in JPEG format, clicking OK launches the JPEG Options dialog box. Select the appropriate Image Options and Format Options and click OK. For more on these options, see Task 7, "How to Build JPEG Files for the Web," later in this part. 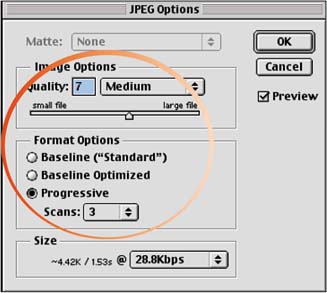
To Save as a PDF When you choose to save a file in Photoshop PDF format, clicking OK launches the PDF Options dialog box. Select either the JPEG or ZIP option in the Encoding area. If you select JPEG, you must also choose a compression rate. Choose any other options that apply and click OK to finish. 
To Save as a TIFF When you choose to save a file as TIFF, clicking OK in the Save As dialog box launches the TIFF Options dialog box. Specify whether the file must be compatible with a Mac or PC. In addition, you should almost always enable the LZW Compression check box, which dramatically compresses the file size without impacting image quality. 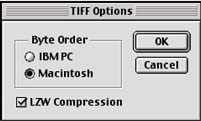
To Preserve the Alpha Channels When saving a file, it is possible to preserve its associated alpha channels. Alpha channels are separate channels used to save selections and to create masks. To preserve the alpha channels, enable the Alpha Channels check box in the Save section of the Save As dialog box. This option is grayed out if there are no alpha channels associated with the file. 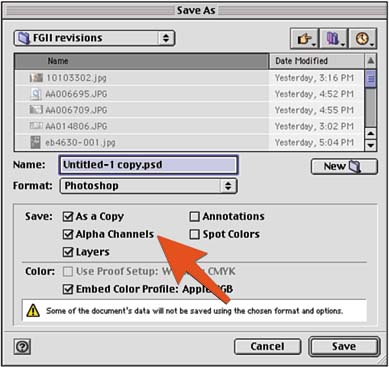
To Preserve Layers and Annotations When saving a file, it is possible to preserve each individual layer and any annotations associated with the file. To preserve the individual layers of a file, enable the Layers check box in the Save section of the Save As dialog box. To preserve any voice or text annotations, enable the Annotations check box. These options are grayed out if there are no layers or annotations associated with the file. 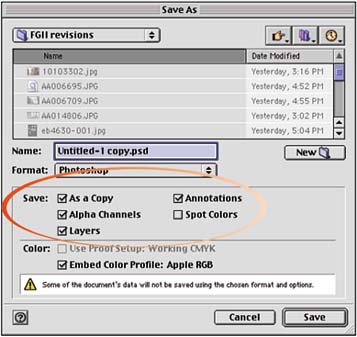
To Preserve Spot Colors When saving a file, it is possible to preserve each individual spot color channel along with the file itself. To preserve a file's spot colors, enable the Spot Colors check box in the Save section of the Save As dialog box. This option is grayed out if there are no spot color channels associated with the file. 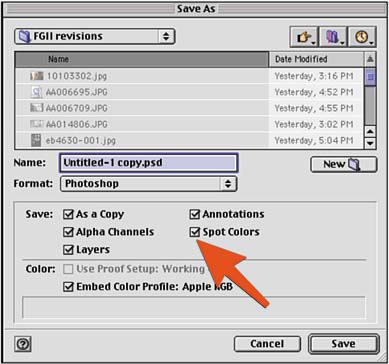
To Set the Color Options When saving a file, it is possible to preserve any color-proofing options along with the file itself. To save the current proofing setup (as specified in View, Proof Colors), enable the Use Proof Setup check box in the Color section of the Save As dialog box. To embed the current RGB working space, select the Embed Color Profile check box. 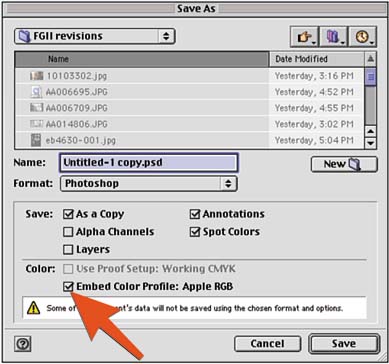
Save the File When you have selected the options you want to use to save the file, click Save to close the Save As dialog box and save your file. 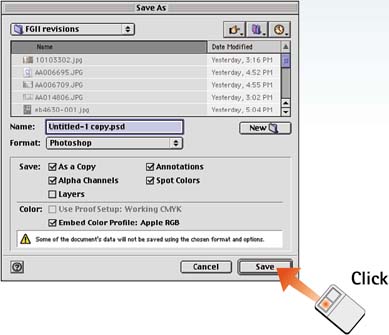
How-To Hints JPEG, PDF, or TIFF? You save a file in JPEG format if you have a photographic image that must be compressed for onscreen viewing (such as the Web). Choose the PDF format if you have a Web document that you want to keep consistent for layout design and print versions. Save a file in TIFF format if you want to save a clipping path with the file to be used in a program such as Illustrator, PageMaker, or InDesign. LZW Slows Things Down Saving a TIFF file as LZW does have its drawbacks mainly that opening and closing files takes longer because Photoshop has to compress and decompress the data. For smaller files, it's no big deal, but for files that are more than 20MB, you will notice the difference. Be Careful Saving JPEGs The image quality of a JPEG file will erode if you repeatedly save the file as JPEG. The compression doesn't just happen one time it is reapplied with every save. You should convert the file to JPEG only at the very end, when the image editing is complete. |
|