Getting Started
| If you haven't already done so, go ahead and log in to your Merchant Solutions account at smallbusiness.yahoo.com/merchant/. Caution: If you are planning on using the product description or product photo from the manufacturer, make sure you get permission in writing first. You do not want to infringe on any copyright. Also for better search engine placement, consider rewording the product description that came from the manufacturer. This will reduce your chances of getting penalized by the search engine's duplicate content filter. Make sure your page contains at least 80% original content. Once you log in, it will take you to the Manage My Services home page. From here, you can go to the Store Manager to work on your store; the Web Hosting Control Panel to view stats, manage files, and view recent backups; the Domain Control Panel to manage advance DNS settings and subdomains; and the Email Control Panel to manage and create email accounts. The flowchart shown in Figure 9.2 has been provided to show you how to navigate to the different control panels and to the Store Editor and Catalog Manager. Figure 9.2. Control panel flowchart.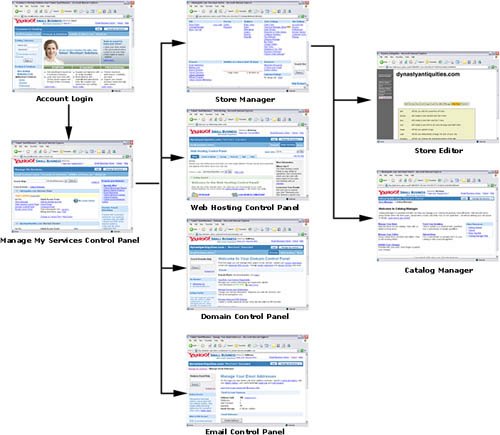 Getting to Know the Store ManagerGo ahead and click on the Store Manager link so we can take a look at all the tools and options to help build your store. Make sure you click through each service to familiarize yourself with what Yahoo! Merchant Solutions has to offer. From the Store Manager, you can process your orders, edit your store, customize your order form, set up shipping rates, set up tax tables, view statistics, add users to the account, promote the site, and much more. As you can see in Figure 9.3, there are a lot of tools and properties to help build and customize your store. Figure 9.3. Store Manager.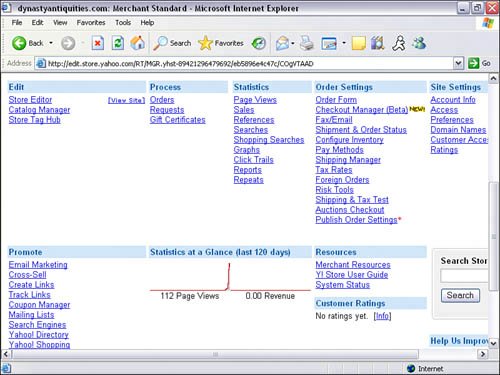 Creating Your First SectionIf you have a lot of products that need to be categorized and grouped, you will want to create sections for easy navigation. You do not want to have hundreds of products on one page. Once you create a section, a button will be created in the navigation menu. In this example, we have various antiques from the Chinese dynasties. We want to group them by their particular dynasty. The first Chinese dynasty is the Zhou Dynasty. Let's create our first section.
Figure 9.4. Add Section form. Figure 9.5. The Zhou Dynasty button was created as a result of creating a section, as described in the demo.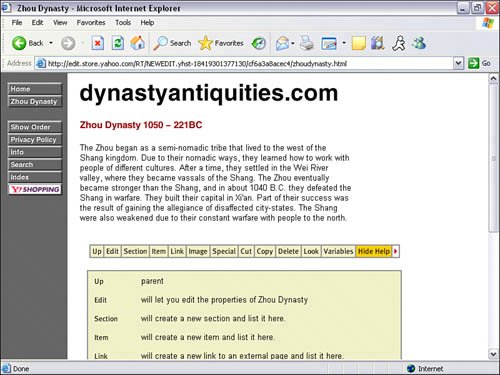 To create additional sections, click on the Up button to go back to the home page and repeat the previous steps. You can create as many sections as you wish. If you forget to click on the Up button, a subsection will be created within the newly created Zhou Dynasty section and a button will not be created in the navigation menu. Now that we have created a section, let's take a look at adding our first product. |
EAN: 2147483647
Pages: 149