Two Ways to Add a Product
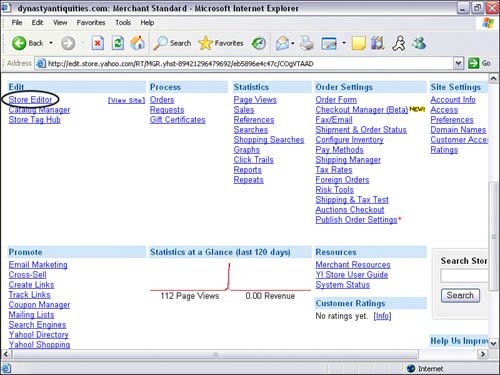
| There are two ways to add products to your online store. You can use the Store Editor or the Catalog Manager. Every time you create a product in Catalog Manager, the product is also created in Store Editor. And vice versa, if you are using Store Editor to create a product, a product record is also created in the Catalog Manager. So whatever method you choose, the product data will be available in both Store Editor and Catalog Manager. Although you can create products in both, we recommend creating the product in Store Editor and using the Store Manager to manage your products. We'll show you how to create your product using both methods. In the following example, we'll create a product in the Zhou Dynasty section we created earlier. Caution: If you add a product before adding a section in Store Editor, a button will also be created with the product name in the menu column. This is fine if you have a few products and want them displayed in your navigation menu. If you have a lot of products and want to categorize them, you will want to create a section first before you create the product. If you make a mistake and create the product first, you can always move the product into its section later. Store EditorUsing Store Editor will help you visually place the products where you want them to go. All you have to do is navigate to the particular section and add the item. Before we get started, let's get to know the Editor Toolbar in Store Editor. To get to the toolbar, click on the Store Editor link in the Store Manager. The toolbar will appear on every page in Store Editor as shown in Figure 9.6. Figure 9.6. Screenshot Editor toolbar.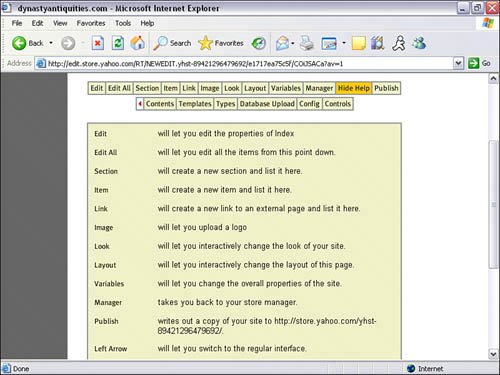 Standard Edit Toolbar
Advanced Editor ToolbarThe advanced toolbar will appear as a second row underneath the standard toolbar when you click on the red triangle next to the Publish button.
Creating Your First Product with Store Editor
Great! Now you have created your first product. To create additional products, just repeat the previous steps, starting with step 2. To view a video on how to create a product with Store Editor, go to www.MyEcommerceSuccess.com. Catalog ManagerLet's take a look at a few advantages of using Catalog Manager.
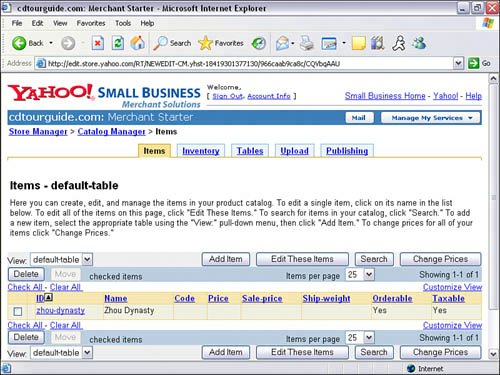
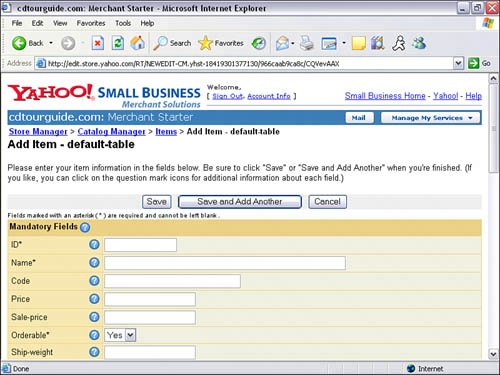
Creating Your First Product in Catalog ManagerFollow these steps to create a product using Catalog Manager:
You've now created a product in Catalog Manager. Although you have created a product, if you navigate to the Store Editor, you will not see the product. This is because the product has not been linked to the home page or any section. You will need to go into the content tree under the Content button on the toolbar in Store Editor to move the product to the area you want. For this reason, it is easier to use Store Editor to navigate and add your product. Getting to Know Catalog ManagerSince you're already in Catalog Manger, let's take a look at the five tools to help you manage your inventory.
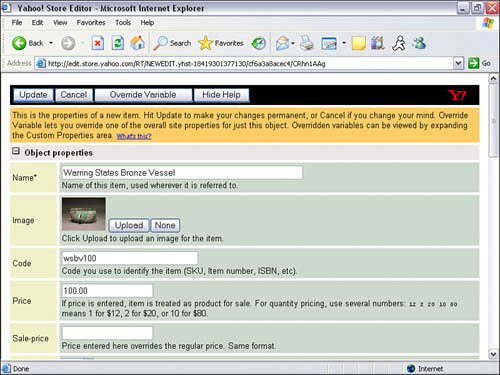
Editing Your Product in the Store EditorOne of the key benefits to editing your product in Store Editor is that you get to see exactly what the page will look like. You can edit, remove, or add product details, images, pricing, and so on. To edit your product
Adding Product OptionsYou can create order options such as size, color, and incremental pricing. Once you add an option, a dropdown menu will be displayed on your product page, as shown in Figure 9.11. Figure 9.11. Options are displayed as a dropdown menu.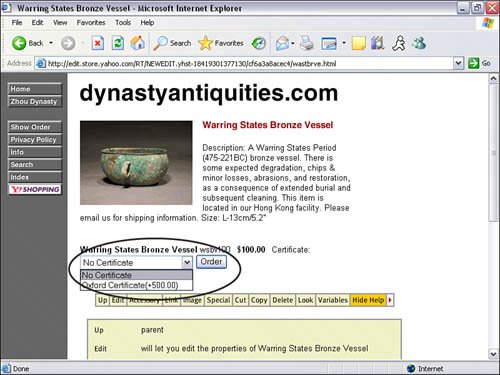 Creating options can be done in either Store Editor or Catalog Manager. Here are two examples of how the parameters must be entered into the Options field.
You can also set up your options for incremental pricing. For example, say you are selling Tshirts and have 3 sizes. The Small is $10, the Medium is $15, and the Large is $20. Here's how you would enter the parameters in the Options field:
If the customer selects Small, no incremental price is added because the product price has already been set to $10. If the customer selects Medium, a $5 charge will be added to the already set price of $10, totaling $15. Note regarding the Options field
Adding Product ImagesThere are two ways to add product images: You can upload product images onebyone or you can upload multiple images at the same time. If you upload images onebyone, you can select the Upload button shown in Figure 9.12 while editing your product or while adding a new product. After you click on the Upload button, you will be taken to another page where you can choose the location of your image to upload, as shown in Figure 9.13. This is a great option for stores with few products. Figure 9.12. Image Upload button.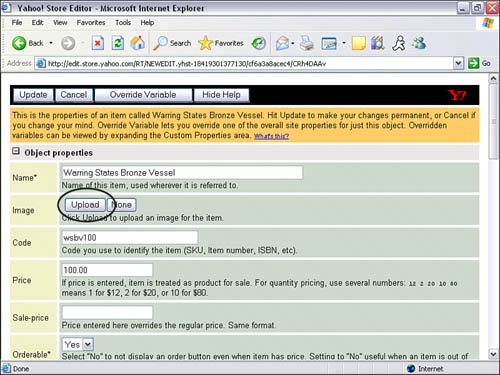 Figure 9.13. Image Upload form.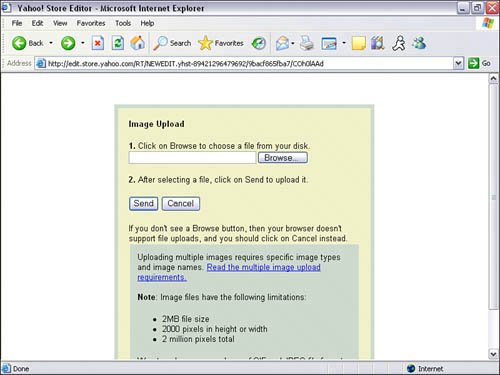 If you have a lot of products, using the multiple image upload will help you save time. This feature will upload all your images at once. How does the system know where to put the images? The name of each file must exactly match the ID of the product page. If you used the Store Editor to create your product, the product ID was created for you and you must go back into the Catalog Manager to find out what the ID is. If you used Catalog Manager to create your product, the product ID is something you entered. You can also go back into Catalog Manager to view the product ID. The Yahoo! store supports both .jpg and .gif image formats. For example, if your product ID is zd100, your image file name must be zd100.jpg. If it's a .gif, the image file name must be zd100.gif. All images must be in a zip file in order to upload. This will help reduce the file size and speed up the file upload time. You may upload as many zip files as you wish, but only one zip file maybe uploaded at a time. If you don't have a zip program, you may download WinZip (winzip.com) or another zip utility program.
Figure 9.14. Multiple Image Upload link.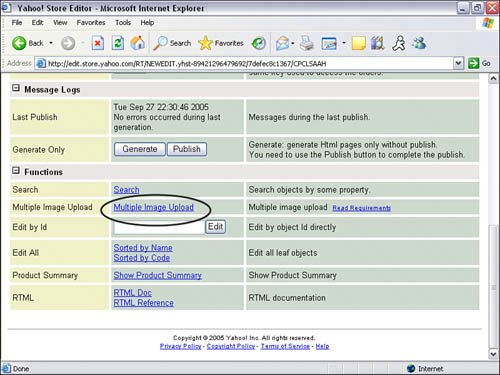 Although you can see all the images you've uploaded in the Store Editor, the changes will not be live until you publish the site. |
EAN: 2147483647
Pages: 149