Chapter 22: The Game Server
![]() Download CD Content
Download CD Content
Now we have some things we've either added to the game world in recent chapters or simply included in our requirements that are not yet supported in the program code.
In this chapter we'll focus on adding the server-side code we need to support the requirements, as well as adding in some code to bring certain concepts to a more complete state.
The Player-Character
You've probably noticed a few things that are odd or incomplete in the player behavior or appearance in the code and art we've dealt with up to now. We'll tackle those things now.
Player Spawning
For our example games, we've used a fixed spawn point. Well, there is a convenient spawn point system available that we can employ.
First thing we need for this system is what we call a marker. Create a new file named C:\koob\control\server\misc\marker.cs, and add the following to it:
datablock MissionMarkerData(SpawnMarker) { category = "Markers"; shapeFile = "~/data/models/markers/sphere.dts"; }; function MissionMarkerData::create(%block) { switch$(%block) { case "SpawnMarker": %obj = new SpawnSphere() { datablock = %block; }; return(%obj); } return -1; } This has the by-now-familiar datablock, this one for a MissionMarkerData. The Create function tells the World Editor Creator how to make the new marker in the game world. Note the use of the switch$ block, even though there is only one case—this is for later use for other kinds of markers. Save your work.
Now copy the directory C:\3DGPAi1\RESOURCES\CH22\markers and all of its contents to C:\koob\control\data\models\markers.
With that done, launch Koob, go into camera fly mode, and then move to a position overseeing the start/finish line, looking down at it. Go into World Editor Creator (press F11 followed by F4), and then add a PlayerSpawns group by choosing System, SimGroup from the Tree view at the lower right and entering PlayerSpawns as the object name in the dialog box. Make PlayerSpawns the current group by locating it in the hierarchy at the upper right and then holding down the Alt key while clicking the PlayerSpawns entry. The PlayerSpawns entry should now be highlighted in gray. Next, add a spawn marker by choosing Shapes, Markers, SpawnMarker from the Tree view at the lower right. A gray-white sphere will be placed in the world. Position about half a dozen or so of these around the start/finish area, hiding a few of them. Make sure they were all created in the PlayerSpawns group.
Now open the file C:\koob\control\server\server.cs and locate the function SpawnPlayer. Change the createPlayer call to look like this:
%this.createPlayer(SelectSpawn());
Next, add the following method to the end of the file (or immediately after the SpawnPlayer
function SelectSpawn() { %groupName = "MissionGroup/PlayerSpawns"; %group = nameToID(%groupName); if (%group != -1) { %count = %group.getCount(); if (%count != 0) { %index = getRandom(%count-1); %spawn = %group.getObject(%index); return %spawn.getTransform(); } else error("No spawn points found in " @ %groupName); } else error("Missing spawn points group " @ %groupName); return "0 0 192 1 0 0 0"; // if no spawn points then center of world } This function will examine the PlayerSpawns group and count how many spawn markers are in it. It then randomly selects one of them and gets its transform (which contains the marker's position and rotation) and returns that value.
With this done, go ahead and try your game. Notice how each time you spawn, it's in a different place.
Vehicle Mounting
In recent chapters, when you've made your player-character get into the car, you may have noticed—especially from the third-person perspective—that the player is standing, with his head poking through the roof.
This is addressed by assigning values to a mountPose array. What we do is for each vehicle, we create mountPoints in the model (which we've done for the car). We need to specify in the car's model some nodes that will act as the mount points. We'll address the pose part of the player model in the next section, leaving the rest until the later section that covers vehicles.
The Model
In recent chapters I have been using a variation of the Standard Male Character as a filler for testing the code, maps, and other models. Now, however, it's time for you to use your own model, the Hero model we created back in Chapter 14. There are a few things we need to adjust in that model, so make a copy of your Hero model, and add him to your Koob models directory at C:\koob\control\data\models\avatars\hero. Create the hero directory if you haven't already done it. Copy all of your Hero model files, including the texture files, into that directory.
Adjusting Model Scale
You may find that your character is too large for your needs. If that is the case, it is easy to resolve. Make a judgment about how his size needs to change. Let's say he needs to be 50 percent bigger than he is now.
Fire up MilkShape and load your model. Look for a special material whose name starts with "opt". If the scale value in that name is 0.2, then change it to 0.3 (that's 1.5 times, or 150 percent of 0.2).
If you don't have a special material that adjusts the scale, create one. Switch to the Materials tab and create a new material and name it "opt:scale=0.15". By default, the DTS Exporter scales objects by 0.1, or one-tenth, the modeled size. So 0.15 is 150 percent of 0.1.
Animations
To properly mount your character in a vehicle, you will need to create a sitting pose. In MilkShape, add some more frames in the animation window—make sure to click the Anim button first!
Then select the last frame, and move the joints around until the character looks something like Figure 22.1.
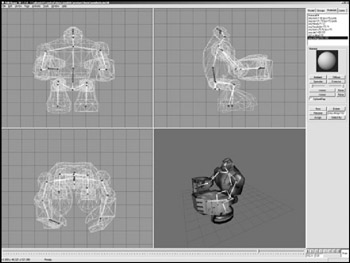
Figure 22.1: Sitting pose.
Create a special material to be the sequence entry for this—it will be a one-frame sequence. Name the material "seq:sitting=102-102", save your work, and then export the file to your C:\koob\control\data\models\avatars\hero\ directory. The rest of the mounting stuff will be handled shortly in the "Vehicle" section.
Server Code
Back in Chapter 20, I provided you with some code to mount and unmount the vehicle, just so you could hop in and out and test sounds. I didn't say much about what it did or why. Let's take a look now.
Collision
The premise is that you simply run up to a car and collide with it to get in. Now you must be mindful not to hit it too hard, or you will hurt yourself when you get in. If you think that it shouldn't be so easy to hurt yourself, then you can edit your player's datablock to suit. Simply open C:\koob\control\server\players\player.cs and find the line that starts with minImpactSpeed= and increase the value —maybe to around 15 or so.
When your player collides with anything, the server makes a call, via the class name of your character's datablock to a callback method called onCollision.
| Tip | The class name for any datablock can be set via script like this: classname = classname; In the case of our player, classname is MaleAvatar, so the line is classname = MaleAvatar; Then methods are defined as MaleAvatar::myMethod() { /// code in here } And they are invoked as MyAvatarObjectHandle.myMethod(); |
OnCollision looks like this:
function MaleAvatar::onCollision(%this,%obj,%col,%vec,%speed) { %obj_state = %obj.getState(); %col_className = %col.getClassName(); %col_dblock_className = %col.getDataBlock().className; %colName = %col.getDataBlock().getName(); if ( %obj_state $= "Dead") return; if(%col_className $= "Item"||%col_className$="Weapon" )//Deal with all items { %obj.pickup(%col); // otherwise, pick the item up } if ( %col_className $= "WheeledVehicle" ) { %node = 0; // Find next available seat %col.mountObject(%obj,%node); %obj.mVehicle = %col; } else { %pushForce = %obj.getDataBlock().pushForce; // Try to push the object away if (!%pushForce) %pushForce = 20; %eye = %obj.getEyeVector(); // Start with the shape's eye vector... %vec = vectorScale(%eye, %pushForce); %vec = vectorAdd(%vec,%obj.getVelocity()); // Add the shape's velocity %pos = %col.getPosition(); // then push %vec = getWords(%vec, 0, 1) @ " 0.0"; %col.applyImpulse(%pos,%vec); } } In the parameters, %this refers to the datablock that this method belongs to, %obj is a handle to the instance of the avatar object that is our player in the game, %col is a handle to the object we've just hit, %vec is our velocity vector, and %speed is our speed.
The first thing we do is to check our object state, because if we are dead, we don't need to worry about anything anymore. We want to do this because dead avatars can still slide down hills and bang into things, until we decide to respawn. Therefore we need to stop dead avatars from picking up items in the world.
After that, we check the class name of the object we hit, and if it is an item that can be picked up, we pick it up.
Next, if the class is a WheeledVehicle, then this is where the mount action starts. The variable %node refers to the mount node. If %node is 0, then we are interested in the node mount0. That node is created in the model of the car, and the next section will show how we put that in. (This is not difficult—it's just a matter of creating a joint in the right place and naming it mount0.)
Then we make the call into the engine to mountObject for the car's object instance, and the game engine handles the details for us. We then update our player's instance to save the handle to the car we've just mounted.
If the object can't be picked up and is also not mountable, then we actually hit it. The next bit of code calculates our force based on our velocity and applies an impulse to the object we hit. So if we hit a garbage can, we will send it flying.
Mounting
Now when you call the mountObject method, the engine calls back to a method in the ShapeBase from which your avatar is derived. The method is onMount, and it looks like this:
function HumanMaleAvatar::onMount(%this,%obj,%vehicle,%node) { %obj.setTransform("0 0 0 0 0 1 0"); %obj.setActionThread(%vehicle.getDatablock().mountPose[%node]); if (%node == 0) { %obj.setControlObject(%vehicle); %obj.lastWeapon = %obj.getMountedImage($WeaponSlot); %obj.unmountImage($WeaponSlot); } } Now if you are wondering why the onCollision handler is accessed via the class name and the onMount handler is accessed via ShapeBase, I'll just have to admit that I'm not sure, and the answer isn't really that apparent. It's one of the vagaries of Torque, but if you keep it in mind, you won't have any problems.
The onMount method is interested in the %obj, %vehicle, and %node parameters. Our player is %obj, and obviously the vehicle we are mounting is %vehicle. The parameter %node refers to the mount node, as discussed earlier.
The first thing the code does is set our player to a null transform at a standard orientation, because the rest of the player object's transform information will be handled by the game engine, with the object slaved to the car—wherever the car goes, our player automatically goes as well.
Next, the mount pose is invoked, with the call to setActionThread. The animation sequence that was defined in the datablock as referring mount0 is set in action. The animation sequence itself is only one frame, so the player just sits there, inside the car.
Now, if we are dealing with node 0, which by convention is always the driver, then we need to do a few things: arrange things so that our control inputs are directed to the car, save the information about what weapons we were carrying, and then unmount the weapon from our player.
Dismounting
Dismounting, or unmounting, is accomplished using whatever key is assigned to the jump action. It's a bit more involved than the mount code. First there is this bit:
function HumanMaleAvatar::doDismount(%this, %obj, %forced) { %pos = getWords(%obj.getTransform(), 0, 2); %oldPos = %pos; %vec[0] = " 1 1 1"; %vec[1] = " 1 1 1"; %vec[2] = " 1 1 -1"; %vec[3] = " 1 0 0"; %vec[4] = "-1 0 0"; %impulseVec = "0 0 0"; %vec[0] = MatrixMulVector( %obj.getTransform(), %vec[0]); %pos = "0 0 0"; %numAttempts = 5; %success = -1; for (%i = 0; %i < %numAttempts; %i++) { %pos = VectorAdd(%oldPos, VectorScale(%vec[%i], 3)); if (%obj.checkDismountPoint(%oldPos, %pos)) { %success = %i; %impulseVec = %vec[%i]; break; } } if (%forced && %success == -1) %pos = %oldPos; %obj.unmount(); %obj.setControlObject(%obj); %obj.mountVehicle = false; %obj.setTransform(%pos); %obj.applyImpulse(%pos, VectorScale(%impulseVec, %obj.getDataBlock().mass)); } Most of the code here is involved in deciding if the point chosen to deposit the player after removing him from the car is a safe and reasonable spot or not. We start by setting a direction vector, applying that vector to our player to figure out in advance where the proposed landing site for the freshly dismounted player will be, and then making sure it's okay using the checkDismountPoint method. If it isn't okay, the algorithm keeps moving the vector around until it finds a place that is suitable.
Once the site is determined, the unMount method is invoked and we return control back to our player model, deposit the model at the computed location, and give our player a little nudge.
When unMount is called, the game engine does its thing, and then it summons the callback onUnmount. What we do here is restore the weapon we unmounted.
function HumanMaleAvatar::onUnmount( %this, %obj, %vehicle, %node ) { %obj.mountImage(%obj.lastWeapon, $WeaponSlot); } EAN: 2147483647
Pages: 197