Working with ActiveX Controls
3 4
At the beginning of this chapter, you learned how to insert native controls into a form or report. ActiveX controls often provide more flexibility and functionality than native controls. In this section, you’ll learn how to insert an ActiveX control. You’ll also learn a few formatting options for one of the more commonly used controls, the Microsoft Date And Time Picker control (one of the ActiveX controls included with Office XP Developer).
ActiveX controls are in-process Automation components that offer a specialized function. For the purposes of this chapter, it’s enough to know that ActiveX controls are non-native controls that you can use in your Access applications. In many cases, using an ActiveX control can save you a lot of work and time because you simply insert the control into your form, set a few properties, and go.
See Chapter 6, "Working with Form Controls," for more details on using ActiveX controls on Access forms.
note
The term in-process means that the component shares the same address space as the client application—in this case, Access. This way, Windows doesn’t have to spend a lot of time managing data and communications between Access and the control, which in turn saves response time. In contrast, an out-of-process component is loaded into its own address space.
Registering an ActiveX Control
Before you can use an ActiveX control, you must register it. Controls that you purchase along with a development package, such as Visual Basic and Office XP Developer, are usually installed and registered when you install the software. Only controls that you acquire independently might need to be registered (as a general rule).
caution
Just because an ActiveX control is registered—and appears in the ActiveX Controls list—doesn’t mean it will work on an Access form. The control might be intended for use in another program, such as Microsoft Internet Explorer or Visual Basic. And those that do work on Access forms might not have the same functionality as they have in another program.
To register an ActiveX control in Access, follow these steps:
- With a form open in Design view, choose Tools, ActiveX Controls.
- The ActiveX Controls dialog box displays currently registered controls, as shown in Figure 8-31.
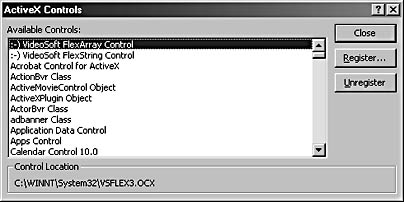
Figure 8-31. You can add registered ActiveX controls to your Access forms using the ActiveX Controls dialog box.
- Click Register, and locate the control in the Add ActiveX Control dialog box, which is similar to the Open dialog box.
- When you locate the control, select it and click OK to return to the ActiveX Controls dialog box. Click Close to return to your form.
Generally, if a control is installed on your system and you have a license for the host application, you’re free to use that control in your Access applications. This might or might not be true in distributed copies of your application. Always check the host application’s licensing information before distributing an ActiveX control. Again, keep in mind that just because the control works in one application doesn’t mean it will work well in Access.
InsideOut
You can use a program that comes with Visual Basic, regsvr32.exe, to register ActiveX controls independently of Access.
Inserting an ActiveX Control
After you’ve registered an ActiveX control, you’re just a few clicks away from accessing that control’s functionality.
To insert an ActiveX control into a form, follow these steps:
- Open a form in Design view.
- Choose Insert, ActiveX Control.
Access will display a list of the registered controls that are currently available in the Insert ActiveX Control dialog box, shown in Figure 8-32. This dialog box is similar to the ActiveX Control dialog box you use to register controls, but the two dialog boxes aren’t interchangeable.
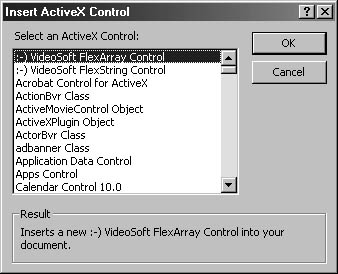
Figure 8-32. Choose an ActiveX control to insert it.
- Select the control you want to insert from the list, and click OK.
Access will insert the control into your form. At this point, you can move it, resize it, and modify its properties just as you would with any native control.
Modifying ActiveX Control Properties
ActiveX controls have properties just like native controls. Furthermore, when you select an ActiveX control in Design view, Access displays the control’s unique properties in the properties sheet. You can also use the control’s custom properties sheet by double-clicking the control. If this doesn’t work, right-click the control, choose the controltype Object option from the shortcut menu, and then choose Properties. Sometimes the Access properties sheet displays a Custom property for these controls. If this is the case, click the Builder button to the right of this property to display the custom properties sheet.
Unlike native control events, ActiveX control events aren’t listed in the properties sheet. They’re available only in the form’s module. When you insert an ActiveX control, VBA automatically adds the appropriate events to the module, and you can access them from the module’s Object and Procedure controls. However, not all events may be functional when an ActiveX control is placed on an Access form (even when you use a control from Office XP Developer).
See Chapter 6, "Working with Form Controls," for more information about working with ActiveX controls on Access forms.
You can bind some ActiveX controls just as you bind native controls: Simply set the control’s Control Source property to the appropriate field. Not all controls will have this capability; when they don’t, the Control Source property won’t be available.
Using the Date And Time Picker Control to Select Dates
If you’ve been using Access for a while, you might be familiar with the Calendar control. Another ActiveX control, Microsoft Date And Time Picker, might be a bit easier to work with than the Calendar control. In this section, you’ll learn how to insert andmodify a date and time picker control. (Microsoft Date And Time Picker comes with Office XP Developer or Visual Basic.) You’ll see just how easy this ActiveX control is to use.
A Date And Time Picker control provides an easy-to-use interface for exchanging date and time information between Access and your users. For example, you can use a Date And Time Picker control to prompt a user to enter a date before running a query. Doing so reduces the chance of errors. Users could still select the wrong date, but they don’t have to worry about remembering the correct date format, and you don’t have to worry about a user making an inappropriate entry.
To insert the Microsoft Date And Time Picker control, follow these steps:
- Open a blank form in Design view.
- Choose Insert, ActiveX Control.
- Select Microsoft Date And Time Picker Control in the Select An ActiveX Control list, and click OK. Access will insert the control, as shown in Figure 8-33.
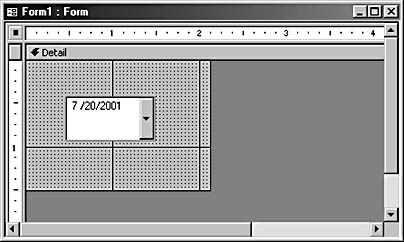
Figure 8-33. Insert a Microsoft Date And Time Picker control into your form.
Click the View selector on the Form Design toolbar to display the form and its new control in Form view. Click the small triangle to the right of the date to display the full calendar shown in Figure 8-34.
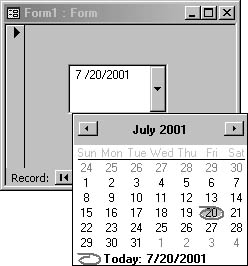
Figure 8-34. Open the control’s calendar.
By default, this control is rather high. Unless you are using a very large font, it will look better if you reduce its height to match a standard text box.
Each field displays a date or time component. To update the date stored by the control, use the back and forward arrows to select a month, and click the date you want to select. (The control opens to the current date by default.) If you prefer to use the keyboard, Table 8-1 describes the keystrokes you can use to update the displayed date and, consequently, the control’s value.
Table 8-1. Using keystrokes to adjust a Date And Time Picker control
| Keystrokes | Description |
| Arrow keys | Press any arrow key to select a new day. The arrow determines the direction the insertion point moves. |
| Home and End | These keys select the first and last day, respectively, in the current month. |
| F4 or Alt+Down Arrow | Use these keys to open the drop-down calendar. |
| Numbers | With the drop-down calendar closed, enter numbers to update the date. If you enter an invalid date, the control rejects it. |
| Plus and Minus keys on numeric keypad | With the drop-down calendar closed, use the Plus and Minus keys to increment and decrement the value of the selected date. |
As you can see, the Microsoft Date And Time Picker control is definitely much easier to use than the Calendar control if the control’s only purpose is to store a date.
See Chapter 6, "Working with Form Controls," for information on getting help when using ActiveX controls.
EAN: 2147483647
Pages: 172