Appendix B - Distributing Access Applications
3 4
When you create an Access application, you may want to install it on computers where Access is not installed. If you have the Microsoft Office Developer (MOD) edition of Office XP, you can use one of its components to prepare a set of files to distribute to the individuals who will be using your database, including a run-time version of Access, which lets Access databases be installed and run by users who don’t have the full version of Access.
The Packaging Wizard component of the Microsoft Office Developer (MOD) edition of Office XP allows you to prepare a package of all the files that your application needs, making it easy to distribute the application to users. When you need to distribute an Access application to individuals who don’t have Access, you can include a run-time version of Access in your distribution package so that users can run the application even if they don’t have Access installed.
While the run-time feature is the main reason to use the Packaging Wizard, you may also want to prepare a package of files to distribute to users (even those who have Access installed), in order to guarantee that they have the correct versions of any ActiveX controls you use in the application. Because the lack of an ActiveX control on a user’s computer (or the wrong version of the control) can cause cryptic errors in an application, preparing a distribution package is a good idea if you use any ActiveX controls in your application.
See "Working with ActiveX Controls" for more information on ActiveX controls.
The Packaging Wizard doesn’t create a single executable file the way Visual Basic does. Instead, it creates a set (perhaps quite a large set) of CAB files, which you can distribute to users on a CD or over a network. The distribution package includes a Setup program (similar to the one used by many Microsoft programs) that makes it easy for users to install the application. In this appendix, you’ll learn how to prepare a set of distribution files to distribute to users, so that they can install and use your application, with all the components the application needs to run properly.
note
If you have used the Setup Wizard for previous versions of MOD (or its predecessor, Office Developer Edition, or ODE), you may have prepared setup packages to be distributed on floppy disks. The floppy disk option is not available in Microsoft Office Developer—probably just as well, because of the size of the distribution files.
Installing the Packaging Wizard
When you install the MOD edition of Office XP, the Packaging Wizard is installed by default, although you can deselect the Packaging Wizard while installing MOD. To check whether this MOD component has been installed, open the VBE window in an Access 2002 database by pressing Alt+F11, and then choosing Add-Ins, Add-In Manager. If the Packaging Wizard appears in the list of available add-ins, as shown in Figure B-1, it is installed and ready to use.
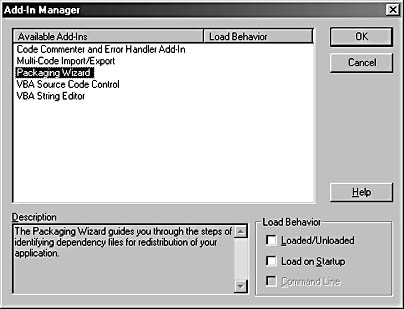
Figure B-1. Check for the Packaging Wizard in the Add-In Manager.
If you don’t see any add-ins listed, MOD has probably not been installed. If other add-ins are listed but the Packaging Wizard is not, MOD might have been installed with the Packaging Wizard component deselected.
In either case, in order to install (or reinstall) MOD with the Packaging Wizard component, follow these steps:
- Insert the CD labeled "Microsoft Office XP Developer." The Office XP Developer Setup screen appears, as shown in Figure B-2.
- If it is highlighted (and it probably will be), click the Windows Component Update link to start installing the Windows components needed by MOD.
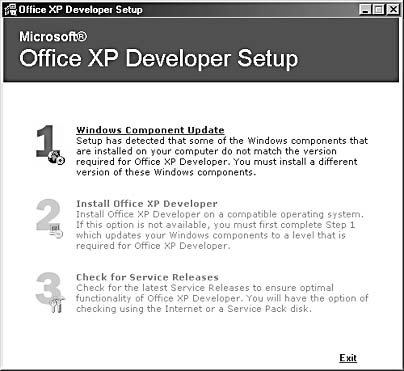
Figure B-2. The Office XP Developer Setup screen looks like this.
- The End User License Agreement appears next; click I Accept The Agreement and click Continue.
- Click Install Now! to start installing the components shown on the screen. You’ll see a progress bar that displays installation progress.
Next, a Restart Windows message box appears. Depending on which components need to be installed on your system, you might have to restart Windows several times. After the last restart, you will see the Congratulations screen.
- On the Office XP Developer Setup screen, click Install Office XP Developer to start installing MOD. After a brief delay while loading installation components, you will get the Setup Start page.
- Click Continue to go to the Options screen, where you can choose to deselect some MOD components. However, you’re better off installing them all if you have the room.
- If you don’t want to install MOD to the default location, click Browse to select a non-default location for the MOD files. After selecting the components you want to install, and perhaps creating a new installation path, click Install Now!.
The Install screen appears next, with a progress bar indicating installation progress. After a final restart, MOD is installed, and you are ready to use the Packaging Wizard and other components.
Using the Packaging Wizard
To demonstrate the Packaging Wizard, this section includes a small sample application, Address Book 2002, with several forms that use special ActiveX controls: the CommonDialog control, the Calendar control, and the DateTimePicker control. When you run the Packaging Wizard, it analyzes the application and gathers together all the files needed to support these special controls, along with the standard Access support files.
To prepare a set of distribution files for an Access application, follow these steps (using Address Book 2002 as an example):
- Open the Address Book 2002 database and press Alt+F11 to open the VBE window.
- Choose Add-Ins, Add-In Manager in the VBE window.
caution
The Add-Ins command in the VBE window gives you different selections than the Add-Ins command in the Access database window. Make sure you are opening the Add-Ins Manager from the VBE window so that you can use the MOD components. - The Add-Ins Manager dialog box opens, as shown in Figure B-3.
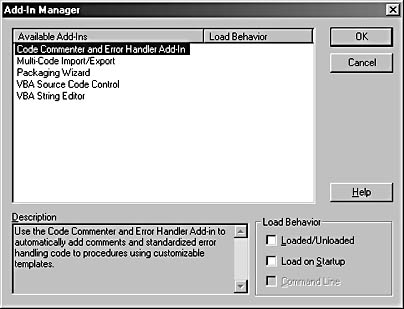
Figure B-3. The Add-In Manager dialog box helps determine which MOD components are loaded on startup.
You can set the Load behavior separately for each component, and also determine whether that component is loaded on startup.
- Because the Packaging Wizard is used infrequently, it is probably not set to load on startup. Select it and then select the Loaded/Unloaded check box to load it now.
- Click OK to close the Add-In Manager, and then choose Add-Ins, Packaging Wizard in the VBE window.
- Select Check This Box To Hide This Screen In The Future on the first page of the wizard if you don’t want to see this page again, and click Next.
- Select the application you want to package and the package you want to build. As shown in Figure B-4, the current database is pre-loaded as the main file, and a package name is suggested, based on the database name. You can also copy, rename, or delete existing distribution packages on this screen. Click Next when you’ve made your selections.
tip
Click Help on any Packaging Wizard page to get more information on the page’s options.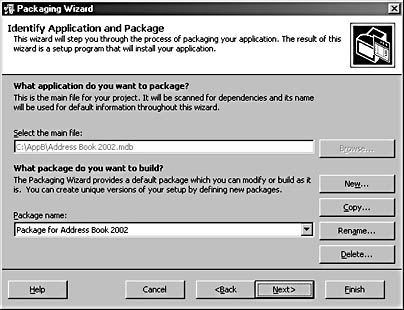
Figure B-4. This page of the Packaging Wizard allows you to identify the application you want to package and select the package to build for it.
- Enter (or accept) the application title, company name, version, and setup language, as shown in Figure B-5. Click Next.
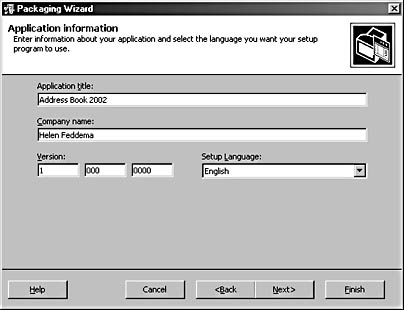
Figure B-5. Enter the relevant package information on the Application Information page.
- The Dependencies screen (shown in Figure B-6) lists the package’s components, including various supporting files needed for the ActiveX controls used in the sample application.
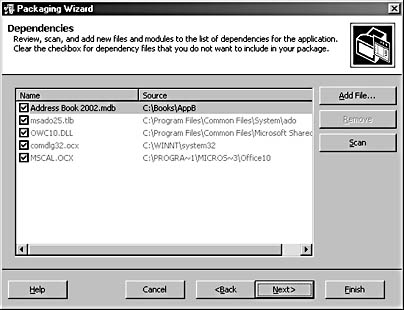
Figure B-6. The Dependencies screen of the Packaging Wizard allows you to choose files and modules for the application.
caution
You may see some components you don’t recognize in the list prepared by the Packaging Wizard. It’s advisable to leave them in the package; they are probably support files needed by some application component, and if you delete a file your application needs, the users will have problems running the application.To add an icon for the application, click Add File to open a standard File Open dialog box to select the icon. The new icon will appear at the bottom of the Dependencies screen. Click Next.
- The Modify Installation Location screen (see Figure B-7) shows where each component will be installed. The suggested locations for standard components should generally not be changed; if you need to add components manually, you will have to select the appropriate location for them. Click Next.
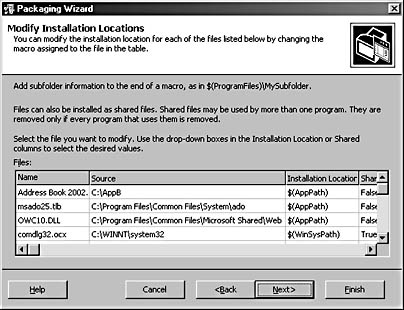
Figure B-7. Generally, you should leave the suggested locations for components as is.
Table B-1 lists the available choices.
Table B-1. Standard install locations for the Packaging Wizard
Installation location options
Example
$(AppPath)
C:\Program Files\ApplicationName
$(WinPath)
C:\Windows
$(WinSysPath)
C:\Windows\System
$(WinSysPathSysFile)
C:\Windows\System32
$(CommonFiles)
C:\Program Files\Common Files
$(CommonFilesSys)
C:\Program Files\Common Files\System
$(ProgramFiles)
C:\Program Files
$(MSDAOPath)
C:\Program Files\Common Files\Microsoft Shared\DAO
$(Font)
C:\Windows\Fonts
- Check Yes, Include The Access Runtime if your users might not have Access installed. Check Yes, Include System Files to ensure that your application will run, in case it uses any of these files. Select Install Internet Explorer 5.1 only if your application requires this program. Select the install language from the drop-down list. Click Next.
tip
If the application’s users do have Access installed, be sure to leave the Access Runtime checkbox unchecked – the run-time files are very large. - Check the two check boxes on the next screen if you want to include the Microsoft SQL Server 2000 Desktop Engine (MSDE)—which you might need if you are packaging a project (ADP file) rather than a database (MDB file)—and the Replication Manager, needed if your application uses replication. Click Next.
- Create Start menu shortcuts as needed. (See Figure B-8.)
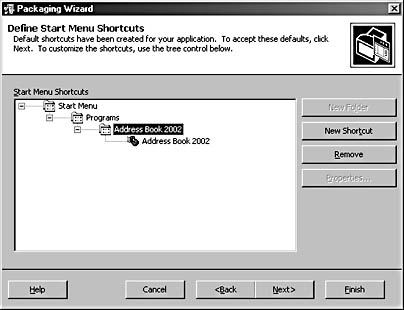
Figure B-8. The Define Start Menu Shortcuts screen of the Packaging Wizard allows you to create a shortcut to your application.
- To assign a custom icon to the application (the icon file must have been included in the set of distribution files, as described earlier), select the Address Book 2002 shortcut and click Properties.
- In the Icon drop-down list of the properties sheet, select the icon you added to the distribution set, and click OK.
- To create a shortcut to compact the database, click the application program group (Address Book 2002 in this case) and then click New Shortcut.
A new shortcut appears in the program group.
- Select the new shortcut and click Properties. In the properties sheet, enter a name and description for the shortcut, and (for a Compact shortcut), select the Specify Custom Command Line check box and add /compact to the end of the standard wizard-generated command line, as shown in Figure B-9. Click OK.
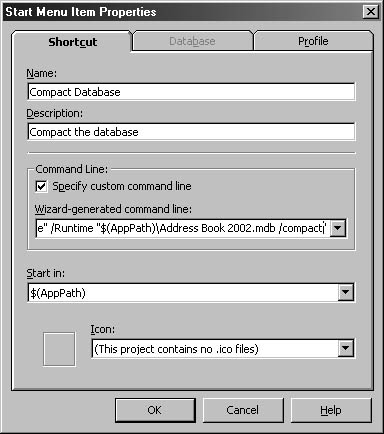
Figure B-9. You can create a shortcut to compact the database.
You can also select an icon for the shortcut, if one was included in the package of files.
tip
For a list of command-line switches to use in shortcuts, open the Startup Command-Line Options Help topic.After clicking the OK button on the properties sheet, the new shortcut is now listed as Compact Database. Click Next.
- Specify a command to run after the application is installed, such as a DOS batch file or a Script Host file (or leave blank if you don't need to run a command). (See Figure B-10.) Click Next.
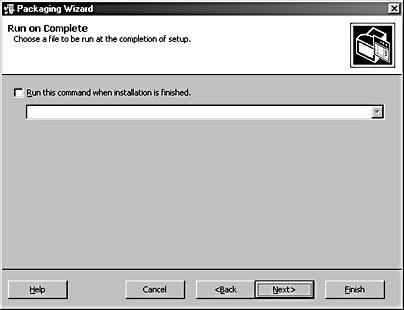
Figure B-10. The Run On Complete screen of the Packaging Wizard allows you to specify a command to run at the end of installation.
- Choose to create your application package immediately or save the setup script for later use. Click Finish.
If you choose to save the package script without building, the wizard will close when you click Finish. You can run the wizard again later, select the saved script, and generate the set of distribution files.
If you choose to build the setup program, when you click Finish, the Browse For Folder dialog box appears. Select (or create) the folder to hold the package files. The default folder is called Package; it’s located under the folder containing the application database. Click OK.
The first time you run the wizard, you will get the message shown in Figure B-11. This message appears when there is no disk image of standard Access components to use when preparing distribution packages.
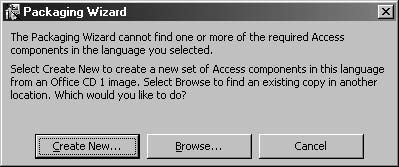
Figure B-11. The Packaging Wizard displays this message if it can’t find the standard Access components.
- To create the set of Access components, insert the Office XP CD (the regular Office CD, not the MOD CD) and click Create New.
- In the Browse For Folder dialog box, accept the default location for the Access files or select another location.
- Select your CD drive in the same dialog box, and click OK.
The files are copied from the CD to the new folder, without any progress bar or dialog box. However, you can see the lights flickering on your CD drive and computer hard drive during the copying process. When all the files are copied, the Create Package screen appears again, and the progress bar will start moving.
The package will be created. When it is done, the Package Complete! screen appears.
To distribute the packaged files, copy them to a CD. When the user inserts the CD, the Setup program will start automatically.
note
A patch for the Microsoft Office XP Developer Packaging Wizard was posted to the Office Developer page of the Microsoft Web site on 10/17/2001. The patch can be downloaded from http://msdn.microsoft.com/downloads/.
EAN: 2147483647
Pages: 172