Creating Calendars Overview


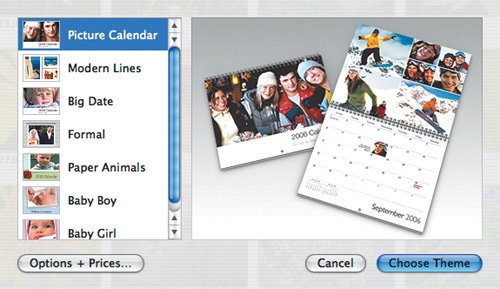
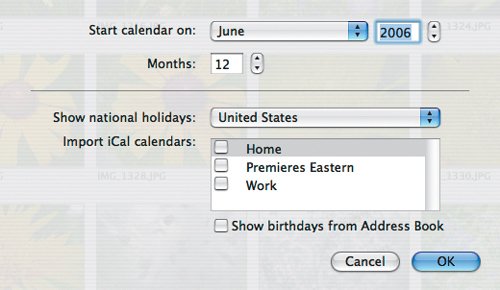
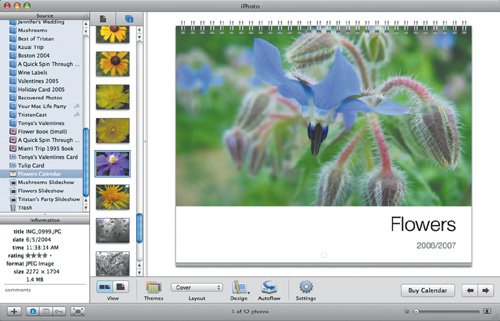
Calendars are a bit more involved to create than cards, though less so than books. Here's the basic process:

To create a calendar:

1.

Select the photos that you want to appear in your calendar.

2.

Click the Calendar button under the display pane (Figure 7.6).

Figure 7.6. Click the Calendar button with photos selected to make a calendar from those photos.


3.

In the calendar design dialog, select a theme from the list of themes. Note the preview of each theme (Figure 7.7).

Figure 7.7. Next, select a theme from the scrolling list of themes.


4.

iPhoto then displays the calendar options dialog; set the options for when to start the calendar, how many months it should contain, and what holidays and calendar events should be included on it automatically (Figure 7.8).

Figure 7.8. Set the options for your calendar.


After informing you of how to add photos to the calendar pages, iPhoto creates your calendar (Figure 7.9).

Figure 7.9. iPhoto creates the calendar in the Source pane to the left, showing the cover in the display pane, with the unplaced photos to the left.


5.

For each calendar page, set the number of photos and the design using the Layout and Design pop-up menus. Drag photos from the vertical unplaced photo list to slots in the calendar page or to particular dates in a month. You can drag photos from slot to slot or date to date to move them around, or off the page entirely to put them back in the unplaced photo list.

6.

When you're done, click the Buy Calendar button and run through the process of ordering your calendar.

Tip

  • You might be able to save some time placing photos if you arrange the photos in an album before selecting the entire album and clicking the Calendar button.


iPhoto 6 for Mac OS X. Visual QuickStart Guide
iPhoto 6 for Mac OS X
ISBN: 0321423313
EAN: 2147483647
Year: 2004
Pages: 225
Authors: Adam Engst

flylib.com © 2008-2017.
If you may any questions please contact us: flylib@qtcs.net