External Flash
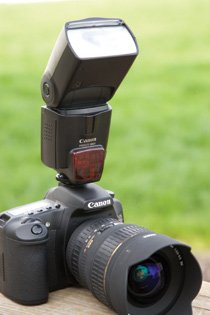
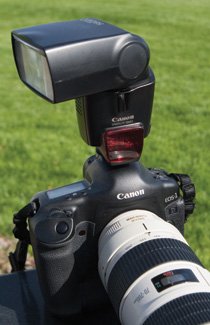
| When you find yourself wishing you could light up subjects from farther away or light larger groups of people, an external flash is the way to go. Where the built-in flash that you might have with your camera is limited in strength to a GN of 15 or so, an external flash like the Canon 580EX has a GN of 58 at ISO 100. For that same shot at f/4 that we were able to get 10 feet of lighting from with the built-in flash, we are now getting 48 feet. Bounce FlashDirect flash can be very harsh and not at all flattering to your subject. In fact, the term "deer in the headlights" comes to mind in many cases when photographing people with direct flash mounted on the camera. Most external flash units can be swiveled and tilted, as shown in Figure 5.4, to bounce the light off a wall or ceiling, giving a much softer look. By way of contrast, in Figure 5.5 the subjects were photographed with an external flash mounted on the camera and aimed straight at the subjects. Figure 5.4. Setting the flash to bounce off a wall or ceiling can soften the light.
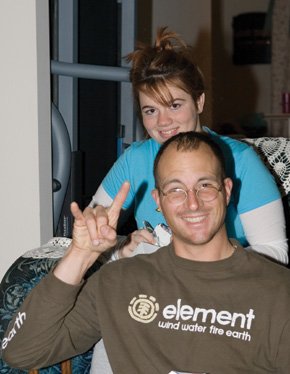
Figure 5.5. Here's an example of shooting with the flash pointed right at the subjects. The light is strong and harsh, with heavy shadows.
As you can see, there are harsh highlights and dark shadows from the intense light coming straight at them. By adjusting the flash head up and bouncing the light off the ceiling, the lighting is much more indirect and softer, with less of a strong shadow (Figure 5.6). Figure 5.6. Bouncing the flash off the ceiling spreads the light and gives a much more pleasant look.
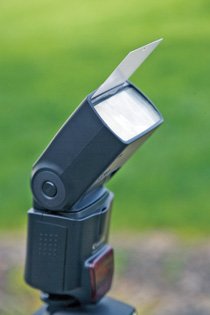
If you don't have a ceiling handy, or your ceiling isn't a neutral color, you can bounce the flash off a card that either comes with the flash unit or is taped onto the flash, as shown in Figure 5.7. Figure 5.7. Most external flash units come with a built-in bounce card that can be used outdoors.
The same techniques can be used to bounce light off a wall by swiveling the head to the side as shown in Figure 5.8, which is a useful method when shooting outdoors with your subject near a wall to help fill in shadows. Figure 5.8. Using the swivel feature on an external flash works similarly to tilting to bounce off a ceiling, but it's an effective way to bounce light when all you have is a wall.
Remote FlashMany of the top-end flash units from companies like Canon and Nikon include support for using the flash as a slave, meaning that it only fires when it sees another flash go off. These flashes often work wirelessly, letting you set up multiple flashes to get the best possible lighting conditions (Figure 5.9). Essentially, you're turning your flash units into studio type lights. Figure 5.9. Many flash units can work as slaves, being triggered when they see the light from another flash.Photo by Laurence Chen
Sync ModesFlash has different sync modes, or ways of synchronizing with the shutter when you capture an image. Every camera has a maximum sync speed which is the fastest shutter speed you can use and still get a full image. If you go beyond this shutter speed, you'll end up with a black band through your photo like the one shown in Figure 5.10. Figure 5.10. If your shutter speed is too fast for the flash, you'll have a photo that is partially black like the lower half of this shot.
In general, a sync speed of 1/125 is commonly the high end for entry- and mid-level digital cameras. In other words, the fastest shutter speed you can use is 1/125, and you'll need to adjust your aperture to stay within this maximum. The duration of the flash is much shorter than the actual exposure though, often as little as 1/15,000 of a second. Because of this, it's possible to see motion in your photos along with sharp frozen detail. To give you control over this, there are sync modes that you can select to tell the camera when to fire the flash.
|


EAN: 2147483647
Pages: 91