Easy Media Creator makes it fun and easy. From the Effect window you can see a thumbnail example of each effect. By clicking on the thumbnail, you can see the effect previewed on your photo. Go ahead and play around with them!
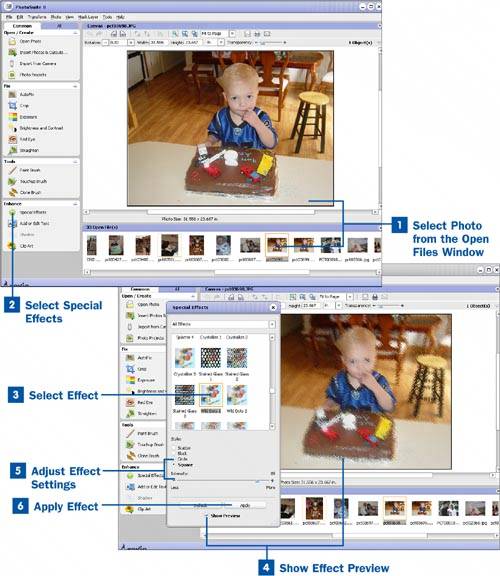
 Select Photo from the Open Files Window
From within PhotoSuite, choose the photo from the Open Files window at the bottom of the screen that you would like to add a special effect to and bring it up in the Canvas window.
 Select Special Effects
After your photo is in the Canvas window, select the Special Effects button from the Enhance window in the tasks pane to bring up the Special Effects window.
 Select Effect
After the Special Effects window opens, choose what type of effect you would like to apply from the drop-down menu at the top of the window, or scroll through all the effects shown to decide which one you would like.
 Show Effect Preview
Click on the effect you would like to use and make sure that the Show Preview box is checked. This allows you to preview what the picture will look like after the effect is applied.
 Adjust Effect Settings
Depending on the effect you choose, there are different settings. You can adjust these settings to your specifications while previewing the photo to make sure you have just the look you want.
 Apply Effect
When you are finished, click Apply Effect to finalize the effect.
Tip
You can revert to the last saved version of your photo at any time by clicking on the File drop-down menu and selecting Revert to Last Saved. This removes any changes you have not saved, and you can start over.