Section 52. Placing Graphics


#52. Placing Graphics

InDesign lets you import a broad range of common graphic formats, including TIFF, JPEG, PDF, and EPS, as well as several lesser-known formats like DCS, PNG, and Scitex CT. You can also import native Photoshop and Illustrator files. Once you import a graphic into a layout, InDesign lets you modify it in several ways, as explained in #53, #54, and #55.

Changing Your Mind After Importing a Graphic

If you click the Open button in the Place dialog box and then discover that you've inadvertently placed a graphic into the wrong frame, press Cmd+Z (Mac OS) or Ctrl+Z (Windows). The loaded graphics icon is displayed, and you can click within an empty frame, click an empty area on the page or pasteboard to create a new graphics frame that's the same size as the graphic, or click and drag to create a new custom-sized graphics frame.


To place a graphic into an InDesign document, simply choose File > Place. (Unlike other popular page layout programs, InDesign doesn't require you to create a frame before you import a graphic, although you can work this way in InDesign if you want to.) The Place dialog box (Figure 52) lets you locate and choose the graphic. What happens after you click Open depends on what object, if any, is selected.

  • If nothing is selected, the loaded graphics icon is displayed, and you can click once or click and drag to place the graphic into a new graphics frame. If you just click, the frame is the same size as the graphic. If you click and drag, the rectangle you create becomes the frame for the graphic. You can also click within an empty frame to place the graphic within it.

  • If a graphics or unassigned frame is selected, the graphic is placed within the frame.

  • If the text insertion cursor is flashing, the graphic is placed within the text frame as an anchored graphic. An anchored graphic is treated like a text character and moves when editing causes text to reflow.

Figure 52. The Place dialog box lets you select the graphic you want to place into an InDesign layout. If you select Show Import Options, another dialog box is displayed after you click Open and offers several options for controlling the display of the graphic.


Dragging and Dropping Graphics

In addition to using the Place command (File menu) to import graphics, you can drag and drop graphic files into InDesign layouts. To drag and drop a graphic, click a graphic file in the Mac OS Finder, Windows Explorer, the desktop, or Adobe Bridge, drag the file icon into an InDesign document window, and then release the mouse button.


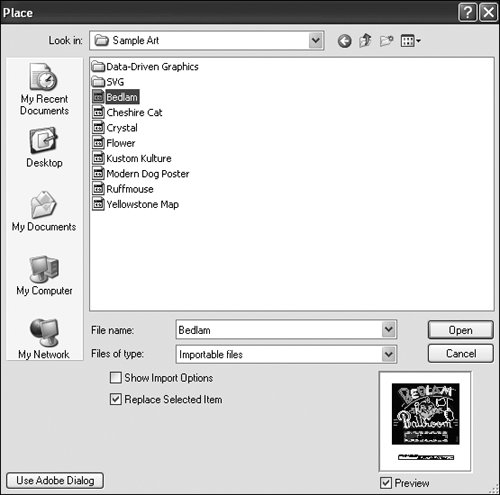
After you import a graphic into an InDesign layout, InDesign maintains a link between the graphic file and the InDesign document. InDesign uses the original graphic file to display it at high resolution, and the original graphic files are also used when you print or export an InDesign document that contains imported graphics. The Links palette (Window > Links) displays a list of all placed graphics. For information about managing links to graphic files, see #58.


Adobe InDesign CS2 How-Tos(c) 100 Essential Techniques
Adobe InDesign CS2 How-Tos: 100 Essential Techniques
ISBN: 0321321901
EAN: 2147483647
Year: N/A
Pages: 142

flylib.com © 2008-2017.
If you may any questions please contact us: flylib@qtcs.net