Technique #51. Slide Mounts Do this once and you'll have a graphic you can use over and over againand you'll save the original in such a way that you can edit it if necessary. key concepts:
free transform 
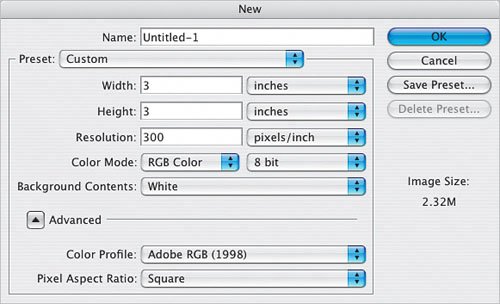
layer styles   Step One. | Create a new document (press Command-N [PC: Control-N]) that is both physically larger and a higher resolution than you think you'll need. (Better to end up with a graphic that's too big that you can scale down, rather than one that's too small.) In my example, the document is 3x3" at a resolution of 300 ppi.
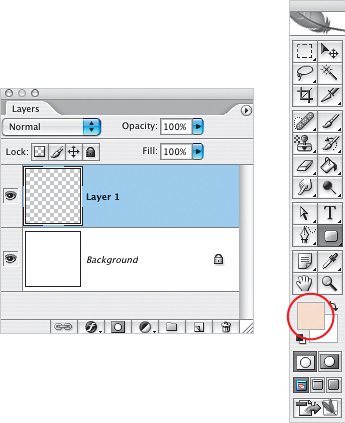
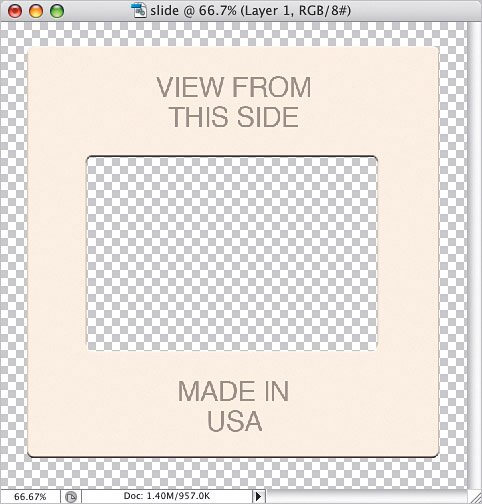
 | Step Two. | Add a blank layer to the document. Then, click on the Foreground color swatch at the bottom of the Toolbox to bring up the Color Picker. Pick an off-white color for the slide (I've started off with a darker color so it's easier to see here).
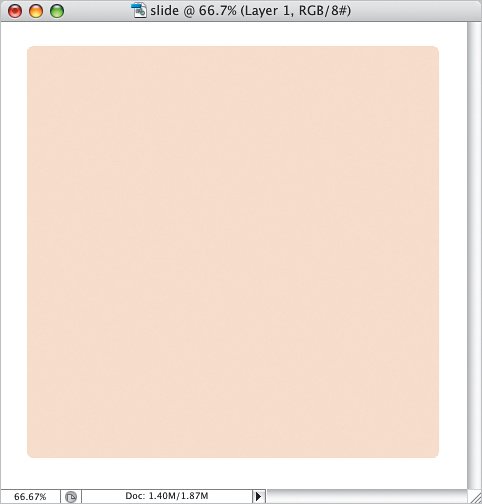
 | | | Step Three. | Click on the Rounded Rectangle tool (or press Shift-U until it comes up), and in the Options Bar, change the Radius to 10 pixels and click on the Fill Pixels icon (the third icon from the left). Press-and-hold the Shift key and click-and-drag to create the slide shape.
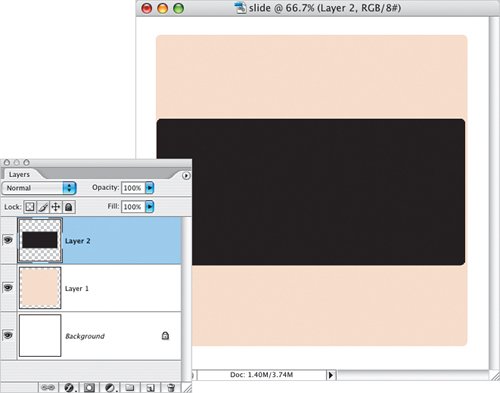
 | Step Four. | Add another new layer. Press D to change the Foreground color to black, and set the Radius to 3 pixels. Click-and-drag to create a shape that's the width of the slide shape and vertically centered, as shown here.
 | Step Five. | Press Command-T (PC: Control-T) for Free Transform. Press-and-hold the Option key (PC: Alt key), click on one of the side handles, and drag towards the center (the modifier key transforms towards the center). Press Return (PC: Enter) once you're done.
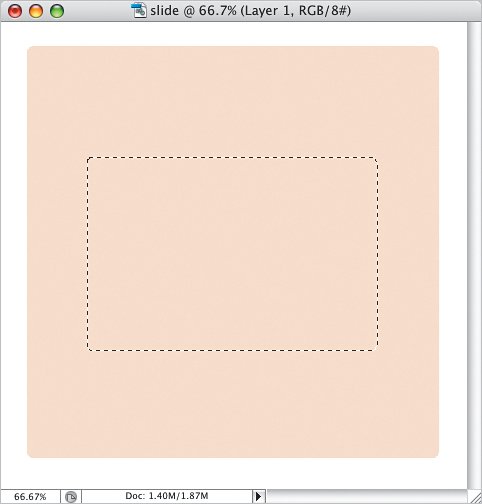
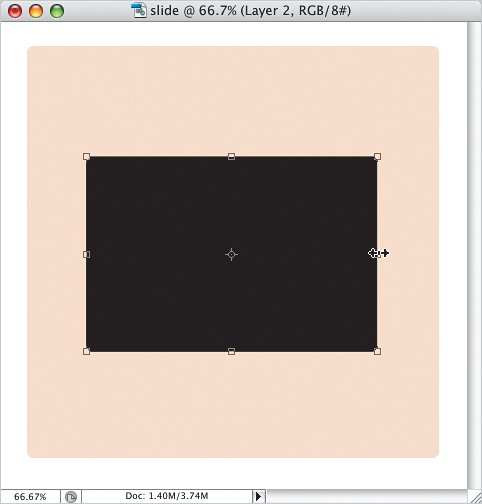 | | | Step Six. | Command-click (PC: Control-click) on the thumbnail of the top layer to make a selection. Then, hide the top layer by clicking the Eye icon to the left of the thumbnail, click on the slide layer, and press Delete (PC: Backspace) to make a hole in your slide layer. Press Command-D (PC: Control-D) to Deselect.
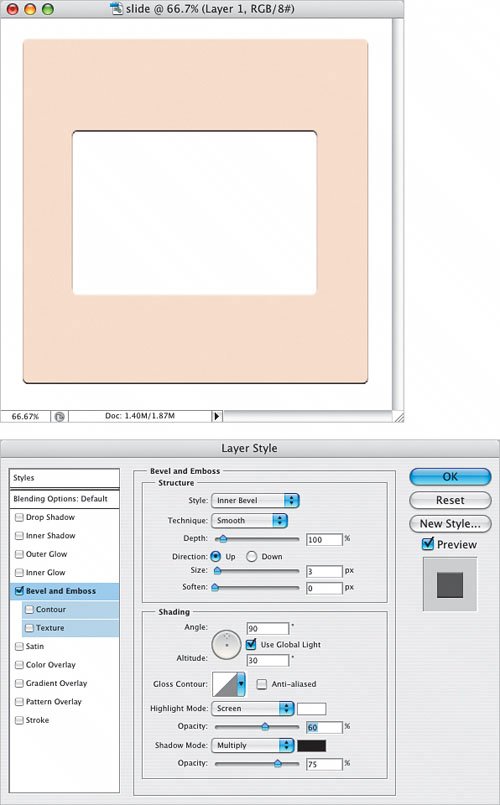
 | Step Seven. | With the slide layer active, click on the Add a Layer Style icon at the bottom of the Layers palette, and add a Bevel and Emboss layer style from the pop-up menu. In the Layer Style dialog, change the Size to 3 pixels.
 | | | Step Eight. | With the Type tool (T), and the Caps Lock key on, click in the center of the slide's upper section. Click on the Center Text icon in the Options Bar, type "VIEW FROM," press Return (PC: Enter), and type "THIS SIDE." Use a simple typeface like Arial or Helvetica. Lower the opacity of the Type layer to around 35%.
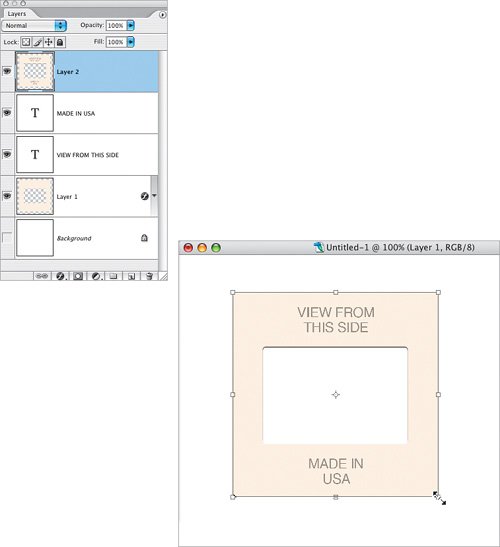
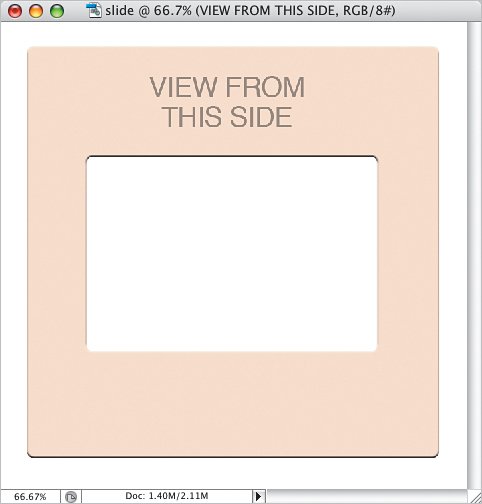 | Step Nine. | To make sure the text and the slide are perfectly aligned, Command-click (PC: Control-click) on the name of both layers in the Layers palette. Press V to get the Move tool and, in the Options Bar, click on the Align Horizontal Centers icon.
 | Step Ten. | Select just the Type layer and, holding down both Option and Shift (PC: Alt and Shift), click-and-drag the text down to the bottom of the slide. This will duplicate the Type layer, which you can then change to say "MADE IN (hard return) USA." Switch back to the Type tool and triple-click on the first line of copied text to highlight and type over it, then do the same for the second line of text. I also chose a lighter color for my slide (by changing the Foreground color), clicked on the slide layer, and then pressed Option-Shift-Delete (PC: Alt-Shift-Backspace) to fill only the existing pixels with the new color.
 | | | Step Eleven. | Hide the Background layer, click on the top layer, and then press Command-Option-Shift-E (PC: Control-Alt-Shift-E). This creates a merged copy of all the visible layers, while preserving all the original layers below. If you save this document as is, you'll have a flattened layer you can click-and-drag into other documents, and you'll have the original layers in case you want to change anything.
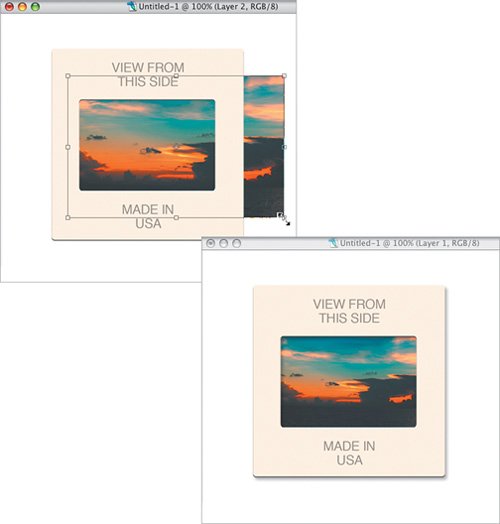
 Here's how you can use the slide mount: Using the Move tool, click-and-drag the merged layer into another document. If it's too large, use Free Transform (with the Shift key held down) to scale down the size of the slide. Then you drag in a photo, position it below the slide layer and use Free Transform to scale the photo to fit in the slide. Here's how you can use the slide mount: Using the Move tool, click-and-drag the merged layer into another document. If it's too large, use Free Transform (with the Shift key held down) to scale down the size of the slide. Then you drag in a photo, position it below the slide layer and use Free Transform to scale the photo to fit in the slide.
 |
Variation In this example, I duplicated the slide layer, dropped in a second photo, and then used Free Transform to rotate both the slide and its photo.
Variation 1 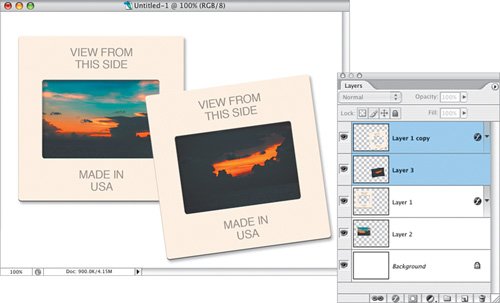 Here, I filled the Background layer with black and used Levels on each of the slide layers to make them closer to white.
Variation 2 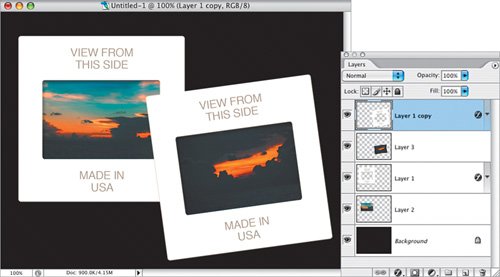 |
|