Step-by-Step Skinning
-
Open Lithunwrap (see Figure 18.13).
Figure 18.13: Lithunwrap can be opened. -
Select File, Model, Open, locate the
 duck.ms3d file, and open it (see Figure 18.14). In the Select menu, make sure Groups is checked.
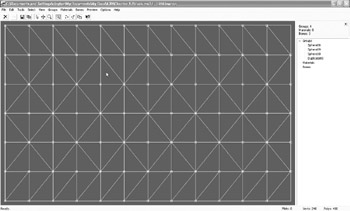
Figure 18.14: Locate the duck model. -
In the Select menu, choose Name (see Figure 18.15). If you were creating a more complex 3D model, it would be wise to spend the time to name various portions of the models with appropriate names. For example, we could change the names of the spheres to Head, Body, and so on. It’s unnecessary for this example, but it is something you should keep in mind for future work.
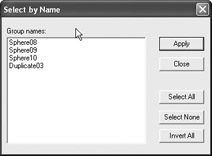
Figure 18.15: Choose Name in the Select menu. -
Choose Select All, Apply, Close.
-
Tools, UV Mapping, Planar (displays a window setup as in Figure 18.16) and click OK (see Figure 18.17).
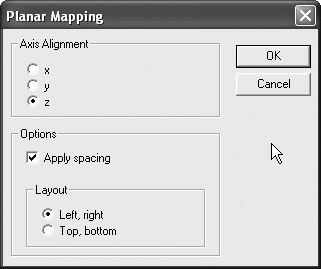
Figure 18.16: The window is displayed.
Figure 18.17: Click OK to continue. -
Choose Materials, Modify (see Figure 18.18).
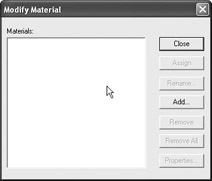
Figure 18.18: We need to modify the materials. -
Click the Add button (see Figure 18.19). Type the name skin in the Description box and click OK.
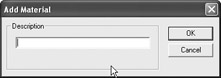
Figure 18.19: Click the Add button. -
The name now appears in the window (see Figure 18.20). Select skin and then click Assign. A window appears (see Figure 18.21) from which you can choose OK.
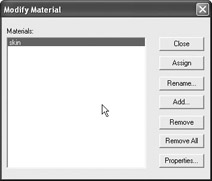
Figure 18.20: The name appears in the window.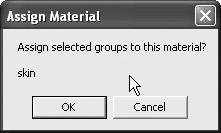
Figure 18.21: This window appears. -
Click Close.
-
Choose File, UVMap, Save (see Figure 18.22). Type the name
skin.bmp (see Figure 18.23). Click OK, as the defaults will work.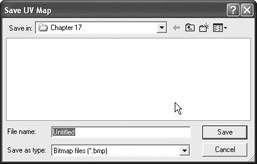
Figure 18.22: The first step in saving the UVMap.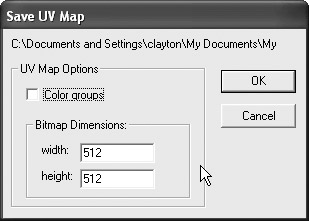
Figure 18.23: Type the name for the skin. -
Choose Materials, Modify (see Figure 18.24).
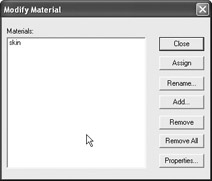
Figure 18.24: Modify the material. -
Click skin and then click the Properties button (see Figure 18.25).
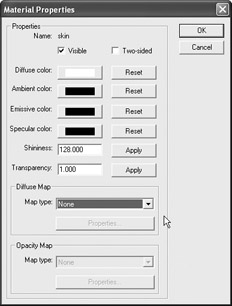
Figure 18.25: Choose the skin properties. -
From the Map Type drop-down list, choose Bitmap (see Figure 18.26).
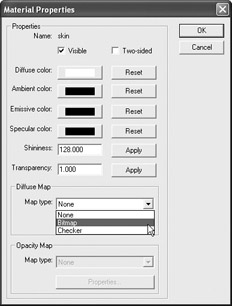
Figure 18.26: Choose Bitmap from the drop-down. -
Click the Properties button beneath Bitmap.
-
Click Change (see Figure 18.27) and then locate
skin.bmp, which we exported earlier (see Figure 18.28) and click OK.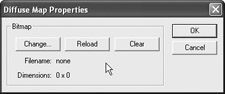
Figure 18.27: The Diffuse Map Properties window.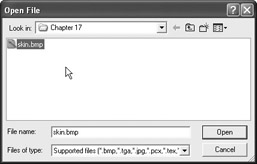
Figure 18.28: Locate the skin we exported. -
Click OK to close the Diffuse Map Properties window.
-
Click OK to close Material Properties.
-
Click Close to close the Modify Material window. This takes you back to the main interface.
-
Choose Preview, Show Model (see Figure 18.29), and you can see the black and white exported image. We can now paint the image in PSP to create a skin that will appear on the model.
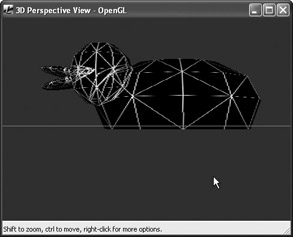
Figure 18.29: We can see the exported image.
EAN: 2147483647
Pages: 168