Step-by-Step Painting in Paint Shop Pro
We painted a 2D representation of the duck model using Paint Shop Pro in the last chapter. In this chapter, we’ll use this same process to create the skin for our 3D model. You might be wondering why doing a 3D model is the better of the two options if we have to paint the skin anyway. The main reason is because of the various animations that we will be required to do if we are creating a complicated sprite. For example, it is not uncommon to have 10 or 15 different animation sequences for sprites. If you have to draw each of these manually, it would take much longer than simply designing one 3D model and doing the animations within a modeling package. Additionally, if you ever need to use the model for another project, it will already be ready for 2D or 3D.
Painting the skin will involve many of the same tools you used in the last chapter. In fact, the entire process will be very similar. We’ll use the following series of steps to create the new skin:
-
Open the exported UVMap we created in Lithunwrap into Paint Shop Pro (see Figure 18.30) and add a new raster layer.
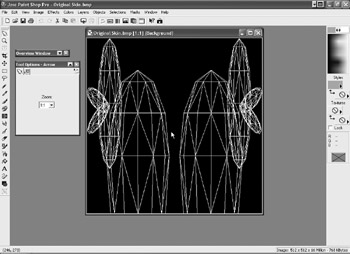
Figure 18.30: Open the exported image. -
Paint the inside of the body a yellow color (see Figure 18.31).
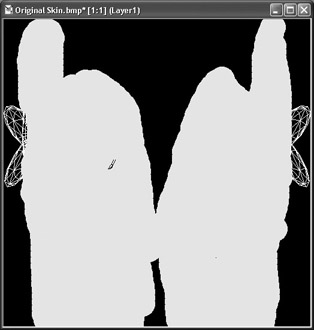
Figure 18.31: Paint the body yellow. -
Paint the beak orange (see Figure 18.32).
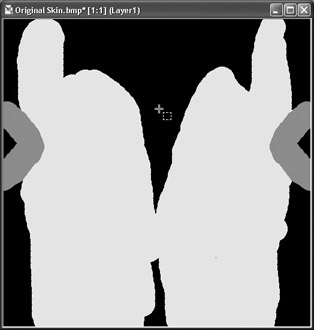
Figure 18.32: The beak needs to be orange. -
Choose Layers, Properties (see Figure 18.33).
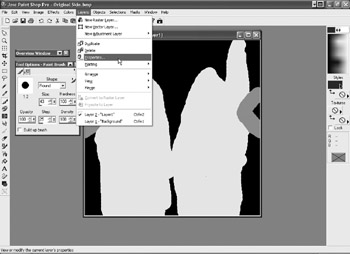
Figure 18.33: Properties needs to be selected from the Layers menu. -
Layer Properties is open. Change Opacity to 25% (see Figure 18.34).
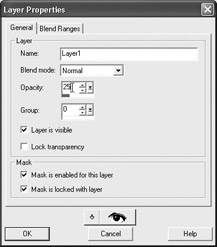
Figure 18.34: The layer opacity needs to be set.We can now see through the above layer to display the UVMap (see Figure 18.35).

Figure 18.35: We can see through the layer. -
Draw in the blue eye at the approximate location seen in Figure 18.36.
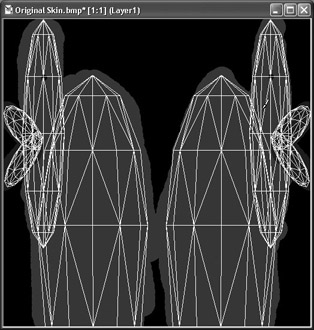
Figure 18.36: Draw the blue eye. -
Open Layer Properties and change Opacity to 100% (see Figure 18.37).
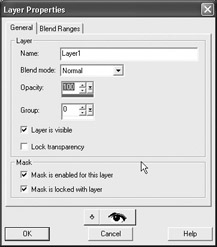
Figure 18.37: Change Opacity to 100%.The skin is now displayed with the eye in the approximate location (see Figure 18.38).
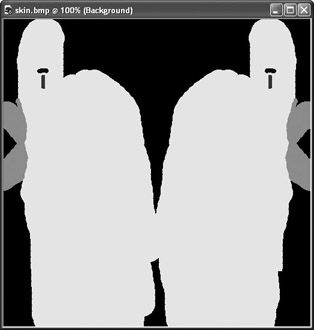
Figure 18.38: The eye is now visible. -
Save the image.
Back to Lithunwrap
Once you have painted the UVMap, we need to go back to Lithunwrap and view the model to make sure that skin looks OK:
-
Open Lithunwrap.
-
Open the model (see Figure 18.39).
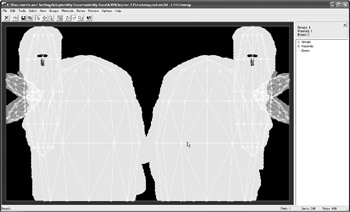
Figure 18.39: Open the model. -
Preview the model (see Figure 18.40).
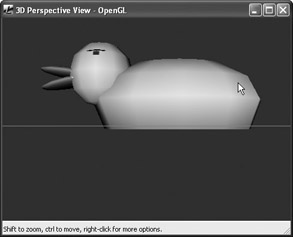
Figure 18.40: Preview the model to see the skin.
You should see the new skin we painted in Paint Shop Pro. It’s now time to create the graphics we’ll use in the game.
Exporting Files for MMF
Open MilkShape and open the mapped 3D model. Once it is open, we can use the lower-right viewport to export a series of bitmaps to represent the duck in the game:
-
Right-click in the lower-right viewport and choose Textured from the pop-up menu (see Figure 18.41).
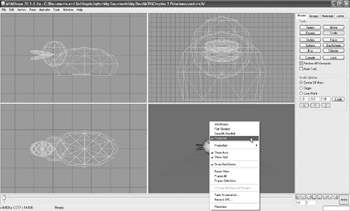
Figure 18.41: Choose Textured from the pop-up menu. -
Right-click the same viewport and deselect the Draw Grid option.
-
Right-click again and choose Take Screenshot (see Figure 18.42).
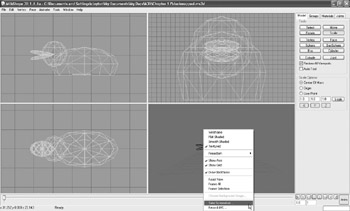
Figure 18.42: Take a screenshot. -
Give it the name
 duck1.bmp and then save the file (see Figure 18.43). Make sure that you add the .bmp file extension because MilkShape seems to have problems unless you add it manually by typing it along with the filename.
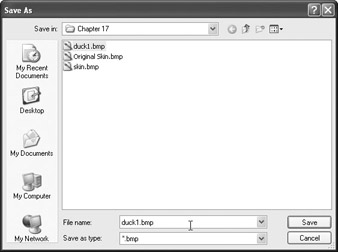
Figure 18.43: Save the file. -
In MilkShape, click the Select button and make sure the Select option is Group. Select all of the groups of the model.
-
Click the Rotate button.
-
Give a value of –45 in the X box in Rotate Options and click Rotate (see Figure 18.44).
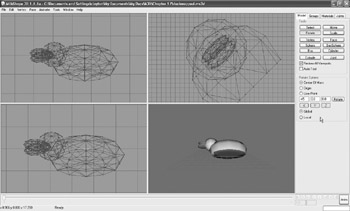
Figure 18.44: Use a value of –45. -
Save the file as
duck2.bmp. -
Click Rotate again to rotate the duck 90 degrees (see Figure 18.45).
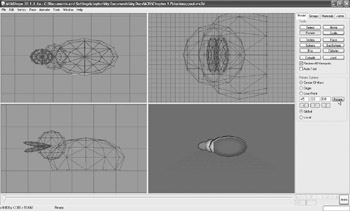
Figure 18.45: Rotate the duck 90 degrees. -
Save the file as
duck3.bmp.
We have all three files we need, so you can choose Edit, Undo to move the model back to 45 degrees and Edit, Undo again to return it to the correct location. You could also have given a value of 90 where –45 had been to rotate it back.
EAN: 2147483647
Pages: 168