| In Word, you can view a document in a variety of ways: Print Layout view. This view displays a document on the screen the way it will look when printed. You can see elements such as margins, page breaks, headers and footers, and watermarks. Full Screen Reading view. This view displays as much of the content of the document as will fit on the screen at a size that is comfortable for reading. In this view, the Ribbon is replaced by a single toolbar at the top of the screen with buttons that you can use to save and print the document, access references and other tools, highlight text, and make comments. You can also move from page to page and adjust the view. Web Layout view. This view displays a document on the screen the way it will look when viewed in a Web browser. You can see backgrounds, AutoShapes, and other effects. You can also see how text wraps to fit the window and how graphics are positioned. See Also For information about Web documents, see "Creating and Modifying a Web Document" in Chapter 11, "Creating Documents for Use Outside of Word."
Outline view. This view displays the structure of a document as nested levels of headings and body text, and provides tools for viewing and changing its hierarchy. See Also For information about outlining, see "Reorganizing a Document Outline" in Chapter 2, "Editing and Proofreading Documents."
Draft view. This view displays the content of a document with a simplified layout so that you can type and edit quickly. You cannot see layout elements such as headers and footers.
You switch among views by using buttons in the Document Views group on the View tab or by using the buttons on the View toolbar in the lower-right corner of the window.  You can use other buttons on the View tab to do the following: Display rulers and gridlines to help you position and align elements. Display a separate pane containing the Document Mapa list of the headings that make up the structure of the documentwhile viewing and editing its text. Display a separate pane containing thumbnails of the document's pages. Arrange and work with windows. Change the magnification of the document.
You can also adjust the magnification of the document by using tools on the View toolbar at the right end of the status bar. You can click the Zoom button and select (or type) a percentage; drag the slider to the left or right; or click the Zoom Out or Zoom In button at either end of the slider. When you are creating more complex documents, it is easier to place elements exactly if you turn on the display of non-printing characters. These characters fall into two categories: those that control the layout of your document and those that provide the structure for behind-the-scenes processes such as indexing. You can turn the display of non-printing characters on and off by clicking the Show/Hide ¶ button in the Paragraph group on the Home tab. Tip You can hide any text by selecting it, clicking the Font Dialog Box Launcher at the right end of the Font group's title bar on the Home tab, selecting the Hidden check box, and clicking OK. When the Show/Hide ¶ button is turned on, hidden text is visible and is identified in the document by a dotted underline.
In this exercise, you will first explore various ways that you can customize Print Layout view to make the work of developing documents more efficient. You will turn white space on and off, zoom in and out, display the rulers and Document Map, and view non-printing characters and text. Then you will switch to other views, noticing the differences so that you have an idea of which one is most appropriate for which task. Finally, you will switch between open documents and view documents in more than one window at the same time. USE the 03_Viewing1 and 03_Viewing2 documents. These practice files are located in the Chapter01 subfolder under SBS_Word2007. OPEN the 03_Viewing1 document.
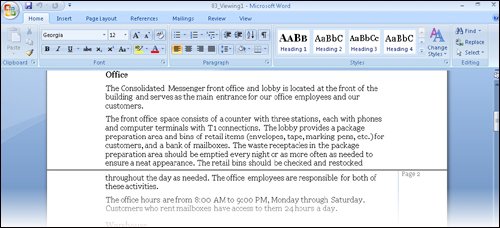
1. | In Print Layout view, scroll through the document.
As you can see, on all pages but the first, the printed document will have the title in the header at the top of the page, the page number in the right margin, and the date in the footer at the bottom of each page.
See Also For information about headers and footers, see "Adding Headers and Footers" in Chapter 4, "Changing the Look of a Document." | 2. | Point to the gap between any two pages, and when the pointer changes to two opposing arrows, double-click the mouse button. Then scroll through the document again.
The white space at the top and bottom of each page and the gray space between pages is now hidden.
 | 3. | Restore the white space by pointing to the black line that separates one page from the next, double-clicking the mouse button.
| 4. | Press  to move to the top of the document, and then on the View toolbar, click the Zoom button. to move to the top of the document, and then on the View toolbar, click the Zoom button.
Zoom  The Zoom dialog box opens.
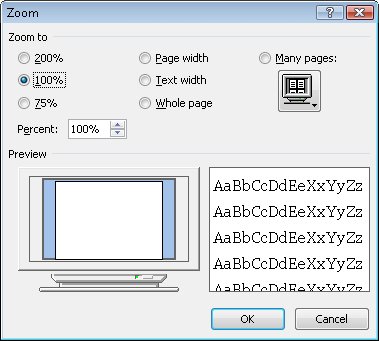 | 5. | Under Many pages, click the monitor button, click the second page thumbnail in the top row, and then click OK.
The magnification changes so that you can see two pages side by side.
 | 6. | Below the vertical scroll bar, click the Next Page button to display the third and fourth pages of the document.
Next Page  | 7. | On the View toolbar, click the Zoom button. Then in the Zoom dialog box, click 75%, and click OK.
Notice that the Zoom slider position is adjusted to reflect the new setting.
| 8. | At the left end of the Zoom slider, click the Zoom Out button a couple of times.
Zoom Out  As you click the button, the slider moves to the left and the Zoom percentage decreases.
| 9. | At the right end of the Zoom slider, click the Zoom In button until the magnification is 100%.
Zoom In  | 10. | On the View tab, in the Show/Hide group, select the Ruler check box.
Horizontal and vertical rulers appear above and to the left of the page. On the rulers, the active area of the page is white and the margins are blue.
| 11. | In the Show/Hide group, click the Document Map check box.
A pane opens on the left side of the screen, displaying an outline of the headings in the document. The first heading on the active page is highlighted.
 | 12. | In the Document Map, click the Shipping heading.
Word displays the page containing the selected heading.
| 13. | In the Show/Hide group, click the Thumbnails check box, and then scroll the Thumbnails pane, and click Page 5.
| 14. | In the Thumbnails pane, click the Close button.
Close  The pane on the left closes.
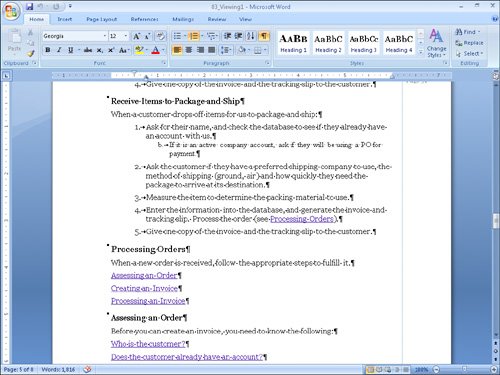
| 15. | On the Home tab, in the Paragraph group, click the Show/Hide ¶ button.
Show/Hide ¶  You can now see non-printing characters such as spaces, tabs, and paragraph marks.
 | 16. | On the View tab, in the Document Views group, click the Full Screen Reading button.
 The screen changes to display the document in a format that makes it easy to read.
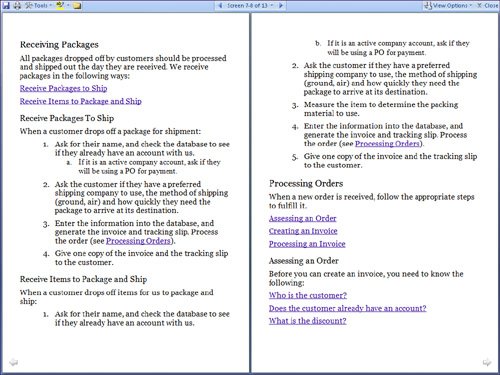 | 17. | At the top of the screen, click the Next Screen button.
Next Screen  You move to the next two screens of information.
| 18. | Explore the other buttons at the top of the Full Screen Reading view, and then click the Close button to return to Print Layout view.
Close  | 19. | Press . Then on the View toolbar, click the Web Layout button, and scroll through the document.
Web Layout  In a Web browser, the text column will fill the window and there will be no page breaks.
| 20. | Press , and then on the View toolbar, click the Outline button.
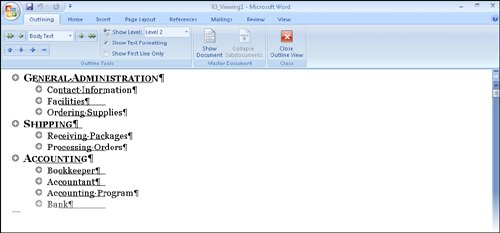
Outline  The screen changes to show the document's hierarchical structure, and the Outlining tab appears at the left end of the Ribbon.
| 21. | On the Outlining tab, in the Outline Tools group, click the Show Level arrow, and in the list, click Level 2.
The document collapses to display only the Level 1 and Level 2 headings.
 | 22. | On the View toolbar, click the Draft button, and then scroll through the document.
Draft  You can see the basic content of the document without any extraneous elements, such as margins and headers and footers. The active area on the ruler indicates the width of the text column, dotted lines indicate page breaks, and scrolling is quick and easy.
| 23. | Click the Microsoft Office Button, click Open, and then in the Open dialog box, double-click 03_Viewing2.
The 03_Viewing2 document opens in Print Layout view in its own document window. Notice that the telephone number in the body of the memo has a dotted underline because it is formatted as hidden.
| 24. | On the Home tab, in the Paragraph group, click the Show/Hide ¶ button to turn it off.
Non-printing characters and hidden text are no longer visible.
| 25. | On the View tab, in the Window group, click Switch Windows, and then click 03_Viewing1.
 The other open document is displayed in Draft view, with non-printing characters visible.
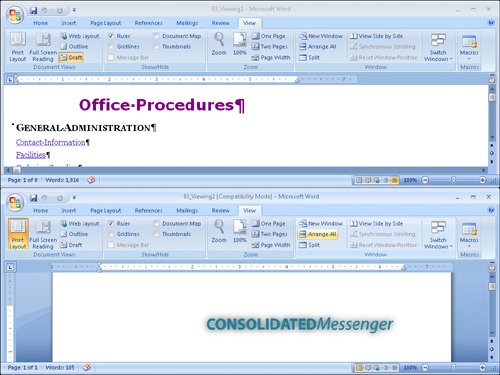
| 26. | On the View tab, in the Window group, click the Arrange All button.
 The two document windows are sized and stacked one above the other. Each window has a Ribbon, so you can work with each document independently.
 | 27. | At the right end of the 03_Viewing1 window's title bar, click the Close button.
Close Clicking the Close button does not quit Word because more than one document is open.
| 28. | At the right end of the 03_Viewing2 window's title bar, click the Maximize button.
Maximize  The document window expands to fill the screen.
| 29. | On the View tab, in the Show/Hide group, clear the Ruler check box to turn off the rulers.
|
CLOSE the 03_Viewing2 document.
|