Creating New Themes
| There are two ways to create a theme: from scratch or by editing an existing one. To create a new theme from scratch, select the Create a New Theme option at the bottom of the Theme task pane. To edit an existing theme, right-click the theme in the list and choose Customize. Both paths will open the Customize Theme dialog box (see Figure 7.4). Figure 7.4. Be sure that a theme is selected before opening the Customize Theme dialog box; otherwise, you will be editing a blank theme.
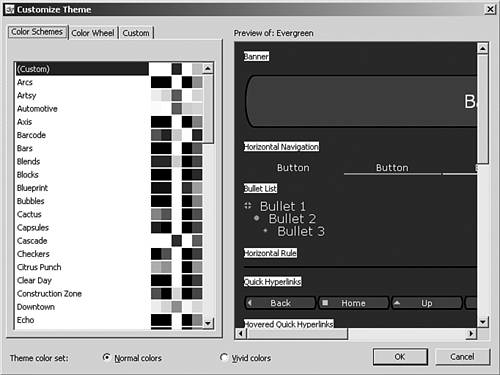
At the bottom of the Customize Theme dialog box are three buttons for the different elements of the theme that you can edit: Colors, Graphics, or Text. NOTE What you are actually editing with the Text button are the various styles for text, not the text of your page. Modifying ColorsClicking the Color button in the Customize Theme dialog box will open a new screen in the box as shown in Figure 7.5. Figure 7.5. The first of three tabs in the Colors section of the Customize Theme dialog box lets you quickly pick the color scheme of any theme installed.
The first tab lists all the themes installed on the machine you are working on and shows a graphical representation of the color schemes applied by each. You can select any option in the list to see what the elements look like in the preview pane to the right of the list. Use this tab of the dialog box if you want to copy the scheme of another theme or to modify an existing theme. The second tab shows the elements in a color wheel format. You can adjust the colors of the scheme through the color wheel format to get a better matching of colors through this design technique. NOTE Clicking on a color in the wheel affects all the colors in that scheme.
The third tab allows you to pick a custom color for each element in a theme (see Figure 7.6). Simply select the item you want to edit from the dropdown menu and choose the desired color from the color dropdown menu. Figure 7.6. The third tab in the Colors section of the Customize Theme dialog box lets you specifically define any element in a theme.
When you select the color dropdown menu, FrontPage will suggest a number of options from the existing theme. If you select the more colors option from that menu, FrontPage will open the More Colors dialog box (see Figure 7.7). Figure 7.7. The More Colors dialog box lets you find the exact color you are looking for.
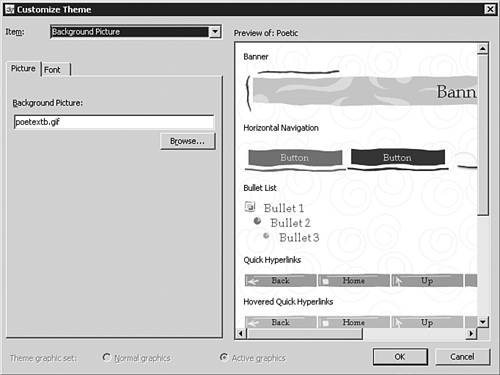
In the More Colors dialog box, you can select a specific color from the image to the left. If you are still not satisfied, you can select the eyedropper icon on the screen to lift the specific color from any graphic on the screen. TIP Too many people spend way too much time trying to find the specific color they are looking for by cross referencing color wheels and charts. The eyedropper element is your best friend because you can use it to lift the color you want. You can use the eyedropper on any graphic on the screen (inside or outside of FrontPage), so if you need a color from something else, size the screen accordingly and you are good to go. Clicking the OK button at the bottom of any tab on the color screens brings you back to the original Customize Theme dialog box. Modifying Graphic ElementsClicking the Graphics button in the Customize Theme dialog box will open a new screen in the dialog as shown in Figure 7.8. Figure 7.8. The Picture tab in the Graphics section of the Customize Theme dialog box lets you modify any graphic element of any theme installed.
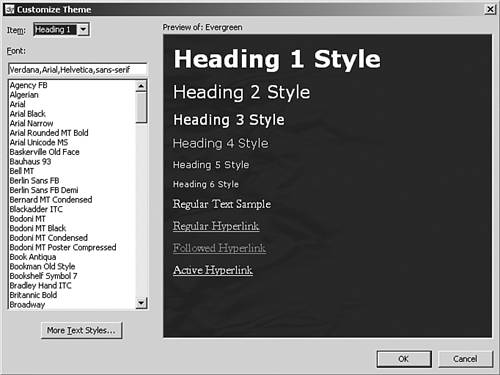
In this screen, you choose the graphic element you want to modify from the Item dropdown box. FrontPage will show you a preview of the item in the preview area to the right of the screen. The Picture tab lists the specific graphic that is currently used for that element. If you'd like to load a new graphic, you can load one in directly from this interface simply click the Browse button and load the graphic from your computer. The Font tab shows the font that will be used, if needed in that graphic element. You can set the style, size, and alignment for the font here as well. Modifying StylesClicking the Text button in the Customize Theme dialog box will open a new screen in the dialog box as shown in Figure 7.9. Figure 7.9. The Text section of the Customize Theme dialog box lets you modify any text element of any theme installed.
To modify a text element, select the Style from the Item dropdown list and choose the font you want to use from the Font list. The change to your theme will be immediately reflected in the preview screen on the right. NOTE For a user to see a certain font in her Web browser, that font must be installed on her system and her browser must be capable of using different fonts. If neither case is true, her choice in the theme will not be seen. What will be seen is the font standard for that system. Saving Your New (or Modified) ThemeOnce you are done creating or modifying a theme, a click of the Save As button in the Customize Theme dialog box will save the theme with the name you give it. TIP If you are modifying an existing theme, consider changing the name to something that will remind you that it is a modified version of an existing theme. In addition, if you use the naming protocol Theme Name (Modification #), the modified versions of the themes will appear in the theme task pane right under their original source. If you modify a theme, FrontPage will save the theme to the installation of FrontPage you are working on. If you would like the theme data to be moved to the site you are working on, apply the new theme to any page in the site. |

 For more information on Web design and color concepts,
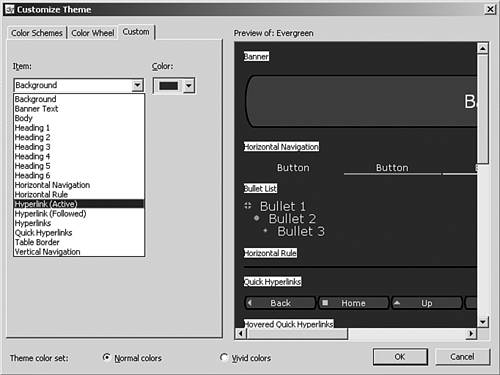

EAN: 2147483647
Pages: 443