Placing Artwork


Most artwork that's used in InDesign comes from other sources such as scanners or digital cameras. Artwork can also be created using programs such as Adobe Photoshop, Adobe Illustrator, Macromedia FreeHand, or Adobe Acrobat. The easiest way to place artwork is to automatically create the frame that contains it when you import the artwork.

To place artwork without drawing a frame:

1.

Choose File > Place. This opens the Place dialog box .

Use the Place dialog box to open a file you wish to place. Check Show Import Options to make refinements to the imported file.

2.

Navigate to find the file you want to import. (See "File Formats" on the next page for a list of the file types you can place in InDesign.)

3.

Check Show Import Options to open the Import Options dialog box before you place the file. (See page 200 for more information on working with Import Options.)

4.

Click Open to load the graphic into an image cursor .

The loaded image cursor appears when you prepare to place artwork.

Tip

Hold the Shift key as you click Open to open the Import Options dialog box, even if the option is not checked.

5.

Click the cursor to place the graphic in a rectangular frame the same size as the artwork.

or

Drag the image cursor to define the size of the rectangular frame.

or

Position the cursor over an existing frame to place the image inside the frame .

The curved loaded image cursor appears when you position the loaded cursor over an existing frame.

Tip

Only the frame is sized when you drag the image cursor. The artwork stays at its actual size. (See page 205 for how to change the size of an image inside a frame.)

File Formats

A wide variety of graphic formats can be added to InDesign documents. These formats are recommended for professional printing:

  • Adobe Illustrator (AI)

  • Adobe Photoshop (PSD)

  • Encapsulated PostScript (EPS)

  • Desktop Color Separation (DCS)

  • Joint Photographic Experts Group(JPEG)

  • Portable Document Format (PDF)

  • Portable Network Graphics (PNG)

  • PostScript (PS)

  • Scitex Continuous Tone (SCT)

  • Tagged Image File Format (TIFF)

Although the following formats can be inserted into InDesign documents, they are not recommended for use in commercially printed documents. These formats are acceptable for low-resolution, onscreen PDF review, or non-PostScript printers:

  • Enhanced Metafiles(EMF)

  • Macintosh Picture (PICT)

  • Graphics Interchange Format (GIF)

  • PC Paintbrush (PCX)

  • Windows Bitmap (BMP)

  • Windows Metafile (WMF)


Placing JPEGs from Digital Cameras

In earlier versions of InDesign, JPEG photos from a digital camera might appear at a huge size. InDesign now computes a more reasonable size so that you no longer need to lower the size of the image.


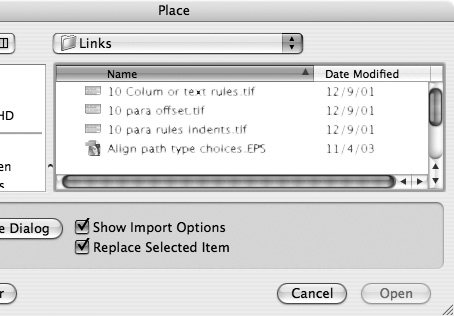
You can also place artwork into an existing frame. This is handy if you have set up empty frames as placeholders for graphics.

To place artwork into an existing frame:

1.

Use one of the tools to create a rectangular, elliptical, or polygonal frame.

Tip

You can use either the frame tools that create graphic frames or the tools that create unassigned frames (see page 82).

2.

Use either the Selection or Direct Selection tool to select the frame.

3.

Choose File > Place and navigate to find the image you wish to place in the frame.

4.

Click Open in the Place dialog box. The file automatically is inserted within the frame.

Tip

You can also use the Pen tool to create frame shapes (see Chapter 7, "Pen and Beziers").

To replace the artwork in an existing frame:

1.

Use either Selection tool to select the frame that contains the artwork you want to replace.

2.

Choose File > Place and navigate to find the image you wish to place.

3.

Click Replace Selected Item in the Place dialog box .

4.

Click Open in the Place dialog box. The new image automatically replaces the contents of the frame.

To move or copy artwork between frames:

1.

Use the Direct Selection tool to select the artwork you want to replace.

2.

Choose Edit > Cut or Edit > Copy. This places the artwork on the clipboard.

3.

Select the frame that you want to move the artwork into.

4.

Choose Edit > Paste Into. The contents of the clipboard are pasted into the frame.


InDesign CS2 for Macintosh and Windows(c) Visual QuickStart Guide
InDesign CS4 for Macintosh and Windows: Visual QuickStart Guide
ISBN: 0321573579
EAN: 2147483647
Year: 2006
Pages: 309
Authors: Sandee Cohen

flylib.com © 2008-2017.
If you may any questions please contact us: flylib@qtcs.net