Adding Command Buttons Another special control type that you can add to your form is a command button. Command buttons are used to perform a particular action. For example, you could put a command button on a form that enables you to move to the next record or to print the form. Access offers different command button types that you can place on your forms: -
Record Navigation You can add command buttons that allow you to move to the next, previous, first, or last record. -
Record Operations You can make buttons that delete, duplicate, print, save, or undo a record. -
Form Operations Command buttons can print a form, open a page (on a multiple page form), or close the form. -
Application Command buttons can exit Access or run some other application. -
Miscellaneous Command buttons can print a table, run a macro, run a query, or use the AutoDialer to dial a phone number specified on a form.  | Placing Command Buttons Form headers or footers make a great place to put any command buttons that you create. Placing them in the header makes it easy for you to go to the top of the form and click a particular command button. |
To place a command button on a form, follow these steps: -
Be sure that the Control Wizards button in the Toolbox is selected. -
 Click the Command Button in the Toolbox. Your mouse pointer changes to show the Command Button icon. Click the Command Button in the Toolbox. Your mouse pointer changes to show the Command Button icon. -
Click your form where you want the command button to appear (such as the header of the form). The Command Button Wizard opens. -
On the first wizard screen, select an action category in the Categories list, and then in the Actions box (see Figure 12.8), select the action that the button should perform. Then click Next . Figure 12.8. Choose what action you want the command button to execute. 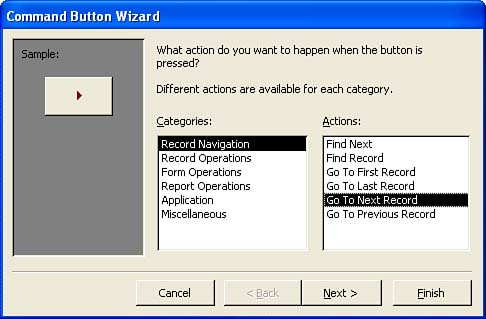 -
On the next screen, you can select to have either text or a picture appear on the command button. For text, choose Text and then enter the text into the appropriate box. To place a picture on the button, select Picture and then select a picture from the list provided (you can use your own bitmap pictures on the buttons if they are available; use the Browse button to locate them). Then click Next . -
On the next screen, type a name for your new button. Then click Finish . The button appears on your form. You can move it around like any other control. |