| After adjusting the page settings for the worksheet and previewing your data, it is time to print. You can print selected data, selected sheets, or the entire workbook. To print your workbook, follow these steps: -
If you want to print a portion of the worksheet, select the range of cells you want to print. To print only a chart, click it (you learn about creating charts in Lesson 15, "Creating Charts "). If you want to print one or more worksheets within the workbook, select the worksheet tabs (see Lesson 13, "Managing Your Worksheets"). To print the entire workbook, skip this step. -
Select the File menu and then select Print (or press Ctrl+P ). The Print dialog box appears, as shown in Figure 14.6. Figure 14.6. In the Print dialog box, select your printer and a page range to print. 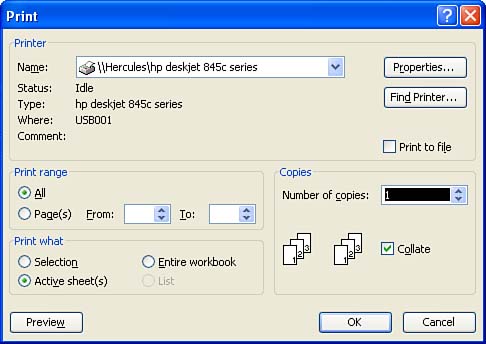  | Print Using the Default Settings  If you click the Print button (instead of using the File menu and clicking Print ), Excel prints your current worksheet without letting you make any selections. If you click the Print button (instead of using the File menu and clicking Print ), Excel prints your current worksheet without letting you make any selections. |
-
Select the options you would like to use: -
Print Range Enables you to print one or more pages. For example, if the selected print area contains 15 pages and you want to print only pages 510, select Page(s) and then type the numbers of the first and last page you want to print into the From and To boxes. -
Print What Enables you to print the currently selected cells, the selected worksheets, or the entire workbook. -
Copies Enables you to print more than one copy of the selection, worksheet, or workbook. -
Collate Enables you to print a complete copy of the selection, worksheet, or workbook before the first page of the next copy is printed. This option is available when you print multiple copies. -
Click OK to print your selection, worksheet, or workbook. While your job is printing, you can continue working in Excel. If the printer is working on another job that you (or someone else, in the case of a network printer) sent, Windows holds your current job until the printer is ready for it. Sometimes you might want to delete a job while it is printing or before it prints. For example, suppose you think of other numbers to add to the worksheet or realize that you forgot to format some text; you'll want to fix these things before you print the file. To display the print queue and delete a print job, follow these steps: -
Double-click the Printer icon in the Windows system tray (at the far right of the taskbar), and the print queue appears. -
Click the job you want to delete. -
Select the Document menu and then select Cancel Printing , or just press Delete . To delete all the files from the print queue, open the Printer menu and select Purge Print Documents . This cancels the print jobs but doesn't delete the files from your computer. The amount of control you have over printing documents depends on whether or not you are printing to a printer directly connected to your computer or a networked printer. In the case of a directly connected computer, you have the ability to cancel any and all print jobs. On a network printer you may not have the appropriate rights to purge or delete print jobs. See your network administrator if you cannot delete your own print documents from the print queue. |