Flylib.com

Books Software


10. Change the System Date and Time Settings

 < Day Day Up > 

10. Change the System Date and Time Settings

The date and time are displayed by the Clock applet that resides on far right of the top panel of the NLD desktop. Selecting the applet displays the current month showing the current date. You can change clock preferences and even copy the time and date (and then paste it into another application) by accessing this applet.

You can also access date and time settings using the Clock applet icon; however, date and time settings are considered administrative settings. This means that you must know the root account password to change these settings.

Note

The date and time settings are administrative settings configured using YaST, which is the NLD configuration utility. YaST actually played an important part when you installed NLD on your system. Access to YaST, no matter what settings you are trying to edit, always requires the root password.
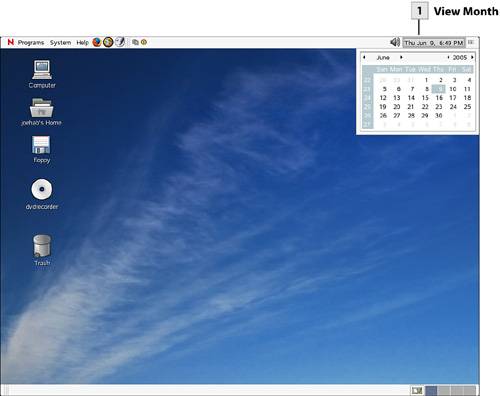

10. Change the System Date and Time Settings


View Month

To view the current date in the context of the current month, select the Clock (showing the current date and time on the top panel). To close the month view, select the Clock a second time.

Open Clock Preferences

Right-click on the date and time and then select Preferences from the shortcut menu that appears. This opens the Clock Preferences dialog.

Change Clock Preferences

Select the Clock Type drop-down box to select either a 12 hour, 24 hour , UNIX time (the seconds that have elapsed since January 1, 1970; this is used primarily by developers), or Internet time (a universal time reference used all over the world) for the clock. To show seconds on the clock, select the Show Seconds check box. To change the clock to UTC (Universal Coordinated Time or Greenwich Mean Time), select the Use UTC check box. When you have completed editing the preferences, click Close .

Change Date and Time Settings

Right-click on the date and time and then select Adjust Date and Time from the shortcut menu. The Run as Root dialog box appears.

Enter the Root Password

Type the root password in the Password box and then click OK . The YaST window opens showing the Clock and Time Zone Configuration.

Edit Date and Time Settings in YaST

In the Region pane select your region. In the Time Zone pane select the appropriate region. To change the time or date, select the Change Time or Date button. The Change System Date and Time dialog opens. Enter the correct time in the Current Time boxes and enter the correct date in the Current Date boxes (the correct format for each entry is provided). After entering the time and date information, click Apply . This returns you to YaST. If you want to change the hardware clock setting to local time (the default is UTC), click the Hardware Clock Set To drop-down box and select Local Time . After changing the clock settings in YaST, click Accept . YaST writes a new configuration file and then closes , returning you to the NLD desktop.

Note

If NLD is the operating system installed on your computer, go with the default hardware clock setting, which is UTC. If you have a computer that is configured for a dual boot situation and also has Microsoft Windows installed on the computer, use local time as your hardware clock setting.


 < Day Day Up > 
 < Day Day Up > 

11. Get Help on the GNOME Desktop

Although the GNOME desktop is easy to navigate, there may be times when you need some extra help. You can quickly access the Novell's GNOME User's Manual from the desktop. The user manual provides basic information on GNOME and provides a section to make it easier for Windows users to switch to the GNOME desktop.

The manual also provides information on specific applications such as Firefox, Evolution, iFolder, and the OpenOffice.org suite. Additional information is provided on managing printers, and basic information is provided on administrative tasks and working in a command shell (entering commands at the command line). You can access Help content using the content links in the Navigation Area (the left frame), or you can search for content by performing either a simple search or a more complex search on the Search tab.

Open the Help Center

Select the Help menu on the top panel and then select User's Manual . The Help Center opens on the desktop. You can maximize the Help Center; select the Maximize button on the left side of the window.

Select Content Topics

The Help Center consists of two areas: a navigation area, which lists topics, and a view window, which shows the information contained in the selected topic. To view a particular topic found in the navigation area (when the Contents tab is selected), select that topic. To view specific information related to the selected topic, select a link in the view window (the right pane of the Help Center).

Tip

To enlarge the font for text in the View window, select the Increase Font Sizes button on the Help toolbar (Decrease Font Sizes decreases the text size ). To go back to a previous topic page, click the Back button. If you want to print a topic, click the Print button on the toolbar.


11. Get Help on the GNOME Desktop


Do a Simple Search

To quickly search for specific Help content, enter a search term in the Search box above the navigation area; then click the Search button. The results of your search appear in the view window. Select specific links provided as search results to view the topic pages.

Select the Search Tab

You can also run a more complex search, which provides you the ability to set more parameters for the search. Select the Search tab of the Help navigation area. Before you run the search, you need to generate a search index for content that the Help system contains. Click the Create Search Index button at the bottom of the Search pane. This opens the Build Search Index dialog.

Generate Search Index

In the Build Search Index dialog, select check boxes of index topics that currently have a status of missing (meaning that an index has not been generated for these topic areas). Then click OK to generate the indexes. The Build Search Indices message box opens declaring that the index creation is complete. Click Close to close this message box.

Run Advanced Search

Enter your Search criteria in the Search box. Set the Method drop-down to either and (the default) or or . Use the Max Results drop-down box to select the number of results that you want to receive from the search. The final step is to set the scope for the search.

You can use the Scope Selection drop-down list to either select All or Custom ( None is also a selection possibility but doesn't apply in this case). If you select Custom, you can then use the check boxes provided in the Scope area of the Search pane to select individual topic areas to include in the scope. After determining the scope, click the Search button. The Search results appear as links in the view window.

Tip

To view a list of Glossary terms (and access their definitions), select the Glossary tab of the Help navigation area. You can view the glossary alphabetically or by topic.


 < Day Day Up >