Create Local Databases After you have installed the WebSphere Application Server, WebSphere Portal Server, and Lotus Workplace products, follow these steps to configure the software. We will be capturing the output in a log file to help debug any problems that occur. -
To create the necessary local databases: -
Log on to your Windows system as db2admin. Ensure the default application server, server1, is started: C:\websphere\appserver\bin\serverstatus all . (Do not be concerned that WebSphere_Portal or LotusWorkplace_Server are not listed as application servers. They will be added in a subsequent steps.) -
If server1 is not running, start it: c:\websphere\appserver\bin\startserver server1 . -
At the DOS prompt, go to C:\WebSphere\WorkplaceServer\config , and enter the following command, as shown in Figure F-8. Figure F-8. DOS prompt to create local databases. 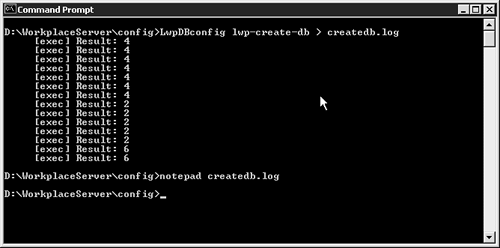 -
Verify the list of DB2 databases, as shown in Figures F-9 and F-10. Figure F-9. Verify list of DB2 databases (screen 1 of 2). 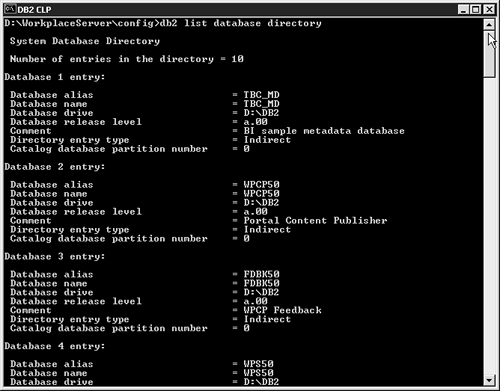 Figure F-10. Verify list of DB2 databases (screen 2 of 2). 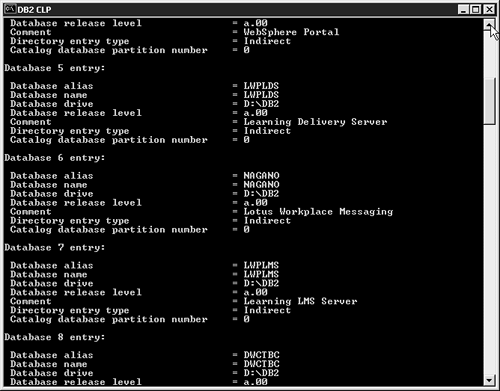 Configure Lotus Workplace Servers -
At the DOS prompt, go to C:\WebSphere\WorkplaceServer\config\lwpprops.properties and edit/configure the following property: -
LWPHostName is set to lwp11.techpreview.ibm.com , as shown in Figure F-11. Figure F-11. Set LWPHostName. 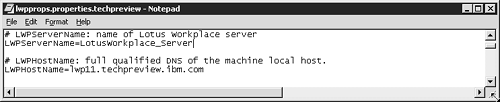
-
PortalSafeMode is set to False, as shown in Figure F-12. Figure F-12. Set PortalSafeMode=False. 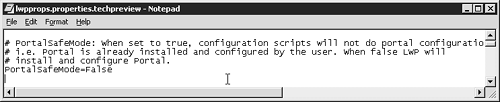
-
Go to C:\WebSphere\WorkplaceServer\config and enter the following command, as shown in the Figure F-13. Figure F-13. Entering the lwpconfig command. 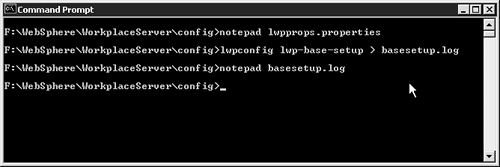 -
Enter the following URL in your browser to verify that all servers are running: http://lwp11.techpreview.ibm.com:9081/lwp/workplace
You should see a plain login screen. Do not log in to the Workplace yet. Update the Web Server Plug-In File -
Enter the following URL in your browser:
http://lwp11.techpreview.ibm.com:9091/admin
-
Log in as any user name as indicated in Figure F-14. The name is not verified , as we don't have security enabled yet. Figure F-14. Log in to WebSphere Administration. 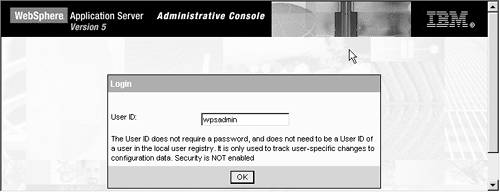 -
Select Environment>Update web server plug-in. Click OK to update (see Figure F-15). Figure F-15. Update the Web server plug-in file. 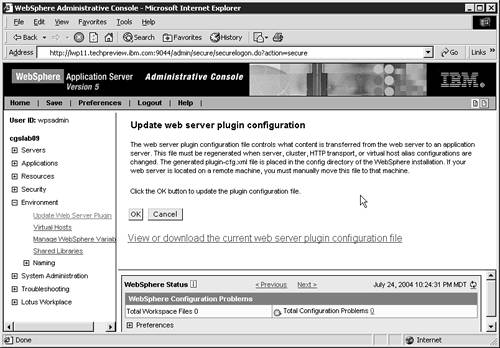 Enable Security -
Make sure the following entries exist in the LDAP directory. Create them if necessary before continuing to the next step. -
A user entry for the WebSphere administrator . The entry must have write access to the directory. The tutorial set up assumes it to be wpsadmin or uid=wpsadmin,cn=users,dc=ibm,dc=com as found in the LDAP. -
A user entry for the WebSphere Portal administrator . The entry must have write access to the directory. Do not create a separate entry. Instead use the entry for the WebSphere administrator. -
A user entry for the LDAP administrator . The entry must have write access to the directory. Do not create a separate entry. Instead use the entry for the WebSphere administrator Note : You can use one entry to represent the WebSphere administrator, WebSphere Portal administrator, and LDAP administrators, rather than a separate entry for each. This tutorial assumes one entry to represent all three administrators. -
A user entry with read access or greater used for WebSphere Portal searches of the directory . This entry can be the same one used for the LDAP administrator. The tutorial set up assumes it to be wpsbind or uid=wpsbind,cn=users,dc=ibm,dc=com as found in the LDAP. -
A Portal administrator group entry with write access to the directory . This group must include the WebSphere administrator, Portal administrator, and LDAP administrator names . The tutorial set up assumes it to be: wpsadmins or uid=wpsadmins,cn=groups,dc=ibm,dc=com as found in the LDAP. -
At the DOS prompt, go to C:\WebSphere\AppServer\bin and enter the following command to create a backup configuration: -
Go to C:\WebSphere\AppServer\bin , and enter the following command to restart the server (see also the Figure F-16). serverStatus -all startServer server1 Figure F-16. Restart the server. 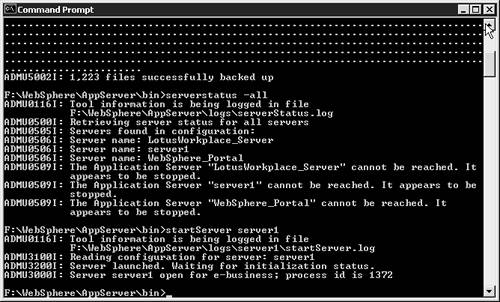 -
Note: Included in the Resources, you will find a completed lwpprops.properties.techpreview file. You can copy it to c:\websphere\workplace\config and rename it to lwpprops.properties or use it as a working template. -
Go to C:\WebSphere\WorkplaceServer\config . -
Edit lwpprops.properties, and specify the following LDAP server properties, all of which are required, as listed here in Table F-1. Table F-1. LDAP Server Properties. | Property | Description | | Wps.LDAPWasUserid=<DN> | Fully distinguished name that corresponds to the WebSphere administrator entry in the LDAP directory. This name must have write access to the directory. This tutorial assumes uid=wpsadmin,cn=users,dc=ibm,dc=com . | | WasAdmin=<non-qualified name> | Non-qualified name of the WebSphere admin-istrator entry. This tutorial assumes wpsadmin . | | WasPassword=<password> | Password for the WebSphere administrator entry. This tutorial assumes wpsadmin . | | Wps.PortalAdminIdLong<DN> | Fully distinguished name that corresponds to the Portal administrator entry in the LDAP directory. This name must have write access. The name can be the same as the one used for the WebSphere administrator. This tutorial assumes uid=wpsadmin,cn=users,dc=ibm,dc=com . | | PortalAdminId=<non-qualified name> | Non-qualified name of the Portal administrator entry. This tutorial assumes wpsadmin . | | PortalAdminPwd=<password> | Password for the Portal administrator. This tutorial assumes wpsadmin . | | Wps.LDAPAdminUId=<DN> | Fully distinguished name that corresponds to the LDAP administrator entry in the LDAP directory. The name must have write access to the directory. The name can be the same as the one for the WebSphere administrator or Portal administrator. This tutorial assumes cn=root . | | Wps.LDAPAdminPwd=<password> | Password for the LDAP administrator. This tutorial assumes password . | | Wps.LDAPBindID=<DN> | Fully distinguished name that Portal uses when searching the directory. The name requires only read access to the directory. Can be the same as the LDAP administrator name. This tutorial assumes uid=wpsbind,cn=users,dc=ibm,dc=com | | Wps.LDAPBindPassword=<password> | Password for the name used for searches. This tutorial assumes password . | | Wps.PortalAdminGroupId=<DN> | Fully distinguished name of the Portal administrtor group entry in the LDAP directory. The group must have write access to the directory and include as members the WebSphere administrator, Portal administrator, and LDAP administrator names. This tutorial assumes cn=wpsadmins,cn=groups,dc=ibm,dc=com . | | Wps.PortalAdminGroupIdShort=<non-qualified name> | Non-qualified name of the WebSphere Portal administrator group. This tutorial assumes wpsadmins . | | WpsHostName=<hostname> | Fully qualified host name of the Portal server, for our set up: lwp11.techpreview.ibm.com . | | Wps.SSOEnabled=<true or false> | True to use single sign-on (SSO) with Lotus Workplace products, false otherwise . SSO is configured through WebSphere Portal. Enter true . | | Wps.SSODomainName=<SSO domain> | If using SSO, SSO domain of the Portal server, for example, .acme.com. This tutorial assumes .techpreview.ibm.com . Note : There is a leading "." before the SSO domain name. | | Wps.LDAPHostName=<LDAP host name> | Fully qualified name of the LDAP server, lwp11.techpreview.ibm.com. | | Wps.LDAPType=<type of LDAP directory server> | Type of LDAP directory. This tutorial assumes IBM_DIRECTORY_SERVER | | Wps.LDAPSSLEnabled=<true/false> | True to use SSL for connections to the LDAP directory server, or false otherwise. Enter false . | | Wps.LDAPSuffix=<suffix> | Suffix for the LDAP directory server. This tutorial assumes dc=ibm,dc=com . | | Wps.LookAside=<true/false> | True to use WebSphere Portal Member Manager (recommended), false otherwise. Enter true . | | LWMLocalDomainNames | The domains that will be considered local for receiving mail. Only users with addresses that match this will be able to use Workplace Messaging. This tutorial assumes techpreview.ibm.com. | | LWMFullyQualifiedDomainName | Your full DNS server name. This tutorial assumes lwp11.techpreview.ibm.com. | | LWMDnsNames | A DNS local to you. On a stand-alone system, you may need to specify a dummy name. This tutorial assumes lwp11.techpreview.ibm.com. |
-
Go to C:\WebSphere\WorkplaceServer\config , and enter the following command (see also Figure F-17): lwpconfig lwp-enable-ldap-security > enableSecurity.log Figure F-17. Enable LDAP security.  NOTE Ensure the LDAP server is started and you have connectivity if it is installed on a remote server. -
Go to C:\WebSphere\AppServer\bin and enter the following commands (see also Figure F-18): -
serverStatus all -username wpsadmin -password wpsadmin -
Depending on which application servers are running, stop them in the following order: -
stopServer LotusWorkplace_Server -username wpsadmin -password wpsadmin -
stopServer WebSphere_Portal -username wpsadmin -password wpsadmin -
stopServer server1 -username wpsadmin -password wpsadmin -
Now start the application servers in the following order: startServer server1 startServer WebSphere_Portal startServer LotusWorkplace_Server -
Go to Windows>Services, and stop and start the IBM HTTP server, as shown in Figure F-19. Figure F-19. Start and stop the IBM HTTP server. 
NOTE This is to allow the Updated Web Configuration to take effect on the server. -
Enter the following URL in your browser, and log in as wpsadmin to test and verify the completion on your IBM Lotus Workplace 1.1 installation (see Figure F-20): http://lwp11.techpreview.ibm.com/lwp/myworkplace Figure F-20. Test completion of IBM Lotus Workplace 1.1 installation. 
-
Then log in as user: wpsadmin , password: wpsadmin . Figure F-18. StartServer commands. 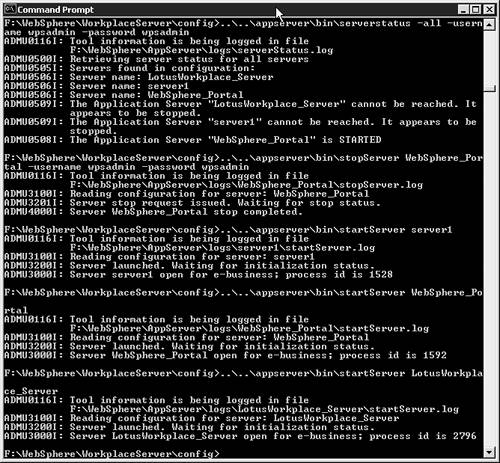 Lotus Workplace Tutorial Summary At the end, you should have a functional install of the IBM Lotus Workplace version 1.1 environment. This proof-of-concept setup can help you understand the functionality, as well as the look and feel of this product. As a developer, you get to play with the different components of the IBM Lotus Workplace V1.1. The APIs to the different components of this product are expected to be available with the next release. |