| IBM Lotus Workplace is a new concept that allows companies to easily and quickly set up collaboration tools on a single, open platform. The idea behind any set of corporate collaboration tools should be to help in the efficient execution of business processes. Lotus Workplace users can access collaborative tools such as messaging, e-meetings, and calendaring and scheduling in the context of the work they're engaged in, rather than as separate applications. The results can include improved responsiveness and business productivity. The supported operating systems are Windows NT (4.0 with Service Pack 6a), Windows 2000 Server (or Window 2000 Advanced Server with Service Pack 2), UNIX Solaris (Version 7 or Version 8), UNIX AIX (Version 4.3.3 or Version 5.1), Linux Red Hat, and Linux (Other) (SuSE Linux Enterprise Server, Version 7). Other requirements are Lotus Domino or IBM Websphere application server software, or both, and IBM DB2. WebSphere Portal provides the framework for bringing together the modular components of the Lotus Workplace platform. It provides both Lotus Domino and WebSphere developer communities with a modular architecture for building integrated collaborative solutions. IBM Lotus Workplace Team Collaboration 1.1 features integrated instant messaging, Web conferencing, and team workspaces. Executives stressed the simplicity of setting up an e-meeting, likening it to a "browser-based, broadcast kind of approach." Using the roles-based IBM Lotus Workplace Web Content Management 1.1, nontechnical users can publish material within the Workplace environment, on a portal, or on an application server. IBM Lotus Workplace Collaborative Learning 1.1 offers self-managed employee training and supports scheduling for both classroom-based and e-learning programs. Each of the modules can easily be embedded within others. For example, users can see which colleagues are on-line from e-mail, use a "people finder" to access information about colleagues from the corporate directory, send an instant message, or enter a collaborative workspace to trade documents and search for learning materials. Target users for this product include contact center workers who often need to solve customer problems by collaborating with colleagues. The Workplace Version 2.0 release will include collaborative document management, a connected rich e-mail client, and new development tools for business users. In order to gather "hands-on" experience for this book, one of our IBM colleagues, Charles Lin of IBM Boulder, installed and tested both WebSphere Portal Server 5.01 and Lotus Workplace 1.1 at the IBM Boulder lab. Charles did point out that since the Lotus Workplace 1.1 installation included the configuration for the LDAP directory and DB2, that installation was greatly simplified when compared to his installation of WebSphere Portal Server 5.01. Even the later WebSphere Portal Server 5.02 extended version still requires separate instillations of Sametime and QuickPlace servers. Lotus Workplace 1.1, on the other hand, does not need to connect to a separate Sametime server for Web conferencing or instant messaging. Lotus Workplace 1.1 also includes a component called Teamspaces, which is similar to but has fewer features than QuickPlace. The Lotus Workplace 1.1 components are all J2EE-based applications running on top of the WebSphere server. Here are some screenshots from the Boulder lab installation of LWP1.1. Figure F-1 shows the Lotus Workplace Mail Portlet while Figure F-2 shows the Lotus Workplace Web Conferencing Portlet. Figure F-1. Lotus Workplace mail portlet. 
Figure F-2. Lotus Workplace Web Conferencing portlet. 
Installing the IBM Lotus Workplace Tutorial To look at this tutorial, access the URL http://www-136.ibm.com/developerworks/lotus/ and then choose "Tutorials" in the Learning Resources section of that portal. The tutorial described here is the one titled, "Installing IBM Lotus Workplace 1.1." In this tutorial, Rohit Saharabudhe of IBM Austin helps you explore how you can install a stand-alone system with the IBM Lotus Workplace V1.1. This environment is a good starting point to get a feel for what version 1.1 offers. The installation can be used for a proof of concept. This tutorial is based on the "Getting started with IBM Lotus Workplace 1.1" workshop, held at Solution Partnership Centers around the world. The workshop introduces the Lotus Workplace (LWP) environment and teaches attendees how to install and configure version 1.1. In this tutorial, you can explore how you can install a stand-alone system with the IBM Lotus Workplace V1.1 code. In order to follow this tutorial for a stand-alone, "sandbox" style controlled environment, you may want to set up a Loopback adapter on your system. Even as part of the workshops, attendees use an image created with a Loopback adapter. This adapter will allow you to set up a virtual network on a Windows environment. The underlying middleware components used in IBM Lotus Workplace require a fully qualified domain name. For you to follow this tutorial, you either need to have your own static IP address and domain name registered or utilize the Loopback adapter and the HOSTS file to make the system think that a particular hostname and IP being used is the true IP. For IBM Lotus Workplace V1.1, it is recommended that you start with a clean Windows 2000 Server environment with Service Pack 4. The following instructions will help you set up a Loopback adapter on this system: -
Choose Start>Settings>Control Panel>Add/Remove Hardware.
-
Click Next .
-
Select Add/Troubleshoot a device and click Next .
-
Select Add New Device and click Next .
-
Select No, I want to select the hardware from a list and click Next .
-
Scroll down and select Network adapters as the hardware type and click Next .
-
Scroll down and select Microsoft as the manufacturer and Microsoft Loopback Adapter as the network adapter and click Next .
-
Click Next and click Finish .
-
From the Windows desktop, right-click My Computer, select Properties .
-
Select the Network Identification tab and then click the Properties button.
-
Click More and add the suffix: techpreview.ibm.com in the text box. Check the box underneath (change primary DNS suffix) as selected.
-
Click OK all the way through, and you will probably be asked to reboot.
Once you've rebooted, set your IP address as follows : -
Choose Start>Settings>Network and Dial-up Connections.
-
Right-click the Microsoft Loopback Adapter.
-
Click Properties .
-
Scroll down and double-click Internet Protocol (TCP/IP).
-
Enter an IP address (10.0.0.1) and Subnet Mask (255.0.0.1).
-
Reboot.
Add this fully qualified hostname (assumed by this tutorial: lwp11.techpreview.ibm.com the IP address (10.0.0.1) to your c:\winnt\system32\drivers\etc\hosts file. Check your network settings. Start a command-line window, and execute the command:
ping lwp11.techpreview.ibm.com
The IP address should be 10.0.0.1 instead of 127.0.0.1. The tutorial assumes that the DB2 Administrator and the Windows Administrator user is the following:
Userid: db2admin Password: db81admn
TIP Installation Be patient. Some of the scripts take time to execute. And keep the Task Manager in view to get a clear picture of the installation process.
Installing IBM DB2 UDB 8.1 Enterprise Server -
Create a local db2admin account, and assign it a password (this tutorial assumes: db81admn ) if one doesn't already exist and make this account a member of the Administrators group .
-
If you haven't already, log in as db2admin and make sure you have the following Local Security Policies set for your db2admin user. Assign these policies by choosing Start>Programs>Administrative Tools>Local Security Policy, Select Local Policies>User Rights Assignments: -
Verify that the db2admin account is a member of the local Administrators group. If not, add the user in that group.
-
From the DB2 Enterprise Edition CD (CD 5-1), run either Setup.exe or Launchp.exe.
-
On the installer screen, click Install Products .
-
Click Next (DB2 UDB Enterprise Server Edition is selected).
-
From Welcome to the DB2 Setup Wizard, click Next .
-
Review the license agreement. If you accept the terms, click I accept the terms of the agreement , and click Next .
-
In the Setup the installation type window, click Typical and click Next .
-
The default screen does not have Data Warehousing and Satellite Administration capability selected. Do not change the defaults. Click Next .
-
A warning screen appears regarding APPC. Click OK .
-
Select the installation action, accept the default, Install DB2, Enterprise Server Edition on this computer. Do not select Save your settings in a response file . Click Next .
-
At Select installation folder for DB2, select the installation folder. This tutorial assumes the folder to be C:\SQLLIB.
-
Set user information for the DB2 Administration Server as follows, and click Next when you are done. -
For user name, enter db2admin , and be sure all the rights are selected for this user. -
Specify the password created in Step 1. -
Leave Use the same user name and password for the remaining DB2 services checked. -
At Set up the administration contact list, accept the default (Local), and click Next .
-
When you see the warning screen Notification SMTP server, click OK .
-
In the Configure DB2 instances screen, click Protocols and configure the TCP/IP protocol. Keep the default settings (Service name, db2c_DB2 and Port number, 50000), click OK , then Next .
-
In the Prepare the DB2 tools catalog window, click Prepare the DB2 tool catalog in a local database and click Next .
-
In the Specify a local database to store the DB2 tools catalog window, accept the defaults and click Next .
-
In the Specify a contact for health monitor notification window, click Defer the task after installation is complete and click Next .
-
In the Start copying files window, review the list and click Install .
-
Click Finish when installation completes.
-
Reboot the machine, and then follow the instructions to Apply DB2 UDB 8.1 Fix Pack 2.
Apply DB2 UDB 8.1 Fix Pack 2 You must apply at least Fix Pack 2 to DB2 UDB 8.1. -
Log on as db2admin .
-
Go to Control Panel/Services and stop all the DB2 services (that are started automatically), except for DB2 DB2-0.
-
From the DB2 Fix Pack 2 CD (CD 5-10), run update.exe. It will automatically find the previous installation of DB2 8.1. If prompted to stop DB2 services, click YES .
-
Click OK , and UPDATE when prompted. Wait until this process is complete.
-
If you see a screen stating DB2 is currently running and locked by the following processes, click YES to shutdown those processes and continue.
-
Click Finish at completion.
-
Reboot your machine.
Next, you'll need to install IBM Directory Server 5.1. Installing IBM Directory Server 5.1 Probably the most important component of a successful LWP deployment is the LDAP server schema. It is imperative that the LWP administrator collaborate with the LDAP administrator. This tutorial assumes a clean install of IBM Directory Server 5.1 and import of provided LDIF. If you are using an existing LDAP server, you can skip the instructions here and go to Lotus Workplace installation. Follow these steps to install IBM Directory Server 5.1 on the same system as Lotus Workplace. -
Log on to the local system as db2admin .
-
From the IBM Directory Server 5.1 CD (CD 3-1), change to the ids_ismp directory and run Setup.exe.
-
Select English as the language to be used, and click OK .
-
Click Next on the Welcome to Installshield Wizard.
-
Review the license agreement. If you accept, accept the terms in the license agreement and click Next .
-
Click Next at the verification that DB2 is already installed.
-
Change the directory name to C:\LDAP and click Next .
-
Select English as the language for IBM Directory Server, and click Next .
-
It is critical to select CUSTOM as the setup type, and click Next .
-
Because IBM Directory Server 5.1 uses WebSphere Application Server to deploy the graphical administration client, you must uncheck Web Administration and IBM WebSphere Application Server . Therefore, only select Client SDK, Server 5.1 , and GSKit as indicated in Figure F-3, and then click Next . Figure F-3. Installing IBM Directory Server 5.1.  -
Review the installation summary, and click Next .
-
Click OK to begin GSKit installation.
-
Click Next (possibly twice) at the completion of installation.
-
Click Next to restart your server.
-
Click Finish .
-
Reboot your system.
IBM Directory Server 5.1 Configuration Upon reboot, there are a few configuration steps required using the IBM Directory Server Configuration Tool: - Click Administrator/ DN password .
- 1. For the Administrator DN, use the default, cn=root .
- 2. For the Administrator password, use password .
- 3. Confirm password, use password .
- 4. Click OK .
- 5. Click OK .
- Click Configure Database .
- 1. Check Create New Database , and click Next .
- 2. Enter your DB2 Administrator user ID, db2admin.
- 3. Enter the DB2 Administrator password, db81admn.
- 4. Click Next .
- 5. Enter a database name, db2ldap , and click Next .
- 6. Check Create a universal DB2 database (UTF-8/UCS-2) , and click Next.
- 7. Use drive C for the database location, and click Next .
- 8. Verify the settings, and click Finish .
- 9. Upon completion, click Close .
- Click Configure Suffixes .
- 1. Under Suffix DN, enter dc=ibm, dc=com and click Add .
- 2. Click OK .
- Click Import LDIF File .
- 1. Click Browse and navigate to select the sample LDIF file, provided in Resources.
- 2. Choose Standard Import .
- 3. At the bottom of the page, click Import .
- 4. Upon completion, click Close .
- Close IBM Directory Server Configuration by choosing File>Close.
Now start IBM Directory Server via Windows Services IBM Directory Server 5.1. Lotus Workplace Installation -
Make sure you are logged in to Windows as db2admin .
-
Run install.bat from the Lotus Workplace Setup CD.
-
In the Select a language to be used for this wizard window, select English , and click OK .
-
In the IBM Lotus Workplace Installer window, click Install .
-
In the Welcome to the IBM Lotus Workplace Installation program window, click Next .
-
In the Results of system checkwindow, make sure you see a supported IBM DB2 Enterprise Server is installed on your server. Click Next .
-
In the The system check detected a DB2 Enterprise Server on this computer window, select the option, This computer will host Lotus Workplace data and products , then click Next .
-
In the Before continuing Lotus Workplace installation, WebSphere Portal must be installed window, click Next . You will see the screen Installing WebSphere Portal. Do not close this window. You can't click this installer.
-
The Lotus Workplace Version 1.1 Installer opens to install Portal. In the Select a language to be used for this wizard window, choose English (the default), and click OK .
-
In the Welcome to the Installshield Wizard window, click Next .
-
Review the license agreement. If you accept the terms, click I accept the terms , then click Next . If you see a box asking you to disable any firewall products running on this machine prior to installation, click OK after disabling them manually.
-
In the Choose the setup type that best suits your needs window, select Full , and click Next .
-
In the WebSphere Application Server will be installed in the following directory window, accept the default, C:\WebSphere\AppServer , and click Next . Make sure this directory path contains no spaces.
-
In the IBM HTTP Server will be installed in the following directory window, accept the default, C:\IBMHttpServer , and click Next .
-
In the You can use Windows Services to run the following WebSphere Application Server features window, just select the Run IBM HTTP Server as a service option. Enter your Windows administrator username ( db2admin ) and password ( db81admn ), and click Next .
-
In the Enter a node name for this instance of WebSphere Application Server window and in the Enter the hostname for this installation of WebSphere Application Server window, enter a node name ( lwp11 ), and enter the fully qualified host name ( lwp11.techpreview.ibm.com ); then click Next .
-
In the WebSphere Portal will be installed in the following directory window, accept the default, C:\WebSphere\PortalServer , then click Next .
-
In the Enter the Portal administrative user and password window, enter wpsadmin for the Portal administrator username and wpsadmin for the password, confirm the password, and then click Next .
-
In the window Lotus Workplace is ready to install. The following components will be installed; click Next . You will see multiple screens as installation progresses. Installation takes approximately one hour . You will use CD1-1, CD1-6, and CD2 for this part of the installation. (This tutorial assumes Portal Administrator of wpsadmin with password of wpsadmin .)
-
In the Installation is successful window, which lists all the components that have been installed, uncheck Launch First Steps and click Finish to launch the Lotus Workplace Installer.
-
In the Results of system check window, click Next .
-
Make sure that the prerequisite product installation has been completed: Lotus Workplace Products Installation -
In the Click Next to install Lotus Workplace Products window, click Next . You will use the Workplace CD for this part of the installation.
-
In the IBM Lotus Workplace Installation window, click Next .
-
In the Select the Lotus Workplace products that you have purchased licenses for window, select all the products, and then click Next , as shown in Figure F-4. Figure F-4. Selecting the Lotus Workplace products. 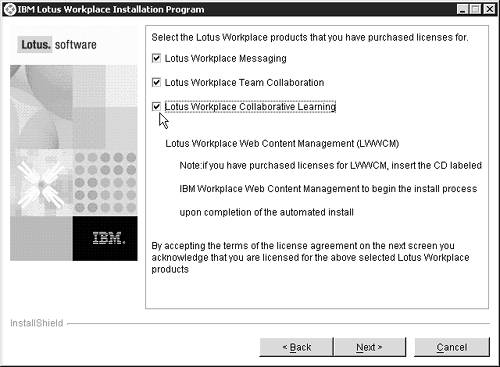 -
Review the license agreement. If you accept the terms, click I accept the terms and click Next .
-
At the next screen, which describes the install options, select Install and set configuration properties and click Next , as shown in Figure F-5. Figure F-5. Select the install and set configuration properties. 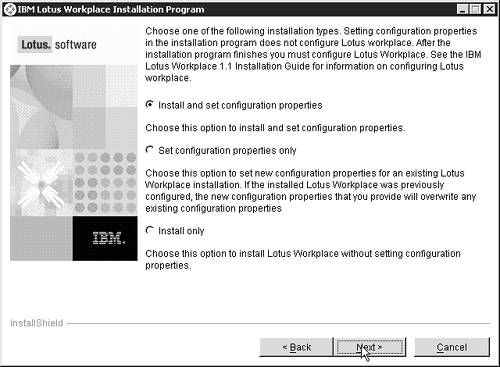 -
In the Click Next to install IBM Lotus Workplace to this directory window, accept the default, C:\WebSphere\WorkplaceServer , and click Next .
-
In the window, The following WebSphere Application Servers were found on this computer, the system should display C:\WebSphere\AppServer . Click Next .
-
Based on the products you selected on the previous panel, these features are available for configuration window, leave all the defaults selected, and then click Next , as shown in Figure F-6. Figure F-6. Select the features to configure.  Granting Access -
In the window Lotus Workplace will install a WebSphere Application Server on this computer, Lotus Workplace requires administrator access to this server. Enter wpsbind as the administrator name and password as the password. Then click Next .
-
In the window Lotus Workplace will install a WebSphere Portal on this computer. Lotus Workplace requires administrator access WebSphere Portal. Enter wpsadmin as the administrator name and wpsadmin as the password. Then click Next .
-
In the To create its databases, Lotus Workplace requires window, enter the local DB2 program directory, C:\SQLLIB . Then enter db2admin for the DB2 administrator name, and db81admn as the password. Click Next .
-
In the window Lotus Workplace sends failure notifications and other automatically generated administrative messages from a postmaster account, enter the mail service queue directory as c:\qfilestore and a valid e-mail address for the postmaster account. Click Next .
Learning Management Server Settings -
In the Learning Management Server Settings window, enter http://lwp11.techpreview.ibm.com, and enter ldsadmin as the username and password as the password. The username does not have to exist in a directory.
-
In the Additional Learning Management Server Settings window, do the following (see also the figure below), and then click Next : -
For Learning Management Server administrator LDAP user or group name, enter wpsadmin . -
For Learning Management Server administrator name type, keep the default selection, User. -
For Path for Learning Management Server application log files, enter c:\lms_logs . -
For Path for imported course packages, enter c:\lms_packages . -
At the second Additional Learning Management Server Settings screen, enter C:\juruindex for the Juru index path and English for the Juru index language. Click Next .
Learning Delivery Server Settings -
In the Learning Delivery Server Settings window, enter http://lwp11.techpreview.ibm.com , ldsadmin as the username, and password as the password. The delivery server will use this information to authenticate with the Learning Management Server. The username does not have to exist in a directory. Click Next .
-
In the Additional Learning Delivery Server Settings window, enter the following, and click Next : -
For Server ID, enter DS1 for the Learning Delivery Server. -
For Description, enter Learning Delivery Server 1 . -
For Path for Learning Delivery Server application log files, enter c:\lms_logs . -
At the second Additional Learning Delivery Server Settings window, enter the following, and click Next : -
For E-mail address to receive system notifications sent by the Learning Delivery Server, enter a valid e-mail address for the administrator, wpsadmin@lwp11.techpreview.ibm.com. -
For E-mail address from which Learning Delivery Server system notifications are sent, enter an e-mail address to display for Learning Delivery Server notifications, wpsadmin@lwp11.techpreview.ibm.com. Learning Delivery Server Content Deployment Settings -
In the Learning Delivery Server Content Deployment Settings window, enter http://lwp11.techpreview.ibm.com, and click New to specify a server to provide course content.
-
In the Learning Delivery Server Content Server Settings window, enter the following, and then click Next . -
For Server name, in the Content Deployment Settings panel, enter a name to identify this Content server, Lwp11 . -
For the Deployment type, select File system . -
For Location for deployed content, enter C:\IBMHttpServer\htdocs\en_US\content , and click OK . -
Click Next with the Learning Delivery Deployment Settings defined.
Lotus Workplace Learning Settings -
In the Lotus Workplace Learning Settings window, enter http://lwp11.techpreview.ibm.com as the URL for the Learning Management Server, and click Next .
-
In the window Lotus Workplace can create a single database for all installed products, or separate, select Create multiple databases , and click Next .
-
In the window To create its databases, Lotus Workplace requires the location of the DB2 databases. Specify the following (see also Figure F-7) and then click Next . -
For DB2 program directory, enter C:\SQLLIB , which should be the default selection. -
For DB2 administrator name, enter db2admin . -
For DB2 administration password, enter db81admn . Figure F-7. Summary of Lotus Workplace features to be installed.  -
At the Warning, to create new database screen, click Next , and answer Yes to the subsequent warning specifying data will be lost.
-
In the DB2 data directory, specify the DB2 data directory window, accept the defaults C:\lwpdata and C:\db2backups as the directory to hold the backup files. Click Next and wait. This step may take a minute to complete. Do not click Next again.
Summary and Installation Wrap Up -
In the Summary information window (see Figure F-7), click Next and wait. This step may take a minute to complete. Do not click Next again.
-
In the Please read the information below window, click Finish , and click Exit on the IBM Lotus Workplace Installer screen.
-
Do not start Lotus Workplace yet. First, configure Lotus Workplace as described in the next section.
|