Spherical Textures
|
| < Day Day Up > |
|
If you apply a flat texture to a spherical object, distortions are inevitable. These distortions are especially noticeable at the poles (Fig. 14.9). As a rule, they are undesirable and very hard to eliminate. Drawing elements in the correct shape so that they have the proper appearance after rendering is even more difficult. As a case in point, it is particularly complicated to model round illuminators on a diving bell.
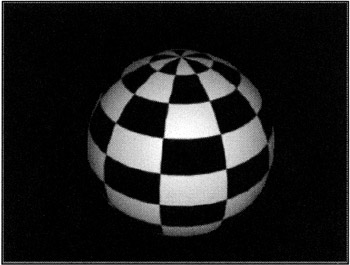
Figure 14.9: Typical distortions of flat textures on a spherical object
There are several methods to solve this problem. The simplest and recommended one uses Adobe Photoshop to transform orthogonal coordinates to polar coordinates.
-
Create a new rectangular image with a 2:1 side length ratio, for example, 600 × 300 pixels.
Note We will use geographical terms to describe the editing process, as they are the most illustrative.
-
Draw lines representing the "equator" and "tropics" (Fig. 14.10).
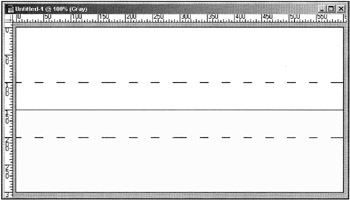
Figure 14.10: Texture dummy -
Select the "northern hemisphere" and copy it into a new file.
-
Change the size of the new file in such a way as to make its side ratio 1:1. In our case, this would be a change from 600 × 150 pixels to 600 × 600 pixels.
-
Apply the Polar Coordinate filter to convert to polar coordinates (Fig. 14.11):
-
Main menu à Filter à Distort à Polar Coordinate
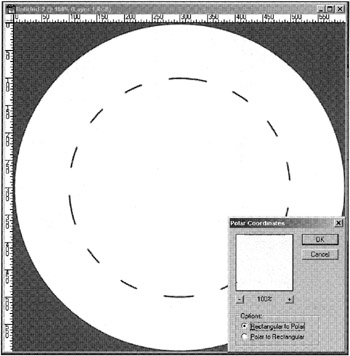
Figure 14.11: Result of converting orthogonal coordinates to polar coordinates -
-
Draw whatever is required within the dashed circle. When you are done, convert back to orthogonal coordinates and resize the file back to the original dimensions. In our case, this would be back to 600 × 150 pixels.
-
Copy the area "north" of the "tropic of cancer" and insert it back into the initial texture.
-
Do the same for the "southern hemisphere" after rotating the image 180° so that the "south pole" is on top.
-
Once you have completed the "polar" regions, draw the "equatorial zone."
The texture is now ready (Fig. 14.12, a). Save it in a format supported by 3ds max and try to use it (Fig. 14.12, b). As you can see, everything looks great. Distortions may still appear near the "poles," but supersampling in the material parameters will help solve this problem.

Figure 14.12: Final texture (a) and an object rendered with the texture (b)
|
| < Day Day Up > |
|
EAN: N/A
Pages: 136