Installing the GroupWise Messenger Client
| The GroupWise Messenger client installation is actually very flexible. There are various ways you can install the client:
This chapter covers all three of these GroupWise Messenger client installation methods. But first, before we cover these methods in more detail, there are some concepts regarding GroupWise Messenger client installation files you should have a handle on. Understanding the GroupWise Messenger Client Installation FilesThe GroupWise Messenger installation created a Software Distribution Directory. Remember the NOVELL\NM directory? The GroupWise Messenger client installation SETUP.EXE utility can be found in the \Novell\NM\ma\software\client\win32 directory. And much like the GroupWise Windows client installation software, it contains a SETUP.CFG file. It is important that you configure the SETUP.CFG file, no matter which method you use to install the GroupWise Messenger client. The best kind of installation is one that does not require the users to answer any questions. In the chapter example, we will configure the SETUP.CFG file without having to ask the users any questions. Following are the steps for configuring the GroupWise Messenger's SETUP.CFG installation settings file:
The SETUP.CFG file is now configured so that users are not prompted with any installation questions when they install the GroupWise Messenger client. Installing the GroupWise Messenger Client from the GroupWise Messenger Software Distribution DirectoryThis is a simple, yet manual, process necessary for your users to install the GroupWise Messenger client. You might consider launching the GroupWise Messenger installation from a login script if your users use the Novell client. Otherwise, follow these steps:
The GroupWise Messenger client should install, without asking any installation questions. Enabling Client Installation from a Web Browser to the GroupWise Messenger AgentThis is a slick way for your users to install the GroupWise Messenger client. Your users go to a location via their Web browsers and can install the GroupWise Messenger client from there. You don't even have to set up a Web server to do this; you simply have to enable this feature on your GroupWise Messenger Agent along with a few other steps. Configure the GroupWise Messenger Client Extractor FileThis is an interesting concept. The GroupWise Messenger client is actually compressed into an extractor file called NVLMSGR.EXE. This file is located in the \Novell\NM\ma\software\client\win32 directory. This file is a self-extracting zip file of the GroupWise Messenger client, including the SETUP.CFG and the SETUP.INI files. The NVLMSGR.EXE file does not ship from Novell. It is actually generated the first time your GroupWise Messaging Agent loads. In fact, each time your GroupWise Messaging Agent loads, it checks to see that the client extractor NVLMSGR.EXE file is already created. The log will read as follows: Client extractor already exists . . . Client extractor successfully built . . . Now, imagine that you tweaked your SETUP.CFG file. However, that change is not incorporated into the NVLMSGR.EXE file. To fix this, delete the NVLMSGR.EXE file, and then bring the GroupWise Messaging Agent down and back up.GroupWise Messaging Agent will re-create the file, and of course incorporate your newly created SETUP.CFG file. Here are step-by-step instructions for doing this:
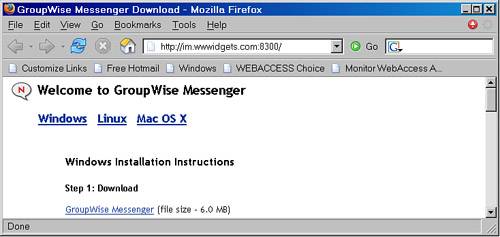
The GroupWise Messaging Agent will generate a newly configured NVLMSGR.EXE file. You should see the Messaging Agent report that it built the client extractor. The GroupWise Messenger client extractor can now be used in a couple of ways. The next two sections talk about how to use the NVLMSGR.EXE file. Install the GroupWise Messenger Client Through a Web BrowserThis section walks you through the steps involved with installing the GroupWise Messenger client through a Web browser. Follow these steps:
This method is slick in some ways, but it still has some manual elements to it. Users must download the *.EXE file and then run it. I like the next method the best, because users aren't required to do much of anything. Installing the GroupWise Messenger Client Along with the GroupWise Windows Client InstallationThis method requires no intervention on the part of your users. This method requires you to read Chapter 12, "Administering the GroupWise Client," and understand it. Chapter 12 deals with how to install the GroupWise client. This section dovetails into the solutions already explained in Chapter 12. Installing the GroupWise Messenger Client Along with a GroupWise Windows Client Mapped Drive InstallationAs a prerequisite to this section, be sure to read the section in this chapter titled "Configure the GroupWise Messenger Client Extractor File," which explains how to configure a GroupWise Messenger client extractor file. This method assumes that you already have a GroupWise Software Distribution Directory with a CLIENT directory that is already configured for installing the GroupWise Windows client. After having done so, follow these steps:
Figure 29.8 shows a GroupWise SDD configured to also support the GroupWise Messenger client installation. Figure 29.8. A GroupWise SDD with GroupWise Messenger installation support When users run the SETUP.EXE file from the SDD\CLIENT\WIN32 directory, it will install the GroupWise Windows client, and it will automatically run the GroupWise Messenger installation. Installing the GroupWise Messenger Client Along with a GroupWise Windows SETUPIP InstallationAs a prerequisite to this section, be sure to read the section in this chapter titled "Configure the GroupWise Messenger Client Extractor File," which explains how to configure a GroupWise Messenger client extractor file. This method assumes that you already have configured your Web server with a GW7CL directory (explained in Chapter 12). Follow these steps:
When users run the SETUP.EXE file from the SDD\CLIENT\WIN32 directory, it will install the GroupWise Windows client, and it will automatically run the GroupWise Messenger installation. Note You do not need to regenerate the SETUPIP.EXE file in order for this installation method to work. There are some additional methods for installing the GroupWise Messenger client. You can distribute the NVLMSGR.EXE through a mail message, and tell users to right-click the attachment and select Open. You can also put the NVLMSGR.EXE file on a website that your organization already has configured. |
EAN: 2147483647
Pages: 320