Saving Multiple Photos in the Background
| One thing I never liked about the previous version of Camera Raw was that working with multiple files at the same time just wasn't possible. If editing each individual photo wasn't enough of a pain, imagine saving 15 or 20 8-megapixel RAW files one at a time. It was time consuming and tedious. Now, in the latest version of Camera Raw, not only can I open multiple photos at once in the Camera Raw dialog and apply my settings to them, but I can also save them all at once. Even better, I can save them as a background process so I can still work while they're saving. Step OneThis trick really works best when you're using Camera Raw in Bridge instead of Photoshop. Mainly because its benefits come from the fact that you can still work in Photoshop while your photos are saving in the background. So, in Bridge select a bunch of RAW photos to open. Then press Command-R (PC: Control-R) to open the photos in Bridge's Camera Raw. 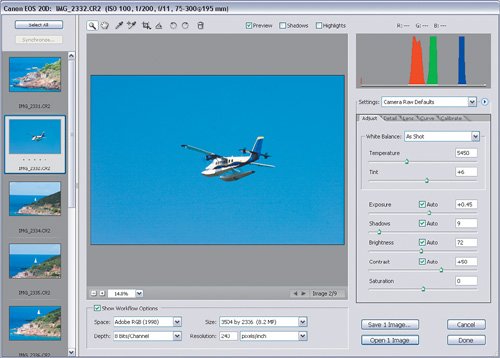 ©MATT KLOSKOWSKI Step TwoOnce Camera Raw opens, you'll see the first photo in the preview window, but you'll also see the others along the left side of the dialog. Go ahead and make your adjustments to the photos as you normally would. When you're done and you're ready to save the photos (yep, all of them at the same time) just press the Select All button at the top left of the dialog.
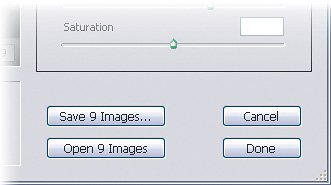
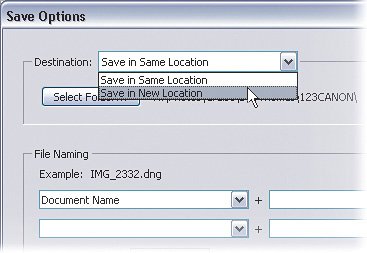
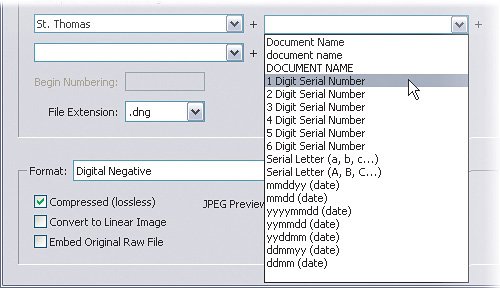
Step ThreeAfter the photos are selected, click the Save Images button at the bottom right of the dialog. Now you'll see the Save Options dialog open. Step FourStarting from the top, choose the Destination where you want to save your images. You can save them in the same location, or choose a new location by choosing Save in New Location from the pop-up menu or pressing the Select Folder button. Step FiveNext, you can choose how you want to name the files. Usually, I name them something descriptive from when or where I took the photos. You can also add serial numbers, serial letters, or a date to your images using the pop-up menus.
Step SixThe File Extension setting is probably the most important here. You'll need to decide what format you want to save these photos in. For this example, we're going to use JPEG. When you change this in Windows, you'll notice the Format section below automatically updates with options relating to whatever format you chose. I'm leaving the Quality setting at 8 here. On a Mac, you'll first need to choose the file format from the Format pop-up menu. Then you can choose the File Extension setting.  Step SevenOkay, here's the cool part. Finally, you're ready to save the photos, so just press the Save button. The dialog will close and you'll be returned to the Camera Raw dialog. If you look directly above the four buttons at the bottom right of the dialog, you'll see a message indicating the progress of the photos being saved. What's really great is that you can now continue to edit other photos while Camera Raw is processing your photos in the background. Cool, huh? 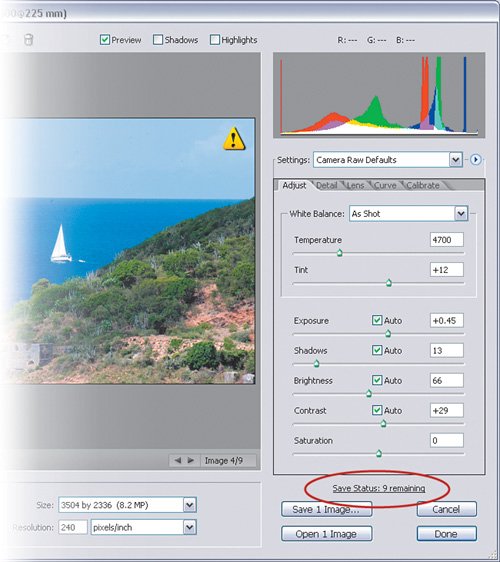
|


EAN: 2147483647
Pages: 113