107. Output a Windows Media (WMV) File  BEFORE YOU BEGIN BEFORE YOU BEGIN
4 About Video Capture 14 Add Media with the Adobe Media Downloader
 SEE ALSO SEE ALSO
109 Output a QuickTime File 111 About Burning to DVDs
107. Output a Windows Media (WMV) File  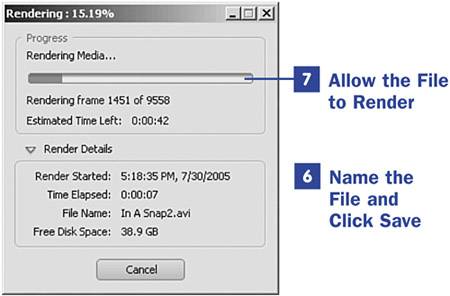
Windows Media Video (WMV) is a popular format primarily because it plays well in Windows Media Player, a free media player that comes with the Microsoft Windows XP operating system. The WMV file format can also be compressed small enough to make it a great choice for email or websites, and the quality can be rather good. If bandwidth is an issue, this is a good option. A WMV file can be scaled to allow streaming over dialup and DSL connections and even for portable devices. If any of these options is your goal, consider outputting your Premiere Elements movie project as a WMV file. 1. | Open the Export Windows Media Dialog Box and Choose Export Preset
Choose File, Export, Windows Media from the menu bar at the top of your screen to open the Export Windows Media dialog box.
If you want to output an DV-AVI file (as explained in 104 Output to an AVI Movie), you know that DV-AVI files are much too large for email or website use; therefore, the output process does not ask you to make choices to establish the size (or compression and quality) of the output file. WMV, MPEG, and QuickTime formats, however, all provide you the ability to choose how the file will be viewed most often; you make a selection by choosing a preset.
When you choose one of the presets in the Export Windows Media dialog box, Premiere Elements automatically sets all the default settings based on that preset. The preset options are, broadly, For Broadband, For Dialup, and For Wireless. Each preset has an additional number of options based on the speed of the viewer's connection.
Select a preset option from the pane on the left side of the Export Windows Media dialog box; look at the description of the selection on the left.
After you have selected an output format, continue with step 2 to set more advanced options; if you do not need to make any advanced settings changes, skip ahead to step 6.
| 2. | Click Advanced (for Advanced Users)
If you have a need to change your output settings, click the Advanced button at the bottom of the Export Windows Media dialog box to open the Export Settings dialog box.
| 3. | Change Export Settings
The Export Settings dialog box has four sections that allow you to change various properties of your output file. The Export Settings section includes the file Format (not changeable) to which you are outputting, the Preset (which you selected in step 1), and Comments (type a brief description of the settings you are creating). Enable the Export Video option to export the video tracks; deselect this option to prevent exporting video tracks. Enable the Export Audio option to export the audio tracks; deselect this option to prevent exporting audio. The Summary section summarizes the current property settings.
| 4. | Change Video Settings
The Video Settings appear on a tab just below the Export Settings in the Export Settings dialog box. In this section are three tabs you can navigate between. The changeable properties on the Video tab are Video Codec, Allow interlaced processing, Encoding Passes, Bitrate Mode, Frame Width [pixels], Frame Height [pixels], Frame Rate [fps], Pixel Aspect Ratio, Decoder Complexity, Keyframe Interval [seconds], Buffer Size [seconds], and Average Video Bitrate [Kbps]. For additional information on most of these settings, see 104 Output to an AVI Movie.
| 5. | Change Audio Settings
By clicking on the Audio tab, you open a panel of audio settings. The available Audio settings are Audio Codec, Encoding Passes, Bitrate Mode, and Audio Format. For additional information on these settings, see 104 Output to an AVI Movie.
 TIP TIP
Click the Audiences tab to choose between Compressed and Uncompressed. The audience you are concerned about is mainly related to the Internet connection speed. If the people viewing the file have a dialup connection, you want a compressed file; if your audience uses a DSL connection, an uncompressed file might be best. If you have made changes to the advanced settings that you want to save, click the Save button at the bottom of the Export Settings dialog box. If you have not made any changes or do not want to save the changes you have made, click Cancel.
| 6. | Name the File and Click Save
After clicking Save or Cancel, you return to the Export Windows Media dialog box (back where you selected the preset). Click the OK button to open the Save File dialog box. Choose the destination location for the file, type the name of the file, and choose the Export Range. Here you have the option to export the Entire Sequence (project) or just what is under the Work Area Bar.
Click the Save button to begin saving your movie as a WMV file. After you click the Save button, the Rendering dialog box opens.
| 7. | Allow the File to Render
The file must be rendered, just as if you were burning it to a DVD. The rendering process varies in time depending on the size of your project and the speed of your computer. The Rendering dialog box shows you the progress and estimated time remaining. If you decide not to continue rendering the file and click Cancel, the WMV file will not be created.
Now you have a file that can be used on a web page, emailed to a friend, or possibly even put onto a CD (size permitting). The file can also be viewed in Windows Media Player and even imported into Windows Movie Maker.
|
|