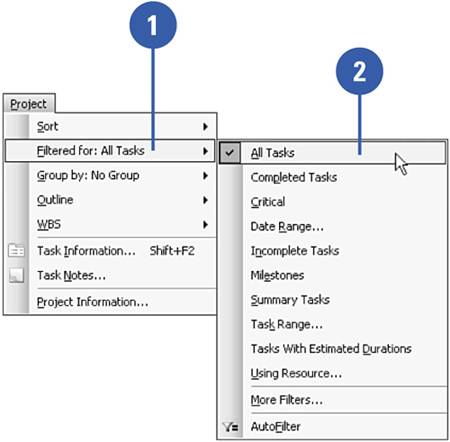
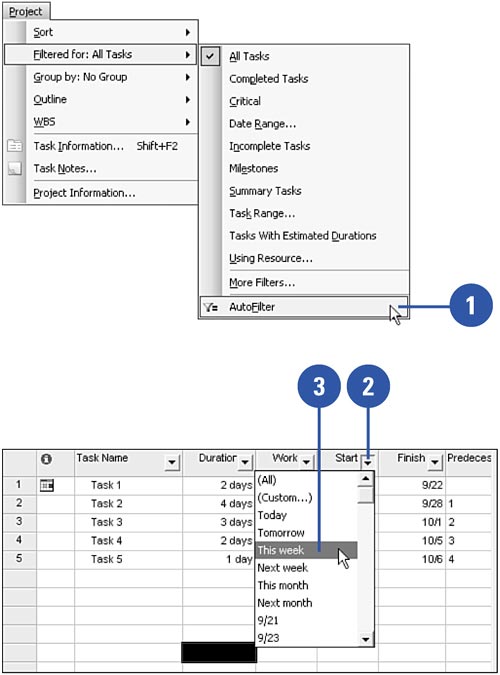
Working with Filters


Some projects are pretty simple ”they contain only a few tasks or resources, and it's easy to keep track of them onscreen in your views. However, there are those projects that are very large and take up many, many screens of data. Finding that certain set of tasks or resources you are looking for in this situation can be difficult. Filters allow you to limit the data shown onscreen so it's easier to find the information you need.

Applying a Filter to a View

graphics/one_icon.jpg Click Project, Filtered For.

graphics/two_icon.jpg If the filter you want to apply is shown in the menu, select it to apply that filter.

graphics/three_icon.jpg If the filter is not shown on the menu, click on the More Filters item.

graphics/four_icon.jpg Select the filter you want to apply.

graphics/five_icon.jpg Click Apply.

graphics/10inf08.jpg

Removing a Filter from a View

graphics/one_icon.jpg Click the Project, Filtered For menu item.

graphics/two_icon.jpg Select All Tasks from the menu.

graphics/10inf09.jpg

Using Autofilter

graphics/one_icon.jpg Click the Project, Filtered For, AutoFilter menu item.

graphics/two_icon.jpg Click on the Auto Filter control in the field you want to filter.

graphics/three_icon.jpg Select the value for which you want to filter. Only tasks or resources that meet the criteria you select will appear after you click on the value.

graphics/10inf10.jpg


Show Me. Microsoft Office Project 2003
Show Me Microsoft Office Project 2003
ISBN: 0789730693
EAN: 2147483647
Year: 2003
Pages: 204

flylib.com © 2008-2017.
If you may any questions please contact us: flylib@qtcs.net