| A FEW COOL MOVES TO ADD BOTH CONTRAST AND DETAIL TO IMAGES WITH LOTS OF FLESHTONE Here's another trick I learned from Photoshop color genius Dan Margulis, and it uses channels to pull off two important adjustments: (1) it adds contrast to the fleshtone areas in your image without oversaturating the color, and (2) it does wonders for adding detail and crispness. The first project lays out how it's done, the second project shows how to deal with other areas in your image that may be affected while you're focused on the fleshtones, and the last project shows how to take the same basic concept and apply it to images that don't have fleshtones. Step 1. | OPEN THE PHOTO THAT NEEDS ADDITIONAL CONTRAST AND DETAIL
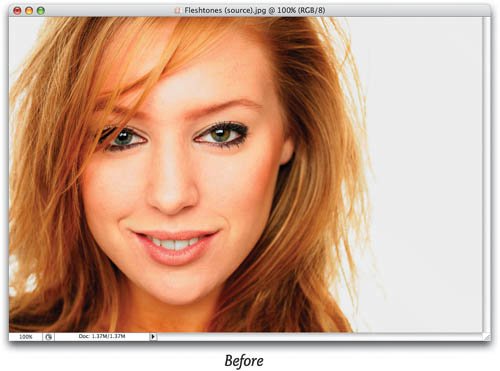
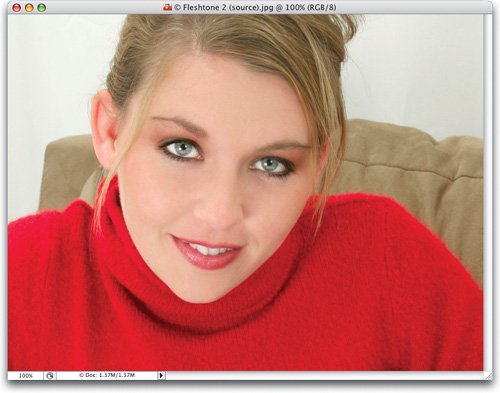
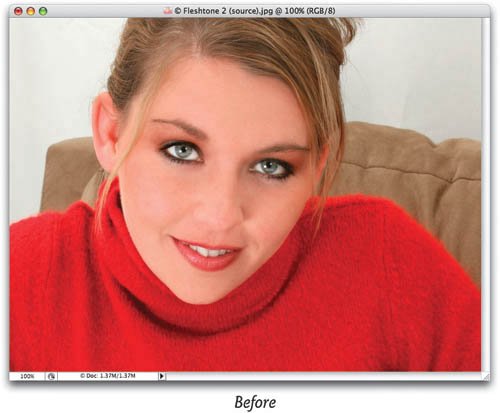
Open the portrait you want to add more contrast and detail to using channels. The photo shown here is actually pretty decent. The color is fairly balanced and the contrast isn't bad at all, but we're going to use channels to create even more contrast.
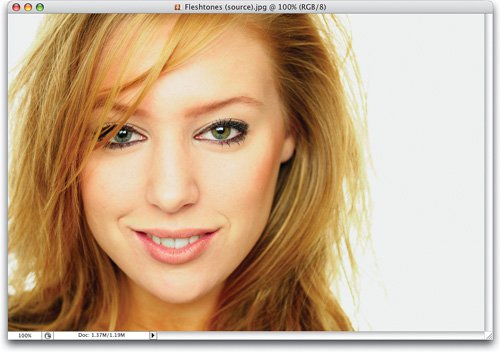 ©ISTOCKPHOTO/PER ARNE BRATTEMO | | | Step 2. | VIEW THE INDIVIDUAL CHANNELS
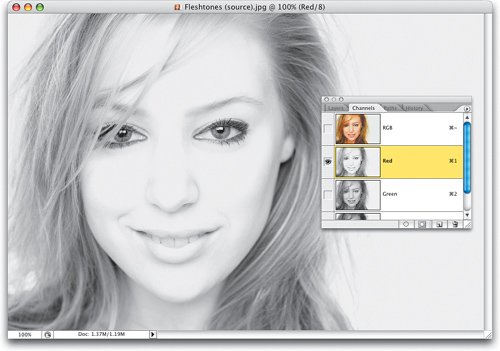
If you look at the individual channels, you can see how the image is made up. For example, here's a look at the Red channel, which is too light and doesn't hold a lot of detail in fleshtone images, so it's not the one we're interested in.
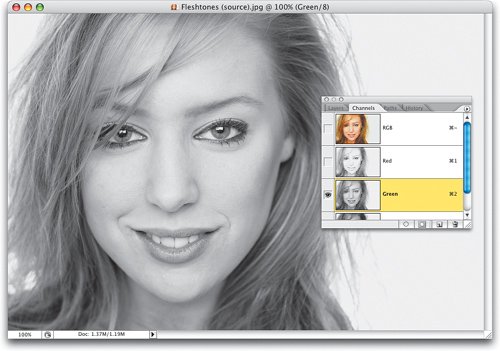
 | Step 3. | FOR IMAGES THAT ARE PREDOMINANTLY FLESHTONES, THE GREEN CHANNEL WILL BE YOUR BEST BET
When it comes to fleshtones, it's the Green channel that normally holds the most detail, so you don't generally have to look at the Red or Blue channel at all when it comes to an image that is primarily a fleshtone (like this one); you can just assume the Green channel will be the target channel you'll use in the next step. The only time I'd even check the other channels is when the Green channel just doesn't work, which in my experience has been fairly rare, but heyit happens.
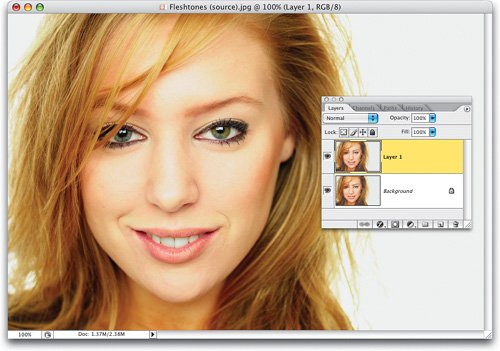
 | | | Step 4. | DUPLICATE THE BACKGROUND LAYER
Go to the Layers palette and press Command-J (PC: Control-J) to duplicate the layer. Right now, this duplicate of the Background layer has three color channels, right? One red, one green, one blue. But, what you're going to do in the next step is replace all three channels on this layer with just the Green channel, the channel with all the detail.
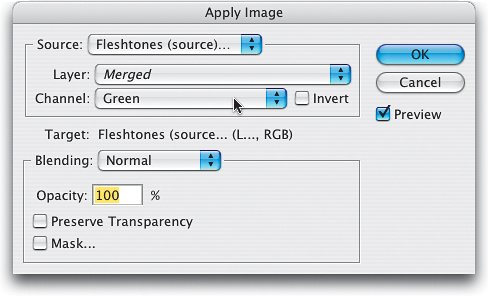
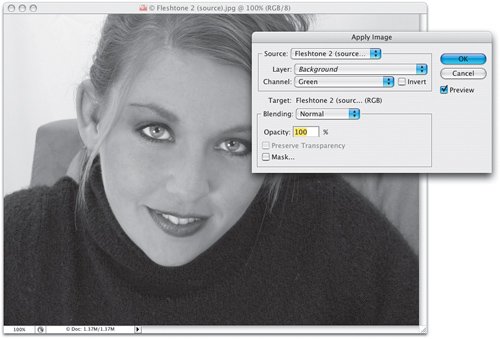
 | Step 5. | CHOOSE APPLY IMAGE, TARGET THE GREEN CHANNEL, BLENDING SET TO NORMAL, AT 100% OPACITY
Go under the Image menu and choose Apply Image. When the Apply Image dialog appears, from the Channel pop-up menu choose the Green channel. Change the Blending mode to Normal, and make sure the Opacity is set to 100% (as shown here), then click OK.
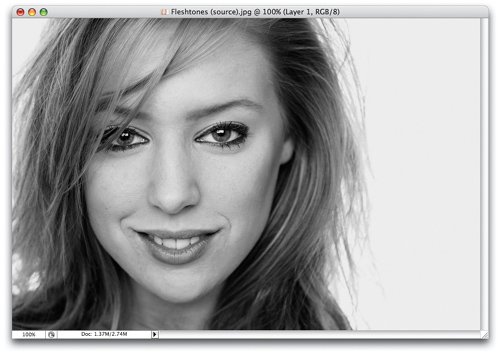
 | | | Step 6. | CLICK OK TO SEE YOUR NEW GREEN CHANNEL LAYER
When you click OK, your full-color duplicate layer is replaced with the Green channel, so now it will look like a black-and-white photo (as you can see here).
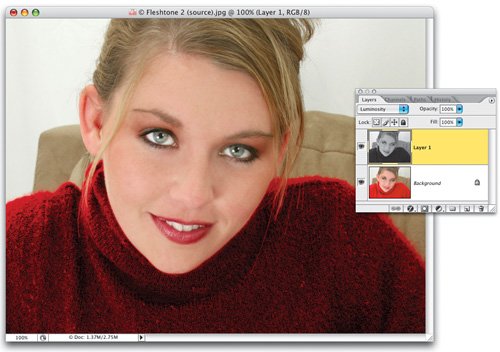
 | Step 7. | CHANGE THE LAYER'S BLEND MODE TO LUMINOSITY
Now, it's this black-and-white layer (which is really just the Green channel) that we'll use to create more contrast in our image. To do that, simply change the blend mode of this black-and-white layer from Normal to Luminosity at the top of the Layers palette (as shown here).
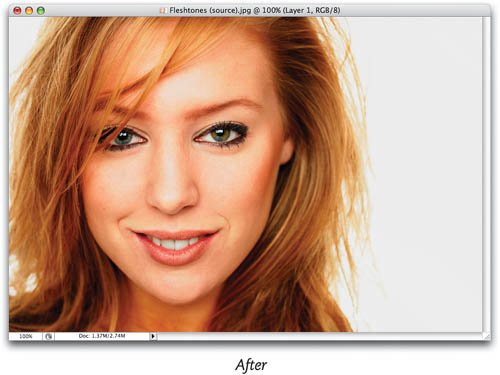
 | | | Step 8. | HERE'S A BEFORE AND AFTER
That's ityou've just greatly enhanced the contrast in your image, without messing up the color. The original photo is shown on the top here, and the richer, more contrasty version is shown on the bottom. Now, in this instance, adding this contrast didn't cause any problems, but in some images, adding this contrast might take away color from another part of your image that isn't fleshtone. Don't worry, as you'll see in the next step there's a trick for that, too.
  | | | Step 9. | OPEN A NEW PHOTO AND DUPLICATE THE BACKGROUND LAYER
Here's a different fleshtone photo, and we want to add more contrast to the skin without messing up any of the other colors. Start by duplicating the Background layer by pressing Command-J (PC: Control-J).
 ©ISTOCKPHOTO/JAIMIE D. TRAVIS | Step 10. | APPLYING THE GREEN CHANNEL HERE MAKES HER SWEATER TOO DARK
This is a portrait, so when it comes to making fleshtones have more contrast, we can pretty much bet on the Green channel to take us there. So, go under the Image menu and choose Apply Image. When the dialog appears, for Channel choose Green, make sure the Blending is set to Normal, and the Opacity is set to 100%. You get an instant onscreen preview at this point, and you can already see that her red sweater is about to get pretty darn dark, but that's okay for now, just click OK to add the extra contrast to the fleshtone areas.
 | | | Step 11. | YOU COULD LOWER THE OPACITY A BIT, BUT YOU'LL LOSE YOUR DETAIL
Now change the layer's blend mode to Luminosity. Yup, that sweater is pretty dark now. You can leave it as is and enjoy the extra detail in the sweater, but it's so easy to bring the original sweater color back while still maintaining the extra detail and contrast in her fleshtones that you may as well "do it right" (as you'll see in the next step).
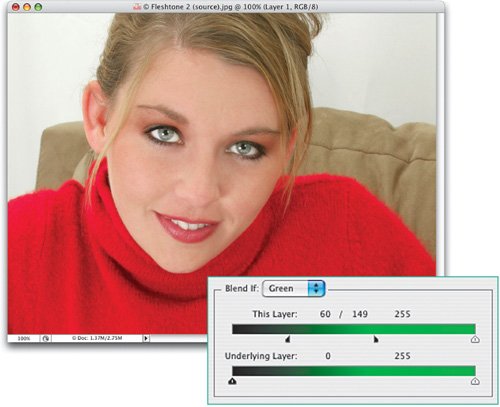
 | Step 12. | USE THE BLEND IF SLIDERS, DRAG THE TOP LEFT SLIDER TO THE RIGHT TO BRING THE SWEATER BACK
To bring back the original sweater color, choose Blending Options from the Add a Layer Style pop-up menu at the bottom of the Layers palette, and in the Blend If section choose Green (because you blended the Green channel earlier). Now, drag the top left slider (for This Layer) to the right until her original red sweater reappears. When it's almost fully in place, hold the Option key (PC: Alt key) and then continue dragging to the right. This splits the slider and creates a much smoother transition, which will be important to make sure the edges of her sweater don't look jaggy.
 | | | Step 13. | A BEFORE AND AFTER, WITH THE SWEATER STILL INTACT
Here's the original image (on the top) and our new version with the enhanced detail and contrast in just the fleshtones (on the bottom).
  | | | Step 14. | IT DOESN'T JUST WORK ON FLESHTONES. START BY DUPLICATING THE LAYER
Now, what do you do if the image doesn't have any fleshtones? Can you still add contrast and detail for images without fleshtones? Absolutely! You just won't automatically choose the Green channelyou'll have to look at all three channels and choose the channel with the most contrast (we'll do that in the next step). Start by pressing Command-J (PC: Control-J) to duplicate the Background layer.
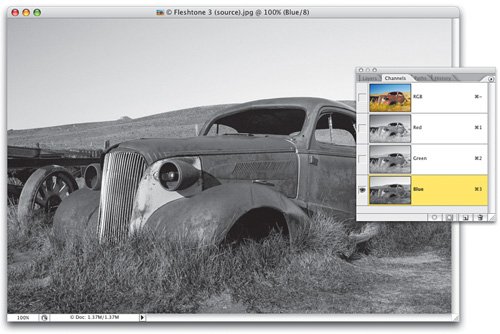
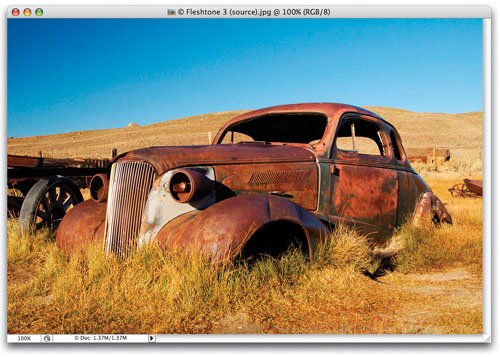 ©ISTOCKPHOTO/JIM PARKIN | Step 15. | FIND THE CHANNEL WITH THE MOST CONTRAST
Use the keyboard shortcuts to toggle through the Red, Green, and Blue channels and see which one seems to have the most contrast. In this image, the Blue channel seems to have the most contrast, so make note of that and go back to the RGB Composite channel.
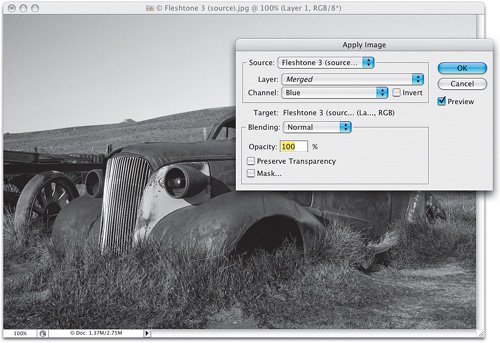
 | | | Step 16. | CHOOSE APPLY IMAGE, AND TARGET THE BLUE CHANNEL
Go under the Image menu and choose Apply Image. This time choose Blue from the Channel pop-up menu, then click OK (you can see a preview of how your duplicate layer will lookit's a nice contrasty black-and-white image now).
 | Step 17. | CHANGE THE LAYER BLEND MODE TO LUMINOSITY
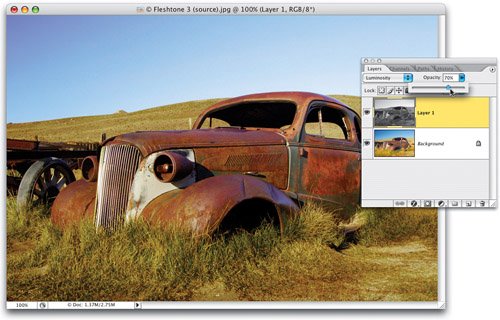
Go to the Layers palette and change the layer's blend mode from Normal to Luminosity. This blends the two together giving you a very contrasty version of your original image. Since the Blue channel was so dark, it might seem a bit too contrasty (whether it is or isn't is totally your callit's your photo, so you can decide what's right for you).
 | | | Step 18. | IF IT LOOKS TOO DARK OR CONTRASTY, LOWER THE LAYER OPACITY
If you do decide that this blending move was a bit too intense (too contrasty), you can simply lower the Opacity setting of this layer (as shown here) until the image looks about right to you (again, there it isto youyou are the bottom line on what looks right to you).
 | Step 19. | IF YOU'D PREFER TO BRING BACK THE ORIGINAL SKY, USE THE TOP RIGHT BLEND IF SLIDER
When I look at this new version of the photo, I really like how the car and the ground look, but I kind of miss the deep blue sky from the original Background layer. If you miss it, too (and I know you do), you know how to bring it back now, right? The same way you did the red sweater in the previous projectusing the Blend If sliders in the Blending Options layer style dialog. This time, for Blend If you'll choose the Blue channel, since it's the channel you used to create all this contrast. Drag the top right slider to the left until the original sky begins to creep into your photo (as shown here).
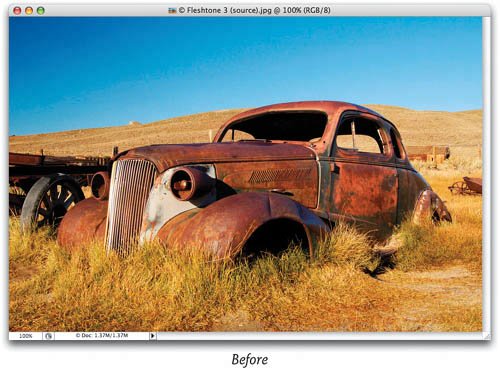
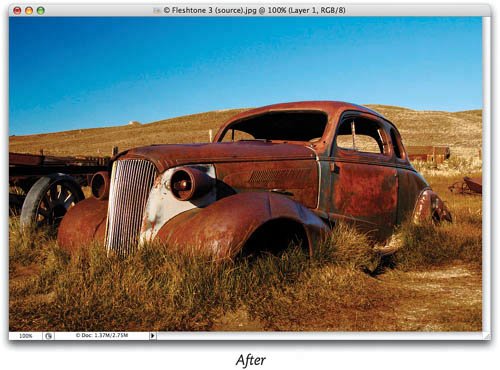
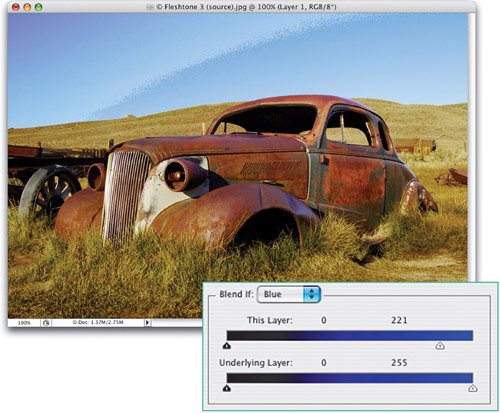 | | | Step 20. | A BEFORE AND AFTER, WITH ADDED DETAIL AND CONTRAST, BUT THE ORIGINAL SKY IS INTACT
Keep moving the slider to the left until the old sky is fully in place, then "split the slider" (you know how by now) to make the final transition smoother. Here's the original photo on the top, and our channel-tweaked version on the bottom, with increased contrast on the car and the ground, but with the original sky still intact.
  |
|