Automating Your Camera Raw Processing
|
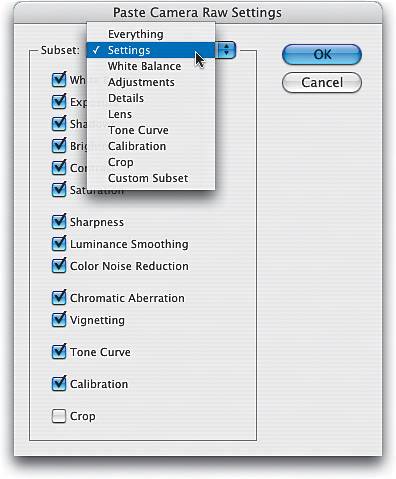
| One of the coolest things about Camera Raw in Photoshop CS2 is the level of automation. By that I mean that when you apply changes to one image, you can easily and quickly apply that same set of changes to a host of other imageseven while you're working on other things, it's still processing in the background. Sweeeet! Method OneThis first one might really surprise you: You can edit multiple RAW images and apply settings to all of them at once, without ever having Photoshop open. That's right, you can do it all from the Adobe Bridge. Just Command-click (PC: Control-click) on the thumbnails you want to edit, press Command-R (PC: Control-R), and those photos will open in Camera Raw (right from the Bridge, without even launching Photoshop). Click on the Select All button in the top-left corner of the Camera Raw dialog to select all your open photos. Now, any changes you make to your main image will be applied to all open images. 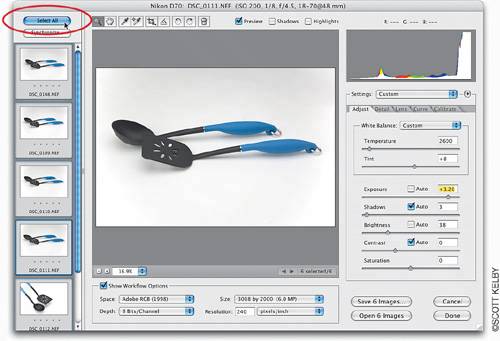 Tip When you click the Save Images button (and choose your settings in the resulting Save Options dialog), Camera Raw will batch process the files while you're correcting your images. A status link will appear above the Save Images button. Click on the link to see the status of your processed images.  Method TwoIf you've made an adjustment to one photo that was taken using a particular camera under a particular lighting situation (like a Nikon D70 in direct sunlight), you can save those changes and apply them in one click to other RAW images from right within the Bridge. First, save your settings by going under the Settings flyout menu (it's the little right-facing arrow to the right of the Settings pop-up menu) and choosing Save Settings. To apply those settings to another image(s), click on that photo in the Bridge, go under the Edit menu, under Apply Camera Raw Settings, and choose your saved setting. 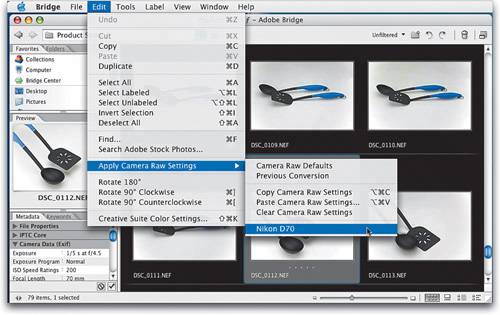 Method ThreeIf you've made changes to a RAW file, you can instantly return to your camera's original default settings by clicking on the photo in the Bridge, going under the Edit menu, under Apply Camera Raw Settings, and choosing Clear Camera Raw Settings. This removes your edits (or the default Camera Raw settings) and replaces the original default settings from your camera. 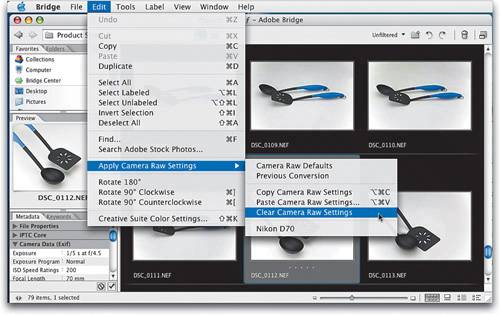 Method FourIf you've applied some Camera Raw adjustments to a file, you can copy-and-paste those adjustments to any other files in the Bridge you like. Start by clicking on the thumbnail of an adjusted RAW photo. Then, go under the Bridge's Edit menu, under Apply Camera Raw Settings, and choose Copy Camera Raw Settings. Now Command-click (PC: Control-click) on the thumbnails of any other RAW photos that you want to have those same settings, and then go back under the Edit menu, under Apply Camera Raw Settings, and choose Paste Camera Raw Settings. This brings up a dialog asking which of those copied settings you want applied: everything or just certain settings. Choose what you want from the Subset pop-up menu or click on the checkboxes to turn on/off the items you want, and then click OK. Those checked settings will be applied to your selected images. How cool is that? 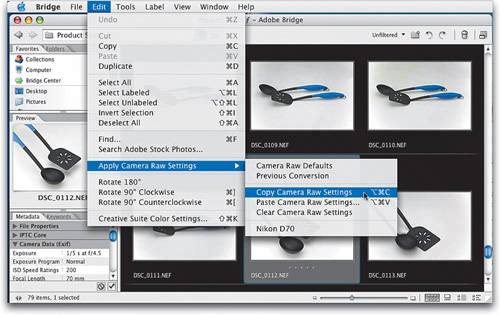 |
|
EAN: N/A
Pages: 187