Shape Text
Once you create a text box, you can reshape the text box and the text within it using the path editing tools that are explained in Chapter 6. Or you can start with a shape and then either align the text to a path or place the text within the path .
You can reshape any text box using path editing tools such as the Pen, Pencil, or Selection tool. As you do, text flows to fill the changed path. If you reshape or resize a text box so that text no longer fits inside it, the oh-so-tiny overflow icon (the plus sign) appears on the right edge of the text box. The following steps illustrate just one technique for converting a standard rectangular text box into a shaped text box.
Follow these steps to reshape a text box:
-
Select an existing rectangular text box, or create one.
-
Use the Add Anchor Point tool (in the Pen tool tearoff in the Toolbox) to add a few new anchor points to the text box.
-
Use the Convert Anchor Point tool to change anchor points into smooth points.
-
Manipulate the anchor control points to change the contours of the text box. Figure 10-9 shows the outline of a text box being edited to match the shape of the hip-hop illustration so that text will flow within the drawing.
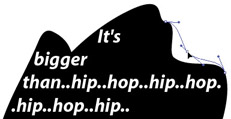
Figure 10-9: Editing a path to alter the flow of text within it
By changing the location and curve attributes of the anchors in your text box, you can create text that smoothly flows around an adjacent shape.
| Note | To review how to edit paths, refer to the discussion of the Pen tearoff tools in Chapter 6. |
When you edit anchor points with the Direct Selection tool to change the path of an object filled with text, you change the path but you don t alter the font size , leading, or other attributes of the text itself.
You can also interactively resize text as you resize the text box . To resize text as you resize a text box, you can use either the Scale tool or the Free Transform tool. Sometimes the Free Transform tool is more effective, because it s a better choice for controlling sizing interactively and it can also be used to rotate or even mirror text (for special effects).
As you resize a text box with the Scale tool or the Free Transform tool, you ll see the text get wider and/or higher depending on how you resize the text box. Text spacing (both line spacing and word and letter spacing) adjusts proportionally as you resize the text box. Figure 10-10 shows an example of text and the text box being resized to make both longer.
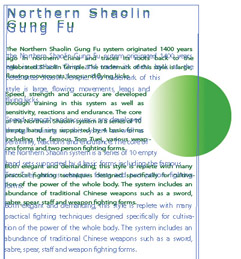
Figure 10-10: Resizing a text box with the Free Transform tool transforms both the size and shape of the text box and the size and shape of the text.
Place Text in a Shape
Rather than starting with a text box and reshaping it, you can start with an existing drawing and simply fill it with text. To fill an existing path with text, you use the Area Type tool in the Type tool tearoff. Follow these steps to fill a path with text:
-
Create a path with any drawing tool, or use an existing path. It doesn t have to be a closed path.
-
Choose the Area Type tool from the Type tool tearoff in the Toolbox.
-
Click the outline of the path.
-
Start typing. The text will appear inside the path, as shown in Figure 10-11.

Figure 10-11: Using the Area Type tool to enter type in an objectTip When you use a path as a holder for Area Type, the fill and stroke properties of that object are removed, and the only role the shape plays is to form a container for the type. If you want to preserve the fill and stroke attributes of a shape and use it as an envelope for Area Type, you need to first duplicate the object, and then sacrifice one of the two copies of the shape to serve as a type container.
Format Area Type Options
You can define several attributes for Area Type. These will affect type that you create with the Area Type tool inside a path. You can set a fixed number of columns, adjust gutter width (space between columns ), and define how far the text should be offset from the path.
You get to the Area Type formatting options by selecting Type Area Type Options from the menu. When you do, the Area Type Options dialog box opens. The Width and Height boxes can be used to adjust the size of the envelope holding the type. Two-column text, for instance, can be handy for flowing text through shapes such as the one in Figure 10-12.
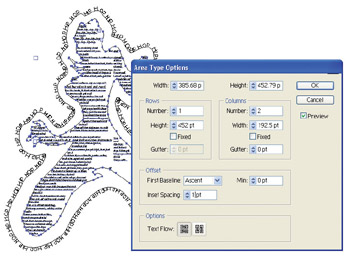
Figure 10-12: Two-column text in a text area
The Insert Spacing box defines the amount of padding between the type and the shape outline. The other Offset options (available from the First Baseline and Min) drop-down menus define the type and amount of shifting of text within an area. You can use the Preview check box to test these features before clicking OK.
Align Type to a Path
Aligning type along the outside of a path is similar to aligning it along the inside of a path. You just use a different tool: the Path Type tool.
To attach type to a path, first create the path or use an existing path. Then select the Path Type tool from the Type tool tearoff and click the path to which you want to align the text. You can then simply begin to type (or paste text from the clipboard). Figure 10-13 shows type being entered on a circle.

Figure 10-13: You can use normal typing techniques to enter type on a selected path.
| Tip | Try this to get comfortable flowing text: Use the Selection tool to select a text box with its text. When a text box is selected, you can move it (or delete it or copy it). You can select text within a text box by double-clicking the box with the Selection tool. This process automatically activates the Type tool. To select a portion of the text within a text box, click and drag (or hold down shift while using the keyboard cursor keys). Triple-click with the Type tool to select an entire paragraph of text. With the Type tool and a text box selected, press command - a ( ctrl - a ) to select all text in a text box. To select either a text box or only the text, use the Direct Selection tool. This tool is useful for resizing a text box without changing the size of the type, but it's tricky to do because most text box outlines are not stroked (that is, they are invisible). Use Outline view to more easily select the text box outline with the Direct Selection tool. |
When you attach type to a path, the path stroke changes to no stroke. Illustrator assumes that you created the path only to use as a guide for the text, and you don t want it to be visible. If you want to see the path to which the text has been attached, you can select that path again and assign a stroke color and other stroke attributes.
When you select text on a path, diamond-shaped icons define the beginning and end of the text. The second of these icons (the one that appears after the text) can be adjusted to enlarge or contract the text area. To adjust the location of the text along the path, use the Selection tool to select the I-beam cursor that appears at the beginning of the text, and drag along the path to reposition the text, as shown in Figure 10-14.

Figure 10-14: Moving text along a path
| Tip | You can click and drag on the center I-beam that appears when the path text is selected to flip the orientation of the text on the path. |
Change Path Type Options
Illustrator CS includes five new options for controlling the flow of text on a path. With Path type selected, you can access these options by selecting Type Type on a Path, and choosing one of the five options from the submenu. The Rainbow, Skew, 3-D Ribbon, Stair Step, and Gravity effects are illustrated in Figure 10-15.
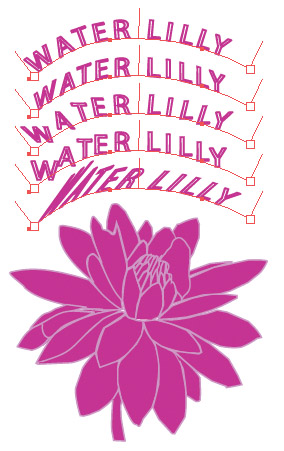
Figure 10-15: New path type effects in Illustrator CS
You can further tweak how text paths appear by opening the Path Type Options dialog box. You can access this by first selecting type on a path and then choosing Type Path Type Path Type Options from the menu.
The Effect drop-down menu in the Path Type Options dialog box allows you to change which type of type path effect to use. The Flip check box flips text both horizontally and vertically. The Align menu lets you align text along the Ascender (top), Descender (bottom), Center, or Baseline of text.
| Note | The difference between descender alignment and baseline alignment is that descender alignment aligns using the bottom of characters , such as the lowercase g or j, that go below the baseline of text. |
EAN: 2147483647
Pages: 175