Set Up a New Document
To create a new document, choose File New, or press COMMAND-N ( CTRL-N ). The New Document dialog box opens, allowing you to define the size and color system for your illustration. The New Document dialog box reflects the settings you last used to define your document, so yours might well look different than the one in Figure 2-1.
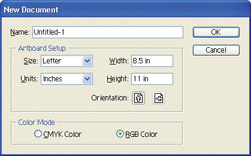
Figure 2-1: Creating a new document
| Note | If you are starting Illustrator for the first time, you might see the Welcome to Adobe Illustrator CS splash screen. Unchecking the Show this dialog at startup check box will make this superfluous interface go away the next time you launch Illustrator. |
If you wish, you can simply accept the existing settings in the New Document dialog box. In that case, you can change document settings later by choosing File Document Setup. But in general, you ll want to define document settings in advance that correspond to the type and size of artwork you are creating.
The New Document dialog box presents you with three decisions: you need to assign a filename to your illustration, you need to set up your illustration s workspace (called the artboard ), and you need to decide which set of colors to use in your illustration.
Assigning a name in the New Document dialog box does not save your file. But when you choose File Save from the Illustrator menu, the document name you assign will be the default filename. The size of the artboard and the color palette you select should reflect how you plan to produce your illustration.
Set Up the Artboard
You should define an artboard size that corresponds to the size of your final output and a color palette that will be the same as the one used when your illustration is produced.
The artboard defines the size of the area of the workspace that will be produced when you print your illustration. Figure 2-2 shows the artboard, along with the scratch area outside the artboard.
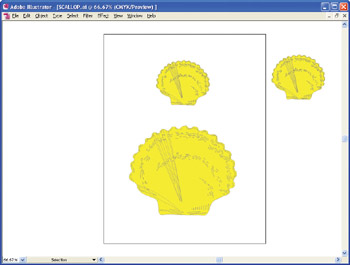
Figure 2-2: Only objects on the artboard print.
The imageable area is the part of your illustration that will be printed, but all objects in the workspace are saved with your file.
The artboard is also important when you are preparing illustrations for the Web. You can size the artboard to 800 —600 pixels, or other dimensions typical of the size of web browsers.
To define the size of the artboard, follow these steps:
-
In the Artboard Setup area of the New Document dialog box, select a unit of measurement for your artboard from the Units drop-down list. Typically you will chose pixels for images headed for the Web and inches, picas, points, millimeters, or centimeters for illustrations destined for printed output.
-
Use the Size drop-down list to choose from one of the preset output sizes, or choose Custom from the Size drop-down list and use the Width and Height boxes in the dialog box to define a size not listed.
-
Use the Orientation buttons to toggle between portrait and landscape orientation for your artboard. The sideways icon (which looks like a horizontal piece of paper) represents landscape orientation.
Caution Don't click OK just yet! You still need to define a color mode for your document.
Define Color Options
The New Document dialog box offers two options for defining colors: Cyan- Magenta -Yellow-Black (CMYK) or Red-Green-Blue (RGB).
You will explore the use of color in artwork in many chapters of this book, and you ll look at defining print color modes in detail in Chapter 22 and web color in detail in Chapter 23. But for now, a quick introduction to the two basic coloring methods will be enough to get you started on your illustration.
RGB is a method of defining colors displayed on monitors . As you might guess, these colors are generated by combining various levels of the colors red, green, and blue. Figure 2-3 shows a graphic intended for the Web using the RGB color scheme. Note that the Color palette displays colors defined as combinations of red, green, and blue.
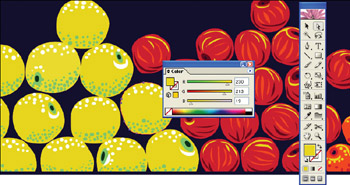
Figure 2-3: Using the RGB Color palette to select a color
In the CMYK color scheme, cyan is a shade of green, magenta is a bluish purple, yellow is of course yellow, and black is represented with a K so as not to be confused with blue. These colors are applied in layers during four-color printing to produce a wide array of colors. Figure 2-4 shows an illustration using CMYK.
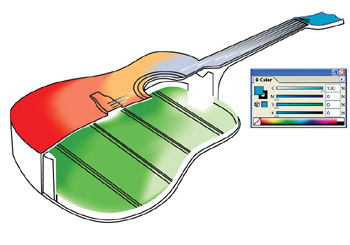
Figure 2-4: Defining colors using CMYK mode ”the selected color is pure cyan
| Note | There are many variations on these options. For example, a set of 216 RGB colors is supported by all (or mostly all) operating systems. These colors are commonly known as browser-safe RGB colors. |
If you change your mind about document settings, you can change them by choosing File Document Setup to open the Document Setup dialog box. Here you can change the size of your artboard. Or choose File Document Color Mode to open a pop-out menu that allows you to toggle between the CMYK (printed color) or RGB (web or monitor output color) modes.
In short, you will generally want to choose CMYK for printed output and RGB for monitor or web output.
Once you have selected a document name, artboard setup, and color mode, you can click OK to close the New Document dialog box and open your new file.
EAN: 2147483647
Pages: 175