Creating Installation Components
Creating Installation ComponentsThe .NET Framework provides the Installer class, which is defined in the System.Configuration.Install namespace. This class is specifically designed to help you perform customized installation actions. Understanding the Installer ClassThe System.Configuration.Install.Installer class works as a base class for all the custom installers in the .NET Framework. Some of the important members of the Installer class are listed in Table 14.2. Table 14.2. Important Members of the Installer Class
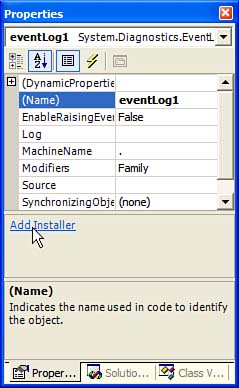
You can derive a class from the Installer class and override the methods listed in Table 14.2 to perform any custom actions. If you want the derived Installer class to execute when an assembly is installed by using a Web setup project or the Installer tool ( installutil.exe ), you need to apply the RunInstaller attribute on the class and set its value to true , like so: [RunInstaller(true)] The Installer classes provide the infrastructure for making installation a transactional process. If an error is encountered during the Install() method, the Rollback() method tracks back all the changes and undoes them, leaving the machine in the clean state it was in before the installation process started. Working with Predefined Installation ComponentsMost of the components available through Server Explorer have predefined installation components associated with them. For example, when you click the Add Installer link for an EventLog component, a ProjectInstaller class is created in the project and the installation component for the EventLog component is added to this class (see Figure 14.3). If you add more installation components (for example, a PerformanceCounter installation component) to this project, they are all added to this ProjectInstaller class. These installation components are actually added to the Installers collection of the ProjectInstaller class. Figure 14.3. The Add Installer Link adds a predefined installation component to your project. When you compile the project to build an EXE or a DLL file, the ProjectInstaller class is part of the output assembly. Deploying an Assembly That Contains the Installation ComponentsYou can deploy an assembly that contains installation components in two ways. These techniques are covered in the following sections. Deploying an Installation Component Using the Web Setup ProjectTo deploy an application that consists of installation components, you need to create a Web setup project as you normally would. However, this time, you use the Custom Actions Editor to deploy the necessary additional resources. At the time of deployment, the deployment project executes the ProjectInstaller class as a part of its custom installation action to create component resources. Deploying an Installation Component Using the Installer ToolYou can also use the command-line Installer tool ( installutil.exe ) to install the assemblies that contain additional component resources. To install the resources contained in an assembly named Assembly1.dll , you could use the following form of the installutil.exe command: installutil.exe Assembly1.dll You can also install resources contained in multiple assemblies, as follows : installutil.exe Assembly1.dll Assembly2.dll Assembly3.dll If you instead wanted to launch the uninstaller for installation classes stored in an assembly, you would use the /u or /uninstall option with the command, as follows: installutil.exe /u Assembly1.dll
Working with Installer ClassesYou can add your own Installer classes to a project to perform custom actions, such as creating a database on a target computer, during installation. These compiled installer classes from the project are then added to the deployment project as custom actions that are run at the end of the installation. The following are typical actions you would perform while creating a custom installer class:
|
EAN: N/A
Pages: 191