| As you may remember from Chapter 3, "Planning a Dynamic Site," there are three rather simple steps to follow. They are: -
Write the script that connects the Chat components to the Flash Communication Server. -
Build the room using the Drag and Drop components. -
Test and tweak. Connecting to the server requires you to place an application folderwe named ours "akbridgeChat"in the Flash Communication Server's Applications folder. When you have done that, you have to write the server-side script that will make the chat room function. In Chapter 3, we showed you how to create the script using Dreamweaver. Here's another method: -
Open Dreamweaver MX 2004 and create a new ActionScript Communications document. -
When a blank document opens, enter the following code: load("components.asc") -
Select File, Save As and save the file as a plain text document, named main.asc , to the OakbridgeChat folder you just created. -
Quit Dreamweaver MX 2004. Note Don't panic if you open the Flash Communication Server's Admin folder and notice the icon of the document just created has changed, as shown in Figure 16.3. When the file is placed in the folder, it is immediately associated with the Flash Communication Server MX. Figure 16.3. The icon for the main.asc text document will change when placed in the Admin folder. 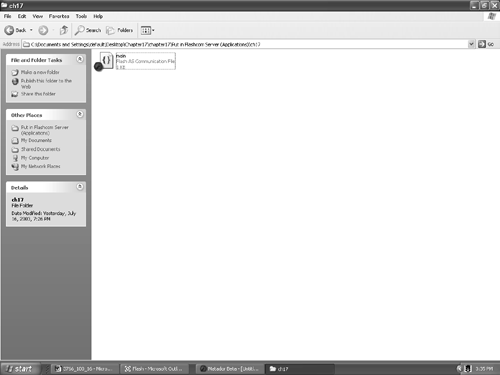
Assembling the Chat Room in Flash MX 2004 The Flash Communication Components are nothing more than "prebuilt" and fully-functioning movie clips. Before we had components, developers had to do a serious amount of coding and design work. If you do not see the Communication Components category in your Components panel, the components have not been installed into Flash. The components and full installation instructions are available at http://www.macromedia.com/software/flashcom/download/components/components.html. To assemble the chat room, follow these steps: -
Open the Components panel. If it isn't visible in your panel grouping, select Window, Development Panels, Components to open the Components panel. (Control-F7 for PC users. Command-F7 for Mac users.) When the panel opens, as shown in Figure 16.4, the Communications Components should be visible. Figure 16.4. The Communication Components offer you drag and drop functionality. 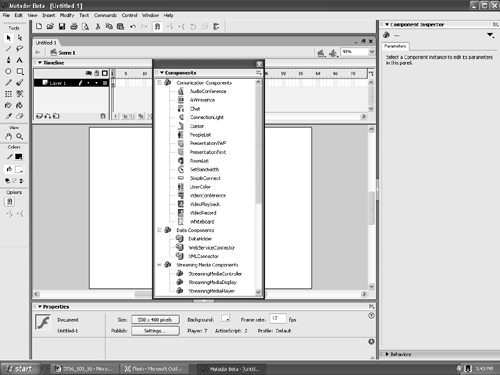 -
Drag the Chat component onto the stage. In the Property Inspector, change the height value to 300 pixels and give it an instance name of ch16_chat . Place the component on the right side of the stage, using Figure 16.1 as your guide. -
Drag the SimpleConnect component to the stage and place it according to the layout. -
Drag the SetBandwidth component to the stage and place it under the Simple Connect component. Give it the instance name of bandwidth_mc in the Property Inspector. -
Drag the PeopleList component onto the stage and place it as indicated in the design. Give it the instance name of peoplelist_mc in the Property Inspector. -
Drag the UserColor component onto the stage, and in the Property Inspector, give it the instance name of usercolor_mc . When finished, your layout should resemble Figure 16.5. Figure 16.5. The components for the chat room are in place on the Flash stage. 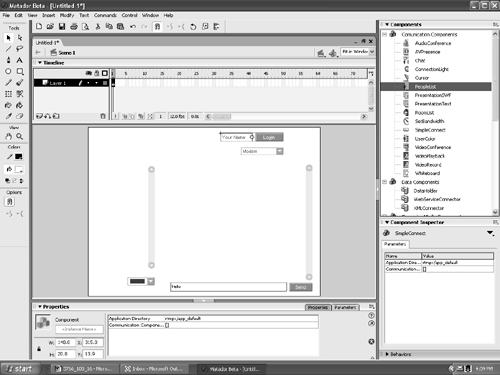 -
The component that makes it all happen is the one component that doesn't have an instance name: SimpleConnect. Its job is to establish all communication with the Flash Communication Server. Select the SimpleConnect component on the stage and open the Component Inspector panel, Alt-F7 (PC) or Option-F7 (Mac). You will notice that the same parameters as those shown in the Property Inspector are visible. The difference between the two areas is that the Component Inspector enables you to change a component's parameters while authoring in both Dreamweaver and Flash. We won't need it, but you really should be aware of its function. -
To use the component to point to the project's directory, click once in the Component's Application directory area of the Property Inspector and enter the URL for the chat on the Flash Communication Server. For our local server, we used the following address: rtmp:/10.0.1.21/OakbridgeChat . -
Having used the SimpleConnect component to point to the directory, it now has to be told what other components are being connected to our session that is being created by the SimpleConnect component. In the Property Inspector, click the [] beside the Communication Component box. This will open the Values dialog box, which will be used to connect the SimpleConnect component to the other components in the movie. -
When the Values dialog box opens, enter the instance names of the components on the stage, as shown in Figure 16.6. Figure 16.6. The Values dialog box for the SimpleConnect component is used to point the Flash Communication Server to the other components on the stage. 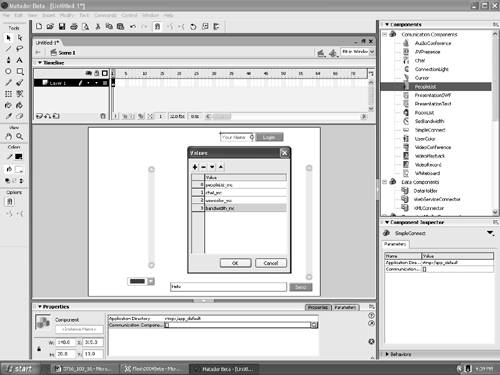 Finishing the Design Work As it currently stands, we have a number of components on the stage, but there is nothing to tell the user what each component does. Follow these steps to complete the design of the chat room: -
Select the Line tool and draw a black line horizontally across the page to separate the login and bandwidth areas from the rest of the page. Set the width of the stroke to 1.5 points in the Property Inspector. -
Using Figure 16.7 as your guide, add the text to the page.We leave the font and point size to your discretion. We used 12 point Times New Roman Bold. Figure 16.7. The chat room is constructed and ready to go.  Dealing with a Potential User Issue Though the Chat component is not accessible to screen readers, the point size of the text entered and the text displayed can be changed. Follow these steps to change the font and the point size of the text used in the Chat component: -
Open the Library panel, Window, Library or Control-L (PC) or Command-L (Mac). -
Select the Chat component in the Library panel. -
Open the Library panel's Options menu and select Edit. This will open the movie clip that drives the component. -
Unlock the Assets layer by clicking the padlock in the layer name. -
Select the text boxes that you want to change and change the point size and font in the Property Inspector (see Figure 16.8). Figure 16.8. The font and point size of the text to be displayed in the chat can be changed by editing the component. 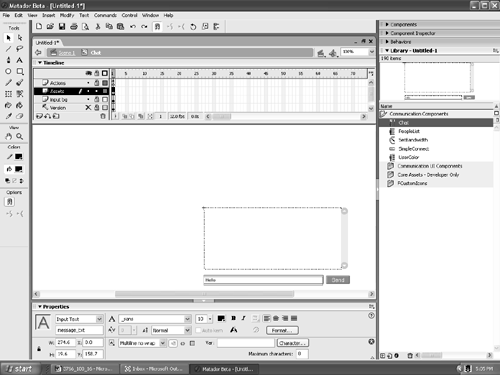 -
When finished, lock the Assets layer by clicking the dot where the lock used to be. -
Click Scene 1 and save the movie. At this point, you can publish the movie and place the resulting .swf file in the Dreamweaver page. Adding the Chat to Dreamweaver MX 2004 -
Launch Dreamweaver MX 2004 and open the ChatPage.htm file in your Chapter 13 Exercise Folder. When it opens, save the page to the Oakbridge folder containing the main.as script and the .swf file. -
Add a layer by choosing Insert, Layer Objects, Layer over the blank area in the middle of the page. Click inside the layer. Open the Files panel and drag the chat .swf from the panel into the new layer. The file may be much larger than the area permitted. To scale the .swf file, click once on the .swf inside the layer. Handles will appear around the file. Drag the bottom-right corner handle diagonally up towards the upper-left corner. When you have it sized properly, click on the layer and move it inside the layout area as well. Click the Play button on the Property Inspector, and you will see your booking page (refer to Figure 13.12). Save the file.  |