Section 7.4. Dealing with Specific Image Problems
Once the cleanup or background work is done, continue with the remaining changes.
7.4.1. Sharpening Image Details
If the image looks soft in the main focal point of the image, you can try and add Unsharp Masking to the image, the before and after of affects of which you can see in Figure 7-19 and Figure 7-20. You may sharpen the image to a small degree, but you will also introduce noise to the image. Start by adding Unsharp Masking and experiment with different variables to see if you achieve an effective result. If not, you'll need to use masks and the Clone tool to produce sharp edges on your object. Typically, Unsharp Masking isn't very effective because the blurred image edge is too wide to sharpen.
Figure 7-19. No Unsharp Masking
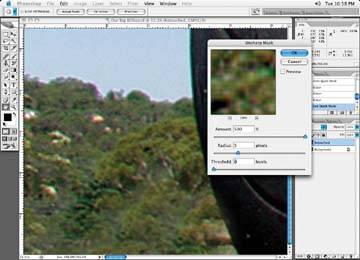
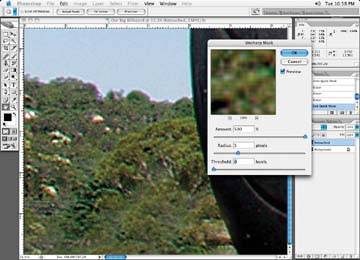
Figure 7-20. Unsharp Masking added to image
I have found that the best option is to painstakingly draw in paths around the various troublesome areas, as I've done in Figure 7-21.
Figure 7-21. Draw masks around the troublesome soft or grainy areas
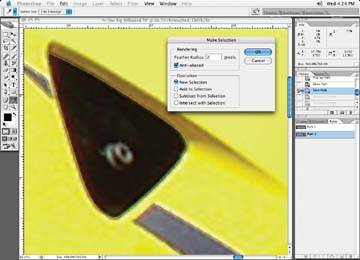
Once the masks are drawn, adjust the softness of the mask enough that the object gets sharper, but not so it appears as though it is cut out and stuck on the page. Figure 7-22 shows the image with not enough softness added, while the softness in Figure 7-23 is just right.
Figure 7-22. Too little softness; notice hard edge when brushed
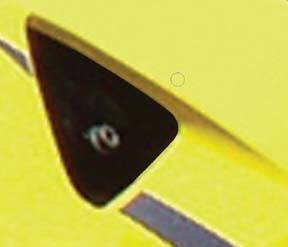
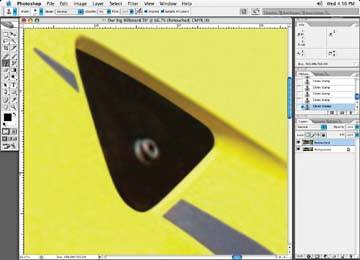
Figure 7-23. The right amount of softness added
Then, using the Clone tool, brush up to the selection. Once you finish one side of the selection, invert the selection and brush the other side until the object is completed. In the end, we've gone from Figure 7-24 to our completed image in Figure 7-25.
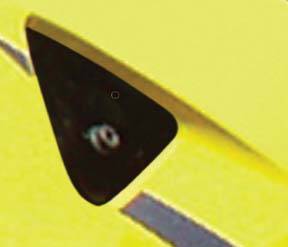
Figure 7-24. Before: the original image
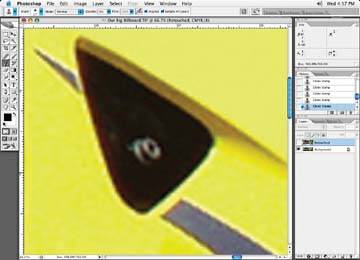
Figure 7-25. After: the final image after cloning up to my selection edges to create the look of a nice finished edge
Repeat this process for all problem shapes and objects in the image. There is no quick way to fix an image in this condition. As I mentioned, fixing large scaled-up images is a very time-consuming process that will test your patience.
7.4.2. Fixing Staircasing or the "Jaggies"
Sometimes an image suffers from staircasing edges or the jaggies, as in Figure 7-26. There are two methods I use to fix this. The first is using the Smudge tool at 50% opacity and drawing around the staircased edges, as in Figure 7-27.
Figure 7-26. The image before the Smudge tool

Figure 7-27. Using the Smudge tool to smooth out the staircasing edges
If the object lines are straight, I use my Shift key and mouse clicks to make my way around the object. You may have to use the Smudge tool and go back and forth over the area edge until the desired effect is created. Play around with your opacity settings on the Smudge tool. I usually start off with 50% opacity and go from there. The Smudge tool softens the edges of the object. You may want to add some noise to these areas when you have completed the Smudge tool corrections.
Another option is to use the Clone tool to fix jagged edges, like the ones in Figure 7-28. Set the tool to a very low opacity, typically 20 or 30%, and then brush along the edge of the object and massage the area back and forth until the area loses the jaggedness, as shown in Figure 7-29.
Figure 7-28. The area with jagged edges before the Clone tool brushing
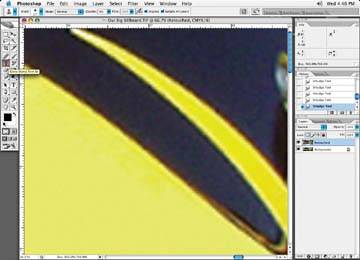
Figure 7-29. The area after the jagged edges have been cloned and massaged with the Clone tool brushing

When employing this technique, change the position of the brushes often so you don't get any repeat patterns. Again, as with other methods described here, add noise to the area to break up the extreme, unnatural smoothness of the brushing.
7.4.3. Fixing a Grainy Image
One option for dealing with a grainy image is to look at the various color channels and see if one of the channels is causing more noise then some of the other channels. The yellow channel is not typically anything to worry about because it is so light; it's the other channels you have to worry about.
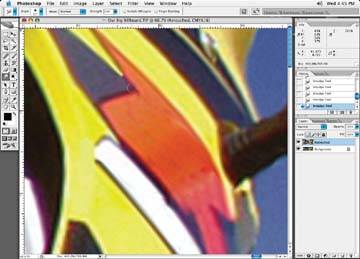
For example, the image in Figure 7-30 has a very grainy area. It turns out much of that graininess is in the cyan channel. If you display the cyan channel, as in Figure 7-31, and add a Gaussian blur to that channel only, it dramatically helps the graininess. (You could also clone or brush only that one channel to get rid of the blur). This way, you don't soften the whole image by blurring all channels, just one channel. This effect can make a big difference and is worth a try, because you are blurring only one or two channels and you are not diminishing the quality of all channels. It also makes the blurring effect less noticeable. Figure 7-32 shows the final results of this technique.
Figure 7-30. Here is a grainy-looking area of an image
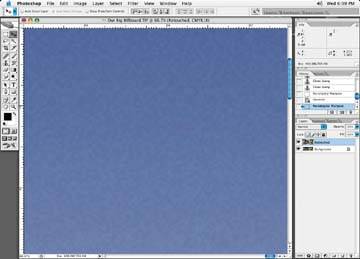
Figure 7-31. The cyan channel has the bulk of the grain
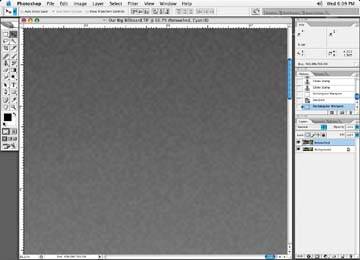
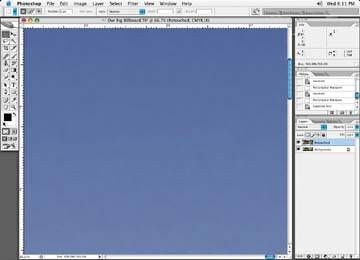
Figure 7-32. Final result of blurring the cyan channel only
Note: Don't be afraid to soften or fix a second channel if blurring only the cyan channel doesn't quite do the trick.
Figure 7-33. Draw a mask around poor-looking areas and shapes
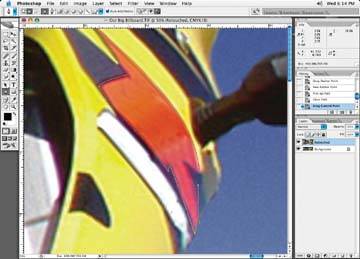
Another technique I use to clear up grainy or blotchy areas is to redraw the area. I start this process by masking off the area that needs to be repaired, as in Figure 7-33.
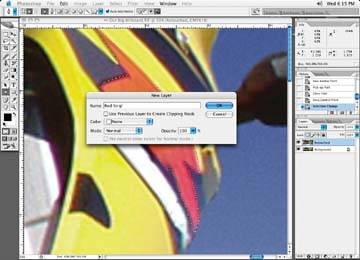
Figure 7-34. I don't want to paint directly on my image, so I'll create a new layer for each newly painted section
Note: Take constant readings of the original color with the Eyedropper tool to ensure that you are brushing in the right color.
Add a new layer and set its attributes to normal, as in Figure 7-34.
With your Brush tool, begin by brushing in color in an attempt to replicate what was there before. With my Eyedropper tool, take readings of the current shades of color that make up the area you wish to repaint. The idea is not to change the color or the way the area is shaded or shaped, just repaint it so that it appears smooth and looks as though it has a higher resolution. Think of it as repainting that old bicycle or car with a fresh coat of paint! Nothing nicer than a snazzy-looking fresh coat of paint!
With the Brush tool, repaint the area shape. Continue this process of making shapes with the Pen tool, making selections, and creating new layers . Take readings of the original color that makes up the shape, and then brush it in to try and match the original shape, but of course with a much smoother, refined look to it.
Figure 7-35. The original unpainted look of the image
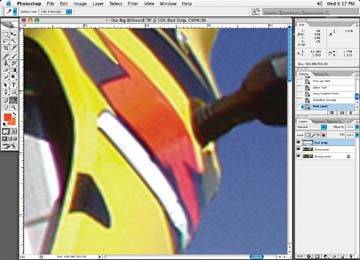
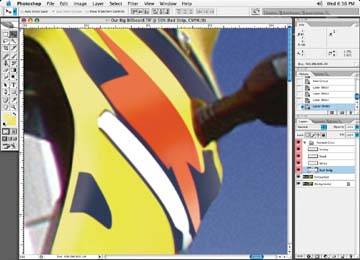
An image that started out like Figure 7-35, when you have brushed the entire area, should look something like Figure 7-36.
This is a great way to fix an area that is in rough shape. It does take some practice, though, and you must constantly take readings to change the color that you are brushing in. Solid objects are easier to fix than complex shapes; you'll have to work up to them. As with any brushed-in surface area, you should add a small amount of noise to these areas. Adding noise helps break up any banding that may occur and reduces the overly smooth surfaces you have just created.
Figure 7-36. The final look of the painted-in shapes on the image
7.4.4. Color Areas of the Image Look Blotchy
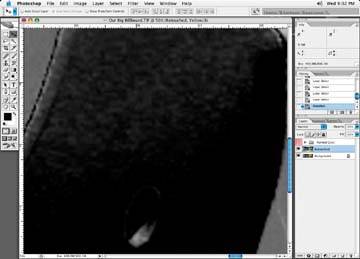
If areas of the image look blotchy this is usually because the color is breaking off hard, like the image in Figure 7-37. You could use my favorite Clone brush tool to soften the area, but you may want to try and color correct with the Curves adjustment first. It may save some time.
Figure 7-37. An image where the color is breaking off and looking rough
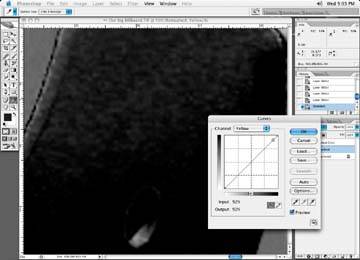
Call up your Curves adjustment tool. With the Eyedropper tool, take readings of the dark and the light side of the color break. If you have your Curves adjustment tool on one of channels and you click on the image area with the Eyedropper, you will get little indicators on the Curves tool as to where that color sits on the color curve of the tool. Once you determine the light and dark areas of your breakup area of your image, put a marker point at these two points, as shown Figure 7-38. Marker points are created by clicking with your cursor on the individual channel curve lines at the various points on the curve line where you wish to mark, create, or lock a point.
Figure 7-38. Read and mark the curve adjustment with your light and dark rough image area
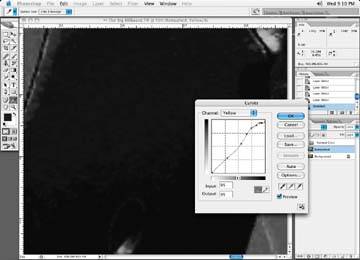
I will also add other marker points outside of these two point so when I make a change to the curve, the outer ends of the points don't swing out as depicted in Figure 7-39.
Figure 7-39. The curves tool with additional marker points outside of the dark and light marker points

Do the same thing for any or all of the channels affected. Next, adjust points on the curve until the level of roughness disappears. Add extra points if you find you are not targeting the right area, as I've done in Figure 7-40. Repeat this process for each channel, if other channels are affected.
Figure 7-40. The final result of our curve efforts
What you are trying to do is create a smooth transition between the hard dark area and the lighter area by adjusting points that may fall in between the original light and dark areas that form the rough area.
Once you are happy with the changes, accept the change. If you had made a selection of the area, that's great. Or, you can take a History snapshot of the change, undo the change, and paint the correction into the affected areas, as described in Chapter 3. Repeat this process on all affected areas.
EAN: N/A
Pages: 83
- Structures, Processes and Relational Mechanisms for IT Governance
- An Emerging Strategy for E-Business IT Governance
- Measuring ROI in E-Commerce Applications: Analysis to Action
- Technical Issues Related to IT Governance Tactics: Product Metrics, Measurements and Process Control
- Governing Information Technology Through COBIT