Appending Elements Using the DOM
Here’s an example putting the DOM to work for you. Up to this point, the text you’ve downloaded from the server using Ajax has been displayed in a <div> element using the <div> element’s innerHTML property, like this:
function getData(dataSource, divID) { if(XMLHttpRequestObject) { var obj = document.getElementById(divID); XMLHttpRequestObject.open("GET", dataSource); XMLHttpRequestObject.onreadystatechange = function() { if (XMLHttpRequestObject.readyState == 4 && XMLHttpRequestObject.status == 200) { obj.innerHTML = XMLHttpRequestObject.responseText; } } That works, but strictly speaking, innerHTML is not a property of the DOM. How about creating an example to display downloaded text using strict DOM techniques?
| Note | Even though innerHTML isn’t a property of the DOM, this may change. innerHTML was introduced by Microsoft in Internet Explorer, and there’s a good chance it’ll be added to the DOM at some point. |
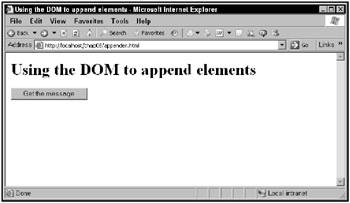
The first way you’ll see this work is in an example named appender.html, which uses the DOM appendChild method to display downloaded text. You can see appender.html ready to go to work in Figure 8.1.

Figure 8.1: Using appender.html
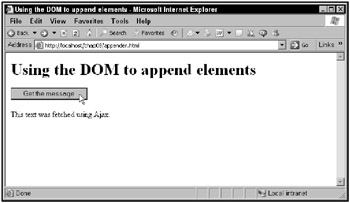
The page you see in Figure 8.1 includes an empty <div> element. When you click the button, the application downloads text and appends that text to the <div> element using DOM techniques, as you see in Figure 8.2.

Figure 8.2: Using appender.html to download text
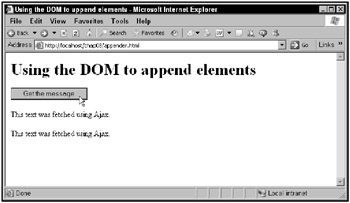
When you click the button again, the text is downloaded and appended to the text already displayed, as shown in Figure 8.3.

Figure 8.3: Using appender.html to append downloaded text
So how does this example work in code? It starts with the button you see in the Web page, which is connected to a function named getData:
<body> <h1>Using the DOM to append elements</h1> <form> <input type = "button" value = "Get the message" onclick = "getData()"> </form> . . .
You also need to create the <div> element to which you can append downloaded text (note that it starts off with an empty <p> element):
<body> <h1>Using the DOM to append elements</h1> <form> <input type = "button" value = "Get the message" onclick = "getData()"> </form> <div width =100 height=100> <p ></p> </div> . . .
In the getData function, create an XMLHttpRequest object as usual:
<html> <head> <title>Using the DOM to append elements</title> <script language = "javascript"> function getData() { var XMLHttpRequestObject = false; if (window.XMLHttpRequest) { XMLHttpRequestObject = new XMLHttpRequest(); } else if (window.ActiveXObject) { XMLHttpRequestObject = new ActiveXObject("Microsoft.XMLHTTP"); } . . . then download the text as usual:
<html> <head> <title>Using the DOM to append elements</title> <script language = "javascript"> function getData() { . . . if(XMLHttpRequestObject) { XMLHttpRequestObject.open("GET", "data1.txt"); XMLHttpRequestObject.onreadystatechange = function() { if (XMLHttpRequestObject.readyState == 4 && XMLHttpRequestObject.status == 200) { . . . } } . . . </head> Now that you’ve downloaded the text, how do you append that text to the targetDiv <div> element? To start, you can enclose the downloaded text in a <p> element, and then append that <p> element to the <div> element.
To create a new <p> element, use the document object’s DOM method createElement:
XMLHttpRequestObject.onreadystatechange = function() { if (XMLHttpRequestObject.readyState == 4 && XMLHttpRequestObject.status == 200) { var newP = document.createElement("p"); . . . } } To enclose a text node with the downloaded text in the new <p> element, create a new text node holding the downloaded text using the document object’s createTextNode method:
XMLHttpRequestObject.onreadystatechange = function() { if (XMLHttpRequestObject.readyState == 4 && XMLHttpRequestObject.status == 200) { var newP = document.createElement("p"); var newText = document .createTextNode(XMLHttpRequestObject.responseText); . . . } } To make the text node a child of the <p> element, append the text node to the <p> element:
XMLHttpRequestObject.onreadystatechange = function() { if (XMLHttpRequestObject.readyState == 4 && XMLHttpRequestObject.status == 200) { var newP = document.createElement("p"); var newText = document .createTextNode(XMLHttpRequestObject.responseText); newP.appendChild(newText); . . . } } then you can append the new <p> element to the targetDiv element in the Web page. Here’s what that looks like:
XMLHttpRequestObject.onreadystatechange = function() { if (XMLHttpRequestObject.readyState == 4 && XMLHttpRequestObject.status == 200) { var newP = document.createElement("p"); var newText = document .createTextNode(XMLHttpRequestObject.responseText); newP.appendChild(newText); var div = document.getElementById("targetDiv"); div.appendChild(newP); } } And there you have it. This example lets you append downloaded text to previously downloaded text.