SDA
Screen Design Aid (SDA) is a utility that lets you create panels (screens) or simple menus for your interactive programs. SDA has so much functionality that this section cannot possibly do it justice. Rather than going over each feature in detail, the utility will be presented by designing a very simple display file. SDA can also be used to create menus, but the menu creation features will not be discussed.
Starting Up SDA
You can launch SDA by choosing an option 17 from PDM, if you want to work on an existing display file source member. In all other cases, you must run the Start SDA (STRSDA) command. Figure 29.20 shows the panel displayed when you start SDA.
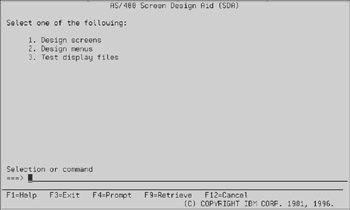
Figure 29.20: Starting SDA.
Select option 1 to design a display file. SDA asks you what source file and source member you want to use, as shown in Figure 29.21.
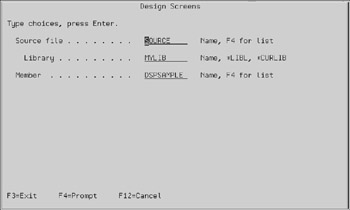
Figure 29.21: Designing screens using SDA.
The example provided here works with source member DSPSAMPLE in source file MYLIB/SOURCE. Press Enter and the panel shown in Figure 29.22 appears.
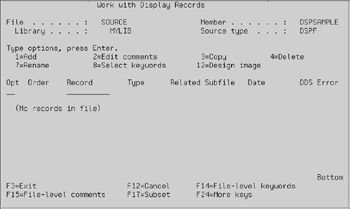
Figure 29.22: Working with Display Records in SDA.
The panel in Figure 29.22 tells you that no records are present in the file. There aren't yet any defined record formats for the display file you are designing. The display shows the name of the source file and source member you selected, and it has automatically appended a source type of DSPF. Note that one of the options you can select (documented near the top of the panel) is option 1 to Add. Enter an option 1 below "Opt" and a record name of PANEL below "Record" as shown in Figure 29.23.
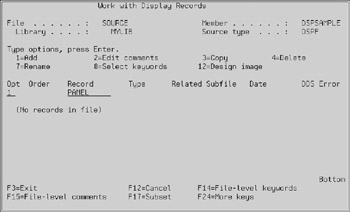
Figure 29.23: Working with Display Records in SDA.
Key the options seen in Figure 29.23 and press Enter. This information tells SDA that you want to add a record format named PANEL to the display file. Naturally, SDA needs some additional information, so it asks for it using the panel in Figure 29.24.
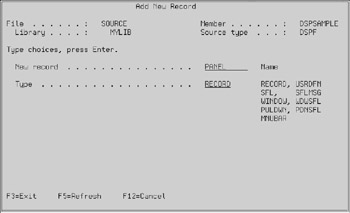
Figure 29.24: Adding display panels using SDA.
SDA presents the panel in Figure 29.25 when you press Enter.

Figure 29.25: Adding display panels using SDA.
The type of record you want to add is RECORD, so you can leave the default value given by SDA and press Enter. You will use RECORD in the majority of cases. SFL and SFLMSG are also used, but not as often. USRDFN is a very advanced, complicated feature that will not be discussed in this book.
The blank panel in Figure 29.25 (except for the informational message at the bottom, which disappears if you press Enter again) is your work area. You can design the panel here, using special codes, commands, and function keys.
For example, to add a title to this panel, type the text shown in Figure 29.26. Make sure to enclose the text in single quotes. Do not worry that it is not centered. Press Enter.
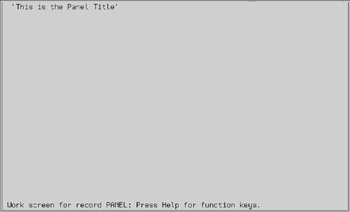
Figure 29.26: Adding fields to display panels using SDA.
When you press Enter, SDA creates a constant field that contains the text you entered. SDA knows it is a constant field because you enclosed it in single quotes. The quotes can be omitted if you are only adding a single word. If you had omitted the single quotes in the example given above, SDA would have created five constant fields that each contained one word.
You can center the field automatically by using the ‘ac’ command (automatic centering). Type the ‘a’ in the space immediately before the field, and the ‘c’ overlapping the first character of the field as seen in Figure 29.27. Don't worry that the beginning letter T is missing. SDA will not forget it.
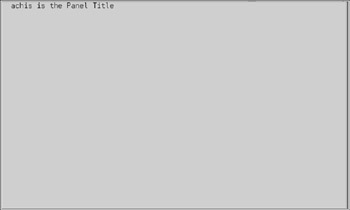
Figure 29.27: Centering text on display panels using SDA.
Once you press Enter, SDA centers the title automatically, as seen in Figure 29.28.
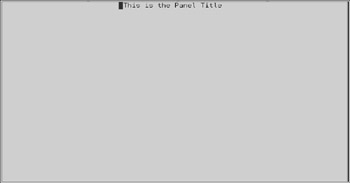
Figure 29.28: Centering text on display panels using SDA.
Now move two lines down (use the arrow keys or the new line key) and add the constant ‘Vendor number’ as far to the left as possible. Do not forget to enclose ‘Vendor number’ in single quotes. Press Enter. SDA adds that constant field to the screen.
Now you can create a data field using the ‘+b(6)’ command. The + means that you are adding a field. The ‘b’ means that the field is alphanumeric, both for input and output. The (6) indicates that the field will be six positions long. The panel should look like that shown in Figure 29.29.
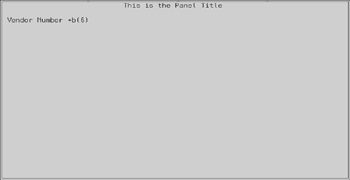
Figure 29.29: Adding Input/Output fields to display panels using SDA.
Key the information like that seen in Figure 29.29 and press Enter. SDA adds the input/output field and replaces your command with a representation of the actual field. Because the field allows input, SDA underlines it (by default, OS/400 underlines input-capable fields).
The screen should look like that shown in Figure 29.30.
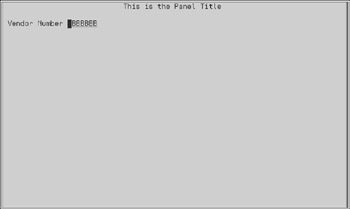
Figure 29.30: Adding Input/Output fields to display panels using SDA.
Other codes define fields of different types and usages. For alphanumeric fields, ‘i’ defines an input-only field, ‘o’ defines an output-only field, and ‘b,’ as you have seen, defines an input/output field. Numeric fields use a code of 3 for input only, 6 for output only, and 9 for input/output.
Therefore, you can add an input-only numeric field, seven digits long (with one decimal place) by using the ‘+3(7,1)’ command.
The new field has no name so far. Actually, SDA has assigned it a generic name that means nothing, so you should rename the field. The easiest way to rename it is by entering a ‘?’ command immediately before the field, as seen in Figure 29.31.
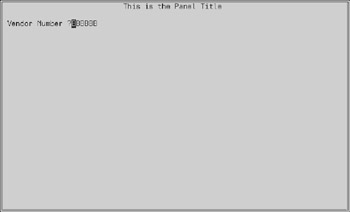
Figure 29.31: Naming fields on display panels using SDA.
Key the information as shown in Figure 29.31 and press Enter. SDA prompts you (at the bottom of the work screen) for the field name and length, as seen in
Figure 29.32. Type VENDOR (the new name of the field). The length is already given, so you don't have to change it.
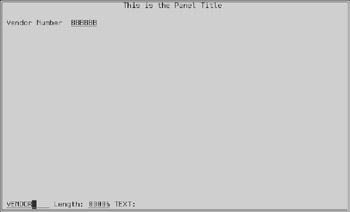
Figure 29.32: Naming fields on display panels using SDA.
Key the information as shown in Figure 29.32 and press Enter. The field is now named VENDOR. Now, to change some of its attributes, enter the * command immediately before the field, as shown in Figure 29.33.
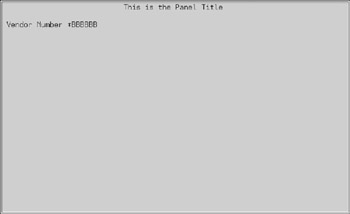
Figure 29.33: Assigning attributes to fields on display panels using SDA.
Key an asterisk prior to the field as seen in Figure 29.33 and press Enter. SDA responds by presenting a panel with many options. You can enter a ‘Y’ on the line that contains the options you want to edit. For example, let's see what "General keywords" do for the VENDOR field, as seen in Figure 29.34.
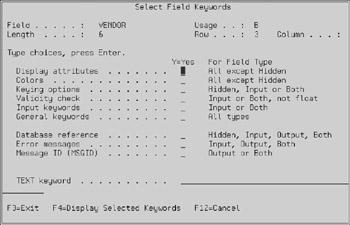
Figure 29.34: Working with field keywords on display panels using SDA.
SDA presents another panel that lets you enter general-purpose DDS keywords that will slightly modify the VENDOR field, when you key a ‘Y’ in the fields labeled General Keywords and press Enter. The result is shown in Figure 29.35.
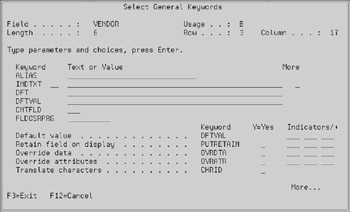
Figure 29.35: Working with general keywords display panel fields using SDA.
From the panel in Figure 29.35, you could assign VENDOR a default value, for example. This way, the panel would have the VENDOR field already filled in by a value you expect the user to type most of the time.
Working with Fields
From the work panel, press F4 to obtain a list of all the fields you have defined in the record format. For example, the example in Figure 29.36 is how the list of fields would look like at the present time.
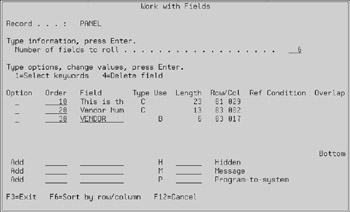
Figure 29.36: Working with fields on display panels using SDA.
Three fields are present. At order 10 and 20, two constant fields (as identified by a C under "Type") are located. At order 30, a data field (named VENDOR) is shown, and its usage is B (both input and output). SDA gives you the length of the fields and their absolute location within the screen.
From the screen in Figure 29.36, you can edit any of the existing fields using option 1. You can also rename data fields by typing over the field name (in this case, by typing over the name VENDOR with a new name). You can rearrange the fields by changing their order. If the fields are not in correct sequence, F6 sorts the fields by their row/column position.
Finishing Up
Press F12 from the work screen to tell SDA that you are done with that record format. SDA again shows the list of records. Note that, this time, record PANEL shows up. The panel in Figure 29.37 even tells you when you maintained it last.
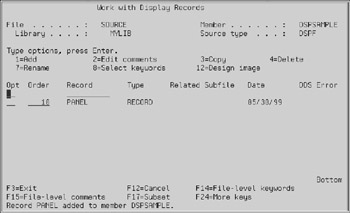
Figure 29.37: Working with Display Records using SDA.
Suppose you don't need to add any other record formats to the display file. Press F12 to tell SDA that you are done working with this source member. SDA presents the final panel, as seen in Figure 29.38.
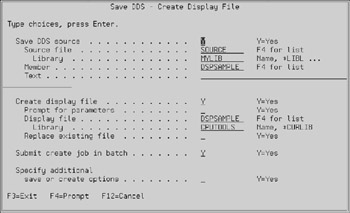
Figure 29.38: Saving a display file using SDA.
Take advantage of the opportunity to add text description to the source member, so it will be easier to identify when you see it in PDM. The "Create display file" determines whether to compile the source member you have edited using SDA. The field always defaults to Y.
If you press Enter, SDA saves the edits you have made in the source member and compiles the display file. You also can press F3 to kill the whole editing session, or F12 to go back to SDA for more work.
EAN: N/A
Pages: 245