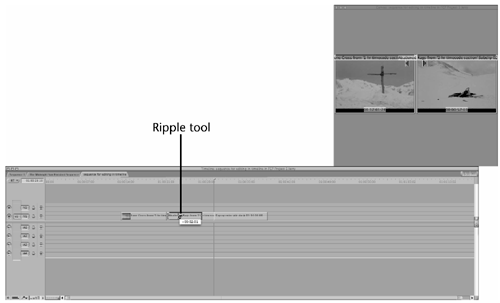
| There's more than one way to edit your clips in Final Cut Pro. You can trim them directly in the Timeline window without using the Trim Edit window. All the same trimming functions available with the Trim Edit window are also available for use in the Timeline window. Ripple, Roll, Slip, and Slide can be done directly on the clips as you see them in the Timeline. You might find editing this way to be more logical or easier to understand. In the NLE world, this is called Timeline editing . Dragging and Dropping in the Timeline Window It's easy and intuitive to simply drag clips around within the Timeline window. You can drag and drop video edits to any video track, and you can do the same with audio clips. You can highlight a clip from the Browser and then drag and drop it in the sequence you've done already. You can rearrange clips there as well. Take a look at Figure 8.36. In this chapter you'll examine the first three shots of the movie again. I've simply dragged the series in order from a Large Icons view of them from the Scene 1 bin in the order you have them right now in your Sequence 1 sequence. If you click the first shot, you can drag it past the third, as shown in Figure 8.37. If you have snapping turned on, you drop precisely next to the shot of your choice. If you need to drop a shot between two shots, keep snapping turned on. When you are in position between the shots (with the snapping indicators showing in the sequence), hold down the Option key and start dragging. The curved arrow tool appears to indicate that you will insert between the two shots. You can also insert in the middle of a shot. This is easy to do with snapping turned off. Figure 8.36. Moving a clip directly in the Timeline window.  Figure 8.37. The Timeline after you move a clip in the Timeline window.  When dragging from the Browser or the Viewer to the Timeline window, you can choose between inserting the shot and overwriting the shot by selecting the area where you release the mouse button. If you drop the shot on the top third of the track, you insert it (see Figure 8.38). If you drop the shot on the bottom two- thirds of the track, you overwrite it (see Figure 8.39). Notice the arrow's display for inserts and overwrites. It's how you can tell that you're ready to drop this clip. If the arrow points right, you insert the shot. If it points down, you overwrite it. Figure 8.38. Inserting a shot from the Browser or Viewer (the arrow points to the right).  Figure 8.39. Overwriting a shot from the Browser or Viewer (the arrow points down).  You can also drag a shot up or down. If you have only one track of video, you automatically create another track by dragging above the first track. The same thing happens with audio clips; dragging them down creates a new audio track if necessary for them to reside in. Ripple and Roll Trims in the Timeline Window By activating the Ripple (press RR) or Roll (press R) edit tools from the Tools window, you can perform ripple and roll edits in the sequence itself in the Timeline window. I've found that if you zoom in on the sequence, you get better control. You can perform ripple and roll edits on video or audio clips. Remember that with a ripple edit, you take frames off or add frames to one clip, pulling the clips past it to come sooner or later in the sequence ( rippling the sequence). With a roll edit, you take frames off as you add frames to either side of the edit point. A roll edit doesn't change the length of the Timeline in any way, because it adds an equal number of frames on one side of the edit point while you are taking away frames from the other side of the edit point. To perform a ripple edit, select the Ripple tool (press RR), highlight the edit point you'd like to trim, and drag it (see Figure 8.40). Notice the "mini two-up" display that appears in the Canvas window. The left frame is the new last frame of the outgoing clip, and the right frame is the first frame of the incoming clip. Also note the counter in a yellow box, showing you the amount you are trimming. When you let go of the mouse button, the edit is performed. The sequence now looks like Figure 8.41. The Abandoned Rags clip is shortened , and the incoming clip is moved to the left. Figure 8.40. A ripple edit in the Timeline window.  Figure 8.41. The Timeline after the ripple edit.  The "Cap up mtn side dusk" still frame clip was moved to the left an equal number of frames that were taken away from the "Abandoned rags" clip. Thus, it was moved sooner in the sequence. As frames were removed from the "Abandoned rags" clip, the incoming clip past it was moved left in the sequence with the edit point. By clicking the other side of the edit, you could perform a ripple edit on the incoming clipin this case, the "Cap up mtn side dusk" clip. If you do this, any clips past it (right now there are none) are pulled sooner, and no hole is left in the sequence. A roll edit is performed the same way. If media is available on both sides of the edit, you may perform a roll edit in the Timeline window. The two-up display appears in the Canvas window when you perform a roll edit. You add frames to one side of the edit point as you take away the same number of frames from the other side of the edit. | 


