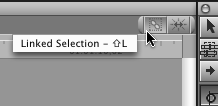
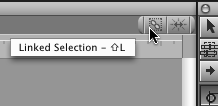
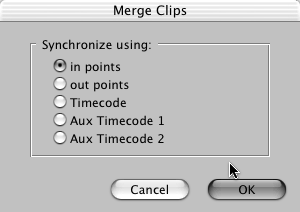
| Linking keeps together video clips that have audio associated with them (such as sync sound). It also keeps stereo audio tracks together. For example, if you move a linked video clip that has a sound you want to keep in sync with it, the linked track is selected at the same time. If you have a linked clip but the audio and video cannot be selected with one click, linking might be turned off. You can activate linking using the Linked Selection button, the chain-link button in the upper right of the Timeline window, as shown in Figure 8.42. (Figure 8.43 shows linking turned off.) You also can toggle linking back on by pressing Shift+L or by selecting Sequence, Link. Figure 8.42. The Linked Selection button in the Linked position.  Figure 8.43. The Linked Selection button in the Unlinked position.  If you trim an actively linked clip, the material that is linked to it is also trimmed with the same number of frames . If you change an audio level within a stereo paired audio track, both tracks are affected. If you have captured clips as audio CH1 and CH2 clips, though, they still act independently of each other. When working with a capture that is video and audio, Final Cut Pro automatically links these clips. The audio can be captured as ch1+ch2, where it behaves as linked-but-independent audio tracks, or as stereo audio, where it behaves as one audio track with two channels (all levels and filter settings are applied identically, regardless of linked selection). You need to understand the difference between linking clips and linked selection. Linking clips creates a link between two or more clips, such as a video clip and an audio clip. After you perform this command, the clips are linked, meaning that if you select one, you select the other unless you've temporarily defeated this behavior by turning off the Linked Selection button. You can turn linked selection on or off at any time. Merging Audio Clips to a Video Clip New to FCP 4 is the ability to merge more than two tracks of audio to a single track of video, up to a total of 24 individual or 12 stereo tracks of audio. A merged clip links to more than one media file. For example, you might want to use a merged clip to create a single clip of video and audio in a case where the audio wasn't recorded on the camera's tape or film (when recording audio on a DAT, for example). After they are merged, these audio and video clips behave as if they were an audio/video clip in the first place. You can use this new feature to sync audio and video even though you didn't use the same tape to record both (or if you used a film camera, which doesn't record audio). You can capture the video and audio as separate clips and then merge them into a single clip, which becomes a master clip and behaves as such. When you capture audio you intend to merge with a separate video clip, it's important to use "house sync" (by connecting an independent video signal such as a black burst generator to your video deck and audio deck) to keep the audio deck synchronized with your system. You should also make sure that the timecode on the audio and video clips is accurate. If you don't use house sync, your audio sync can drift out of sync over time within the merged clip. Creating Merged Clips You need to synchronize your audio to your video before you merge the clips. You can do this in several ways. If the timecode on the videotape and the timecode on the audio tape have been "slaved" or are the same, you needn't do anything special. Just highlight the audio and video clips you want to merge in the Browser, Ctrl-click one of them, and select Merge Clips to open a dialog box that asks you how you want to synchronize the clips. Figure 8.44 shows your choices. You can sync the clips by selecting In points that you've determined are in sync (such as the close of a clapstick and the sound that was recorded on your DAT at the same moment). You can also select Out points, Timecode (if the timecode matches on the two clips), Aux Timecode 1, or Aux Timecode 2. Aux Timecode is timecode you've added to a clip. You can determine what the sync point is, for example, and then assign timecode to the two clips that matches. You'll find these columns for this purpose in the Browser as part of each clip's information. Figure 8.44. The Merge Clips dialog box.  Using a clapstick on the shoot to create a sync point is the best way to prepare for merging clips later in postproduction if you cannot sync or "slave" the timecode to the respective recording devices. This makes the process of syncing the audio to the video using In or Out points very easy. All you need to do is find the first frame of picture where the clapstick closes and the first bit of sound recorded on your audiotape. Set In points on each clip. Highlight both clips. Ctrl-click one of the clips and select Merge Clips from the contextual menu. Select "in points" in the dialog box. You should be in sync. If you've used an end slate instead of a head slate, put Out points on the two clips where this moment in time was recorded. The sound of the clap and the first frame of the closed clapstick are at the end of the recording in this case, and you select "out points" as the synchronization method. After being created, merged clips act as if they came from the same capture. | 