| The Distort filters include an amazing array of options that let you ripple, pinch, shear, and twist your images. Experiment with all of the Distort filters to get a feel for the different effects you can apply to your images. One filter in particular stands above the others in its power and flexibility: the Liquify filter. The Liquify filter creates amazing effects by letting you warp, twirl, stretch, and twist pixels beyond the normal laws of physics. You've probably seen plenty of examples of this filter, where someone's face is wildly distorted with bulging eyes and a puckered mouth. However, you can also use the Liquify filter to create more subtle changes and achieve effects that would be impossible with any other tool. The Liquify filter is unique in that it includes a dialog box with its own complete set of image-manipulation tools. And because the Liquify filter works within its own dialog box, you can't undo specific changes with the Edit > Undo command or Undo History palette. Fortunately, the Liquify filter offers its own Reconstruct tool to restore any area to its original (or less contorted) state. The Reconstruct tool allows you to "paint" over your image and gradually return to the original version, or stop at any state along the way. If you just want to go back and start over, clicking the Revert button is the quickest method. To distort an image with the Liquify filter 1. | Select an entire layer, or make a selection of the area you want to change.
| 2. | From the Filter menu, choose Distort > Liquify, or double-click the Liquify filter on the Filters palette (Figure 7.25).
Figure 7.25. The Liquify filter appears in the Distort category in the Filters palette menu. 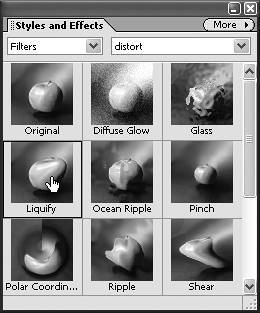
If your image includes a type layer, you will be prompted to simplify the type to continue. This means that the type layer will be flattened into the rest of your image's layers. Be aware that if you click OK, the type will no longer be editable.
The Liquify dialog box appears, with a preview of the layer or selection area. The Warp tool is selected by default, with a brush size of 64 and a pressure of 50 (Figure 7.26).
Figure 7.26. The Liquify dialog box includes its own set of distortion tools as well as options for changing the brush size and pressure. 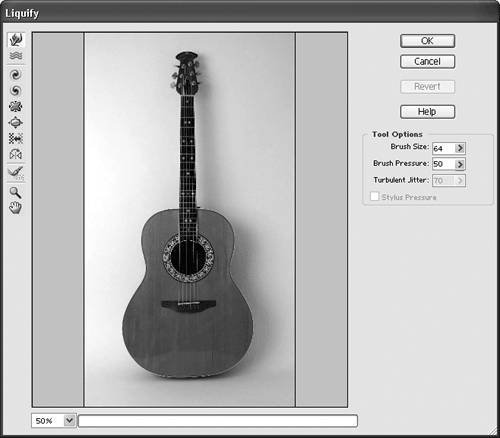
You'll probably want to change the brush size and pressure during the course of your work.
| 3. | To change the brush settings, do one of the following:
- To change the brush size, drag the slider or enter a value in the option box. The brush size ranges from 1 to 600 pixels.
- To change the brush pressure, drag the slider or enter a value in the option box. The brush pressure ranges from 1 to 100 percent.
| 4. | Distort your image with any of the Liquify tools located on the left side of the Liquify dialog box (Figure 7.27) until you achieve the look you want. To use any tool, simply select it (just as you do tools on the main toolbar) and then move your pointer into the image (Figure 7.28).
Figure 7.27. The Liquify tool set. 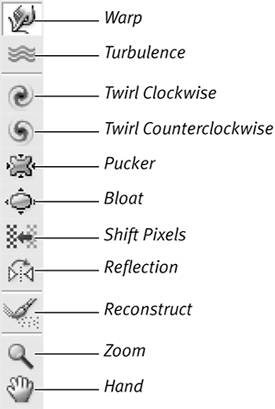
Figure 7.28. The best way to become familiar with the Liquify distortion tools is to experiment with them on a variety of images, as in this series of guitar images. 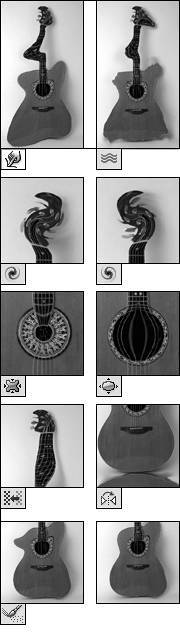
|
To undo changes - In the Liquify dialog box, click the Reconstruct tool. Then, while holding down your mouse button, "brush" over your image to gradually undo each change you've made.
The Liquify Tools Warp lets you push pixels around as you drag with the mouse. Turbulence works similar to the Warp tool, but it incorporates some actions of the other Liquify tools to create random variations, or turbulence. You can change the amount of turbulence with the Turbulence Jitter slider in the tool options. Twirl Clockwise and Twirl Counterclockwise rotate pixels in either direction. Pucker moves pixels toward the center of the brush area. Bloat moves pixels away from the brush center and toward the edges of your brush. Shift Pixels moves pixels perpendicular to the direction of your brush stroke. Reflection copies pixels to the brush area, allowing you to create effects similar to a reflection in water. Reconstruct restores distorted areas to their original state. As you brush over areas with this tool, your image gradually returns to its original state, undoing each change you've made with the Liquify tools. You can stop the reconstruction at any point and continue from there. The Zoom and Hand tools work just like the ones on the Photoshop Elements toolbar. |
To undo all Liquify changes - In the Liquify dialog box, click the Revert button to return the image to its original state.
 Tip Tip
Here's another way to undo Liquify changes: In the Liquify dialog box, hold down the Alt key. The Cancel button changes to Reset. Click the Reset button to undo any changes you've made with the Liquify tools. The Revert and Reset buttons work the same way, but the Reset button, true to its name, also resets the Liquify tools to their original settings.
|