| Photoshop Elements includes a couple of blur filters that can create a sense of motion where none exists. In many cases, you'll want to select a specific area in your photo when using these filters, so that the motion or movement is applied to one object, such as a person, your dog, or a pair of shoes. The Motion Blur filter blurs a layer or selection in a specific direction and intensity. The result can simulate the look of taking a picture of a moving object with a fixed exposure or of panning a camera across a still scene. The Radial Blur filter can create the impression of a camera zoom or of an object moving toward or away from you. You can also create the impression of an object spinning at variable rates of speed. In either case, the Radial Blur filter lets you control the center of the effect and the amount of blurring or motion. To add a motion blur to an image 1. | Select the desired layer to make it active. To create a feeling of motion in just a portion of your image, select an area with one of the selection tools (Figure 7.16).
Figure 7.16. You can apply the Motion Blur filter to an entire layer or to a selection, as we'll do in this photo. 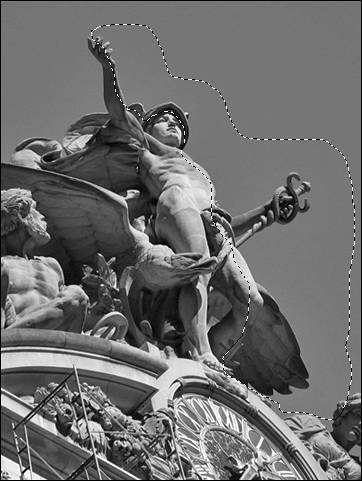
| 2. | Do one of the following:
- Double-click the Motion Blur filter on the Filters palette (Figure 7.17).
Figure 7.17. Once you've chosen a layer or selection, double-click the Motion Blur thumbnail on the Filters palette. 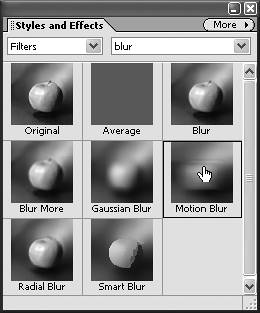
- From the Filter menu, choose Blur > Motion Blur.
The Motion Blur dialog box appears with options for the motion angle and distance (Figure 7.18).
Figure 7.18. The Motion Blur dialog box includes options for the angle and distance of the effect. 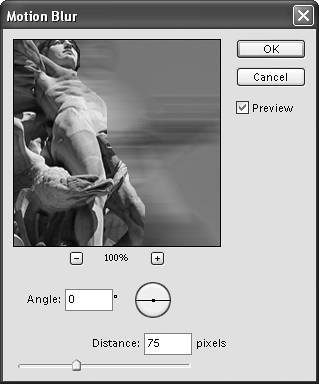
| 3. | Set the Angle and Distance options to get the look you want. You can refer to the preview window in the dialog box, and if the Preview option is checked, you can also see the results in the main image window.
By default, the Angle option is set to 0°, meaning that the pixels will be blurred along the horizontal axis as shown next to the Angle text box. So, the impression of motion will be right to left (or left to right) across your screen. You can change the angle by dragging the line on the Angle icon or by entering a number of degrees in the Angle text box.
The Distance option determines the number of pixels included in the linear blur, with the default set to 10 pixels (a moderate amount of blurring). When you reach the upper limits of this option (999 pixels), the objects in your photo may become barely recognizable.
| 4. | When you are satisfied with the effect, click OK to apply it to your image (Figure 7.19).
Figure 7.19. Click OK to see the Motion Blur filter applied to your image. If you want to back up and try again, just choose Edit Undo and experiment with different settings. 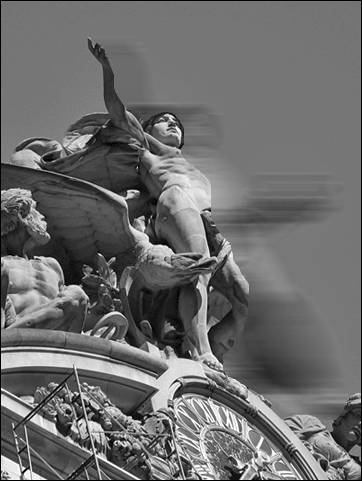
|
To add a circular blur to an image 1. | Select the desired layer to make it active. To create a feeling of radial motion in just a portion of your image, select an area with one of the selection tools.
A circular (elliptical) selection works especially well when you want to create a circular effect (Figure 7.20).
Figure 7.20. A circular selection, like this windmill, works particularly well with the Radial Blur filter. 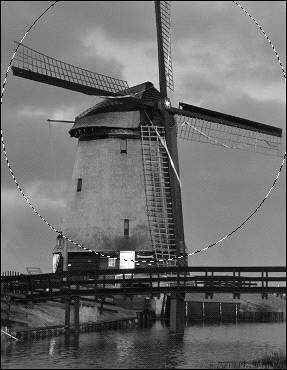
| 2. | Select the Radial Blur by doing one of the following:
- Double-click the Radial Blur filter on the Filters palette (Figure 7.21).
Figure 7.21. The Radial Blur filter is located next to the Motion Blur filter on the Filters palette. 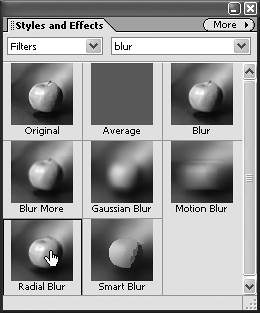
- Choose Filter > Blur > Radial Blur from the main menu.
The Radial Blur dialog box appears, with options for amount of blur, blur center, blur method, and effect quality (Figure 7.22).
Figure 7.22. The Radial Blur dialog box includes options for the amount and method of blur. This filter does not include a preview, but the Quality options include Draft, which you can use to quickly apply and view the effects of the filter on your image. 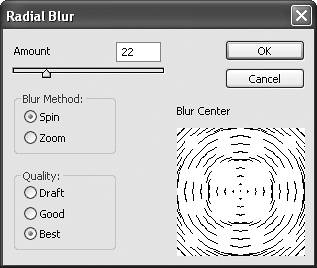
| 3. | Set the Amount and Blur Center values for the Radial Blur effect.
The two Blur Method options are Spin and Zoom. Choose Spin to blur along circular lines (Figure 7.23) or Zoom to blur along lines radiating from the center, as if you were zooming in or out of an image (Figure 7.24).
Figure 7.23. The Spin method creates the impression of an object spinning around a center point. To change the center point, drag the preview in the Blur Center window. 
Figure 7.24. The Zoom method creates the sense of an object moving toward or away from you. 
| 4. | Select a Quality option for the filter.
Draft quality produces a quicker rendering of the filter, but with slightly coarse results. The Good and Best options both take a bit longer to render, but provide a smoother look; there's not a big difference between the latter two options.
| 5. | When you are satisfied with the effect, click OK to apply it to your image.
|
 Tip Tip
The Radial Blur filter doesn't include a preview window, so if you aren't happy with your results and want to try different settings, just click the Step Backward button (or press Ctrl+Z) to try again.
The Blur Filters I've covered the steps for using a couple of my favorite blur filters, but the others can be just as effective. Here's a summary of how the blur filters work and when you might want to use them. Blur softens the look of an image or selected area and is great for retouching photos where there's a harsh edge or transition. The results are similar to what you get with the Blur tool. Blur More works like the Blur filter, but with much greater intensityit's like using the Blur filter three times on the same image. The results are often too dramatic for minor photo retouching, but are great for blurring one particular area of an image (like the border), thereby emphasizing the untouched areas. Keep in mind that the Blur and Blur More filters don't include a dialog box or preview window. Just select a layer or area and apply the filter to see the results. Gaussian Blur allows you a greater amount of control, and you can use this filter to make anything from minor to major adjustments to your image. For most simple photo retouching, the Blur command works well, but if you're not happy with your results and want to tweak a bit, try Gaussian Blur. Motion Blur can be used to simulate a moving object or the panning of a camera. Radial Blur results in either a zooming or spinning motion, depending on the option you choose. Smart Blur lets you build customized blurs, with complete control over the blur radius (the area affected by the blur effect) and threshold (the number of pixels within a given area affected by the blur). Smart Blur is useful for softening an image or for times when you want a more subtle blur effect. |
|