Animated Shadows
The last concept of light and shadow we discuss is actually pretty straightforward. In this example, we discuss the direct correlation between light and shadow, and how you might use this to enhance your 3D animations. Instead of creating this next piece in the standard step-by-step tutorial style, you'll examine some sample Flash movies.
First of all, open sun.swf . Here you have a scene showing a building with the sun in the background. The sun is initially high, causing the building to cast a shadow. If you click the Move button, the sun starts to move across the sky, and you see the shadow from the building move to the opposite direction and get a little longer:
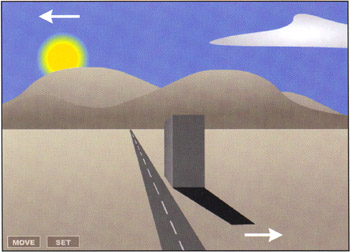
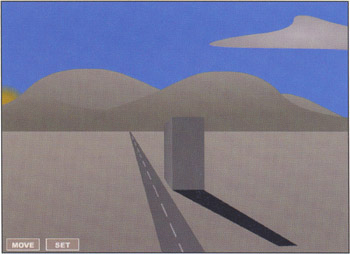
The direction and size that the shadow takes is directly affected by the direction of the light source. This is important to consider when you create believable 3D and, although logical enough, it's often overlooked. As the sun moves further down into the horizon, the building shadow gets even longer. Now click the Set button, and you'll see that as the sun starts to go below the mountains and the horizon, the scene begins to get dark ”it's night time. Take a look at sun.fla to see how these simple ideas were put together.
Returning to the shadow animation, the shadow gets longer because the amount of direct light that actually hits the building's side is greater when the sun is lower in the horizon versus when it's higher in the sky. In this case, the object is a building and the source is the sun.
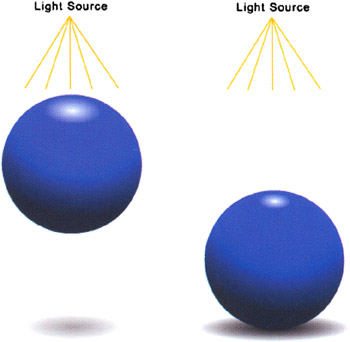
Let's take a quick look at this relationship using parts of the ball you made earlier in the chapter. We've re-created the ball and its associated shadow in ball_shadow.swf (you can also open up ball_shadow.fla to see how this example was constructed ). Open ball_shadow.swf and pay particular attention to both the shadow and highlight of the ball when it is in the air and on the ground.
In this movie we have another simple demonstration of a light source affecting an object. It's clear that the highlight is large when it's closer to the source, but the shadow, on the other hand, is small and faint. This is because the object is far away from the surface where the shadow is being cast. A faint shadow also tells the viewer that the object is much smaller than the light source. The reason for this is the light source is actually shining around the ball onto the surface.
When the ball falls closer to the ground, the shadow will get bigger and darker because the light cannot reach the area under the ball as easily. The changing shadow in this case tells the viewer that the light affects the ball and that it is in motion. It also tells the viewer that the ball is getting closer to the landing surface. Also notice that the highlight is smaller when the light source is further away ”this is a subtle yet effective indication of the relative positioning of the light source and the object.
The reason we take the time to include shadows and highlights is to add to the believability that the object is supposed to be 3D, moving up then down, casting shadows, and creating highlights. Experiment with ball_shadow.fla to see what other kind of light and shadow effects you can create.