Using EJB-QL and ejbSelect()
|
Basic Database Access
To illustrate how to use Resin-EE and CMP, you will work through an example. Our example, called the Entitlements application, allows you to gather information about a login, including the login name, description, and position. It also lets you assign groups that the login is allowed to view. You can further break down the groups into subgroups. As we run through the features of Resin-EE, we expand our example. You will define a new application called login and place a new directory with the same name in the /doc directory of the Resin server; you'll also place the appropriate <web-app> entry in the resin.conf file.
Your first step is to query the primary login database called login. This table is used to store all of the information about a particular login without group or subgroup information. Use this SQL to create the table:
create table login ( login varchar(64) not null primary key, ts timestamp, role varchar(32), description varchar(128), opendate datetime, closedate datetime );
Then populate a couple rows so that you have some information to view:
insert into login values ('johnd', now(), 'owner', 'owner john doe', '2002-10-10', null); insert into login values ('janed', now(), 'CFO', 'Chief Financial Officer', '2002-12-10', null);
The login Table Entity Bean
Resin-EE creates the connection between a database table and an object using a bean called entity. The Resin-EE entity bean is based on the EJB entity bean and, as such, contains a number of interfaces and classes that provide its functionality. The interfaces and classes are sparse because most of the work is handled by Resin-EE itself.
Entity beans have three classes/interfaces:
-
Local home interface— Allows the bean to be found and instantiated; typically called <tableName>Home.java.
-
Local interface— Describes the set/get and business methods available in the bean. The set or get method relates to the columns defined in the table the entity is representing. The interface is typically called <tableName>.java.
-
Implementation— Contains the logic behind the available methods; typically called <tableName>Bean.java.
Let's look at each of these classes individually and show the code in them that provides basic access to the login table.
The Local Home Interface
The local home interface has two primary tasks: creating and finding objects. Written as an interface, the local home interface extends EJBLocalHome for a format like this:
import javax.ejb.*; public interface <InterfaceName> extends EJBLocalHome { } The name of the interface is typically a string that ties the entity bean to the table it is representing. For our case, use the interface name LoginHome. In this first attempt at creating the entity bean, you aren't going to create any new rows in the database table. (To learn how to create rows, see the section "Updating the Table" later in this chapter.)
In your local home interface, you first add the ability for the bean to find rows of data using the table's defined primary key. If you look back at the definition for the login table, you find that the primary key has been set as the login column. The login column has a type of varchar(), which you must use when building the primary key finder method.
All entity beans should have a method in the interface called findByPri-mary(<type>) that returns a local interface object. The purpose of the method is to take a value in the primary key column of the table, search for the row, and return the appropriate result. As you might expect, the primary key is unique; therefore, the method returns either null or an object populated with the values from the database row. If there is an error, the method throws a FinderException exception. The parameter to the method must be the same type as the database table column (or one that can be properly cast by Java). Here's what your local home interface looks like for the login table:
package entitlements; import javax.ejb.*; public interface LoginHome extends EJBLocalHome { Login findByPrimaryKey(String id) throws FinderException; } As you can see, the LoginHome interface extends EJBLocalHome and includes a single method called findByPrimaryKey(string). The method returns a Login object (which you define in the next section). The parameter is a string that is compatible with the varchar() type of the primary key column.
Most entity beans should implement the findByPrimaryKey() finder method. However, it isn't the only one allowed. You might want a finder method that returns all rows, or one that searches on the opendate column. You add more finder methods to your local home interface in the section "Using EJB-QL and ejbSelect."
The Local Interface
The local interface exposes the methods available to clients that need to interact with the entity bean. This interaction includes getting values, setting values, and other business tasks. Let's break this down a little. When an application needs information from the login table, it might use the findByPrimaryKey (String) method you defined earlier. Let's say the application passes the login string "johnd" to the method. Since you know the database contains a row with this login, the findByPrimaryKey() method returns to the application a new object created from the local interface. The new object is populated with all of the values from the database row where the primary key is equal to "johnd". The values are stored in private attributes defined from the login database table. All of this happens automatically without you having to write the code.
The local interface includes methods that allow the application to access the values from the database row. In order to get the values, you need to provide getter methods appropriate for the login table. Because your table contains seven fields, you need seven getter methods.
The same is true for the setter methods. If you want to allow the user to change an attribute in the new object that will be reflected in the table automatically, you have to write setter methods for each of the table fields that can be changed.
Finally, you can write additional business methods that relate to the particular table. You might have a method called setNewRole() that automatically spell-checks a passed string. Another possibility is a method called changeOpendate() that makes sure the passed date is valid. You can create any number of business methods.
Before you can add the get/set and business methods, you must build the local interface by creating a new interface. You use the name of the table you are representing and extend the interface with the EJBLocalObject class:
package entitlements; import javax.ejb.*; public interface Login extends EJBLocalObject { } Now you can add the appropriate set/get methods. Let's assume that all of the fields from the row can be obtained and all but the login primary key can be set. Here's what the interface looks like:
package entitlements; import javax.ejb.*; public interface Login extends EJBLocalObject { String getLogin(); String getTs(); String getRole(); String getDescription(); String getOpendate(); String getClosedate(); void setTs(String t); void setRole(String s); void setDescription(string s); void setOpendate(String d); void changeClosedate(String d); } That's all the code you need to set and get the values of the database row represented by this entity bean. Notice that you didn't include a public setClosedate() method but instead added a business method called changeClosedate (Date d). This allows you to provide some logic behind setting the closedate. You define the setCloseDate() method in the implementation class so it can only be called from within changeClosedate() if the provided date passes mustard.
The Implementation Bean
If Resin-EE writes all of the database code for you, why do you need to have an implementation file? The answer is that you need a foundation available for the server to fill out its own generated code as well as a place to put the code for your business methods. You include all of the set/get methods in the implementation file using the abstract designator. You add your business method with the code containing your custom logic. Here's an example:
package entitlements; public abstract class LoginBean extends com.caucho.ejb.AbstractEntityBean { public abstract String getLogin(); public abstract String getTs(); public abstract String getRole(); public abstract String getDescription(); public abstract String getOpendate(); public abstract String getClosedate(); public abstract void setTs(String t); public abstract void setRole(String s); public abstract void setDescription(string s); public abstract void setOpendate(String d); public abstract void setClosedate(String d); public void changeClosedate(String d) { if (d > getOpendate()) { setClosedate(d); } } } Notice the code extends a class called com.caucho.ejb.AbstractEntityBean. This is a convenience class provided by Caucho for handling default definitions of methods all entity beans must implement but hardly ever override. As you can see, all of the get and set methods are declared abstract and provided with the appropriate access scope.
You define the changeClosedate() method with logic for setting the closedate. You want to allow the closedate to be changed in the database table only when it is greater than the date the login was opened.
The EJB Descriptor
If you aren't familiar with Enterprise JavaBeans, you might be asking yourself how the server can generate all of the SQL necessary for finding rows based on the primary key as well as the setter/getter methods simply based on the three files you created earlier. Actually, you need to create an additional configuration file (using the extension .ejb) called the deployment descriptor. The EJB file isn't connected to just one entity bean, so the name of the file is usually tied to the application. For our example, call the file entitlement.ejb.
The entitlement.ejb, which is XML based, is used to describe both the entity bean you are building here as well as session beans (described later in the chapter). The format for the entity portion of the file is:
<ejb-jar> <enterprise-beans> <entity> <ejb-name> <local-home> <local> <ejb-class> <prim-key-class> <primkey-field> <persistence-type> <reentrant> <abstract-schema-name> <sql-table> <cmp-field><field-name> </entity> </enterprise-beans> </ejb-jar>
Table 6.1 describes the specific tags.
| TAG | MEANING |
|---|---|
| ejb-jar | Contains the top-level root element. |
| enterprise-beans | Indicates the bean configuration. |
| entity | Indicates an entity bean is being configured. |
| ejb-name | Specifies the name of the EJB being configured. This will be used for relationships. |
| local-home | Specifies the name of the class that should be used to define the local home interface. |
| local | Specifies the name of the class that should be used to define the local interface. |
| ejb-class | Specifies the name of the class that should be used to define the implementation of the bean. |
| prim-key-class | Specifies the Java data type that most closely matches the SQL type used for the primary key. |
| persistence-type | Specifies the type of persistence used for the bean: container or bean. |
| reentrant | Determines whether or not the bean may call itself. |
| abstract-schema-name | Specifies an abstract name for the bean. If the <sql-table> element isn't found, the server uses this name as the database table. |
| sql-table | Specifies the database table name to be used for this entity. |
| primkey-field | Specifies the field in the table defined as the primary key. |
| cmp-field | Specifies a parent container element for each of the fields in the database table that will be managed. |
| field-name | Specifies the name of the field to be managed; if sql-column isn't found, the server uses this as the field name. |
| sql-column | Specifies the actual SQL column name for the defined field. |
Using the descriptions from Table 6.1, define the EJB file for your Login bean. Here's the file:
<ejb-jar xmlns="http://caucho.com/ns/resin" > <enterprise-beans> <entity> <ejb-name>Login</ejb-name> <local-home>entitlements.LoginHome</local-home> <local>entitlements.Login</local> <ejb-class>entitlements.LoginBean</ejb-class> <persistence-type>Container</persistence-type> <prim-key-class>String</prim-key-class> <reentrant>True</reentrant> <primkey-field>login</primkey-field> <abstract-schema-name>logins</abstract-schema-name> <sql-table>login</sql-table> <cmp-field><field-name>ts</field-name></cmp-field> <cmp-field><field-name>role</field-name></cmp-field> <cmp-field><field-name>description</field-name></cmp-field> <cmp-field><field-name>opendate</field-name></cmp-field> <cmp-field><field-name>closedate</field-name></cmp-field> </entity> </enterprise-beans> </ejb-jar>
As you can see, all of the interfaces and classes defined for the bean are listed, as well as all of the fields from the database. When the getOpendate() method is called against an object for this table, the system automatically removes the get and converts the first character after the get to lowercase in order to find the opendate field. If you were to define a setter method called setMyField, the server would convert this to my_field. The second, third, and so forth capital letters after the first one are considered delimiters but if you don't want them automatically separated use an underscore between the words.
Configuring the web.xml File
Well, you are almost ready to start using your new bean. First, though, you need to put an entry in the web.xml configuration file for your application. In the web.xml file you created for your database entry earlier in the chapter, you need to add configuration information about the entity bean:
<ejb-server jndi-name="cmp"> <data-source>jdbc/entitlements</data-source> <config-directory>WEB-INF</config-directory> </ejb-server>
Here you are defining a new resource reference element that lets the system know you are creating a new JNDI entry with the name /env/cmp. The new resource will be implemented by the class com.caucho.ejb.EJBServer. This resource will be the framework or container for handling all of your entity (and eventually session) beans. You are also setting the data-source parameter equal to the resource-ref for the database you created earlier.
Using the Entity Bean
At this point, you've created a database table, inserted rows into the table, created an entity bean, and configured the system to be aware of the bean. But how do you use it? One solution is to use a servlet.
If you elect to use this solution, then you must write a servlet (shown in Listing 6.1) that will find it, create it, and use the findByPrimaryKey() method you defined.
Listing 6.1: Our servlet code.
package entitlements; import java.io.*; import javax.servlet.*; import javax.servlet.http.*; import javax.naming.*; import javax.ejb.*; public class LoginServlet extends HttpServlet { private LoginHome home = null; public void init() throws ServletException { try { Context cmp = (Context) new InitialContext().lookup("java:comp/env/cmp"); home = (LoginHome) cmp.lookup("Login "); } catch (NamingException e) { throw new ServletException(e); } } public void doGet(HttpServletRequest req, HttpServletResponae res) throws IOException, ServletException { PrintWriter out = res.getWriter(); res.setContentType("text/html"); out.println("<h3>All Current Logins</h3>"); try { Login login1 = home.findByPrimaryKey(''johnd'); Login login2 - home.findByPrimaryKey(''janed'); Login login3 = home.findByPrimaryKey(''joes'); out.println(''Login: '' + login1.getLogin() + ''<br>'); out.println('Opendate: ' + login1.getOpendate() + '<br><hr>' ); out.println('Login: ' + login2.getLogin() + '<br>'); out.println('Opendate: ' + login2.getOpendate() + '<br><hr>' ) ; out.println('Login: ' + login3.getLogin() + '<br>'); out.println('Opendate: ' + login3.getOpendate() + '<br><hr>'); } catch (FinderException e) { throw new ServletException(e); } } } Let's walk through the servlet code. After Resin-EE loads the servlet, it executes the init() method first. This method attempts to find the context associated with the /env/cmp reference. Once it does, the server uses a lookup() method to find the home interface to the Login entity bean. The "Login" string relates to the <ejb-name>Login</ejb-name> entry in your entitlements.ejb configuration file.
These lines of code are executed once so that the servlet has a reference object to the home interface for the entity bean related to the login table. By putting this code in the init() method, you save the system the time necessary to locate the home interface each time the servlet is used. It should be clear that no data is associated with the login table—there is only a reference to the home interface that can be used to obtain data. If you look back at the home interface code, you see that the only method defined is findByPrimaryKey(), so that is how you get data from the table.
All of the work for the servlet occurs in the doGet() method. Here the output from the servlet is prepared before trying to get data. Next, a call is made to the findByPrimaryKey() method of the home interface object using login name parameters. You know you will find data in the database with the two login strings. If there is a problem with the find, a FinderException will be thrown and caught by your code.
For each of the findByPrimaryKey() method calls, a unique entity bean is returned. Each object has a getter method used to obtain information stored in the object. You have queried a database for a specific row and displayed the data from the row.
Deploying the Code
Of course, to get all of this code to work, you must place it in the classes directory of your application. The Entitlements application hierarchy is shown in Figure 6.1.
/doc /entitlements /WEB-INF web.xml entitlements.ejb /classes /entitlements EntLogin.java EntLoginBean.java EntLoginHome.java
Figure 6.1: The Entitlements application hierarchy.
Running the Code
With all of the code loaded in the right directories and the resin.conf file supplied with the appropriate <web-app> element, it's time to browse to the servlet. Use the URL http://localhost:8080/entitlements/LoginServlet; the result is shown in Figure 6.2.
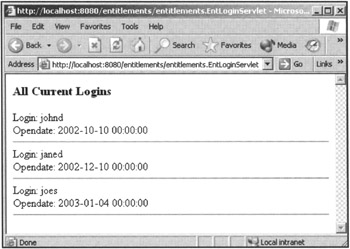
Figure 6.2: The servlet output.
|
EAN: 2147483647
Pages: 180