Unit Testing the Application
|
The bulk of the server configuration and application installation can be completed automatically by the Studio unit test environment. If you have not generated the deployment code for your EJBs yet, now is the time to do so. From the J2EE Perspective, select the PlantsByWebSphereEJB project, and run the Generate ( Deploy and RMIC code menu action. This will generate the Java RMI stubs and ties, plus all the code that the EJB container requires in order to host these EJBs. This includes such things as local/remote home and local/remote interface implementations, as well as artifacts necessary to support CMP persistence.
The creation of the server configuration, and execution of the unit test environment is started simply by selecting an application (typically the web project, although this action can be run from any module, and even some artifacts contained within the modules). So locate the index.html file in the Web Content folder for the PlantsByWebSphereWAR project, and from the context menu you can choose one of:
-
Run on Server
The run action will configure the server, start it, and display the artifact in the embedded Studio web browser. -
Debug on Server
The debug action will do the same thing, but start the server JVM in debug mode, meaning you can set breakpoints in the application code. -
Profile on Server
The profile action is the same again, but enables profiling of the resultant application.
The first response to this action is to display a dialog, allowing you to specify the server on which the application will be started. Once that's selected, the desired configuration will be generated, and the server started:
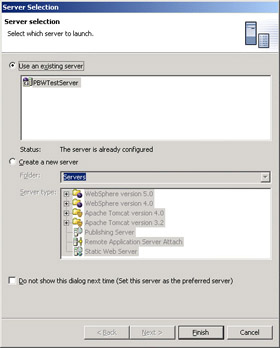
You should now be able to run the complete Plants-By-WebSphere application, in the Studio unit test environment.
Exporting the Application
Having completed your unit test, you'll want to install the application into a standalone server. To do this we'll need an EAR file to install. Therefore, we need to export our enterprise application project.
To do this is quite simple. Just select the PlantsByWebSphereEAR project in one of the J2EE views, right-click and choose Export. From the Export wizard, choose to export the project as an EAR file, then on the next screen, choose where to create the EAR file:
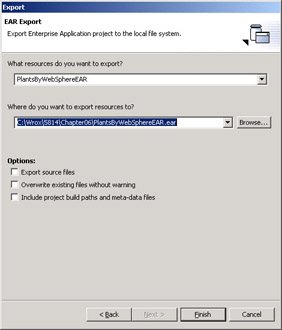
Just hit Finish to complete the process.
|
EAN: N/A
Pages: 135